The Your Expenses section lets you view, search, and edit expenses. You can edit only the expense(s) with the Draft or Reported status.
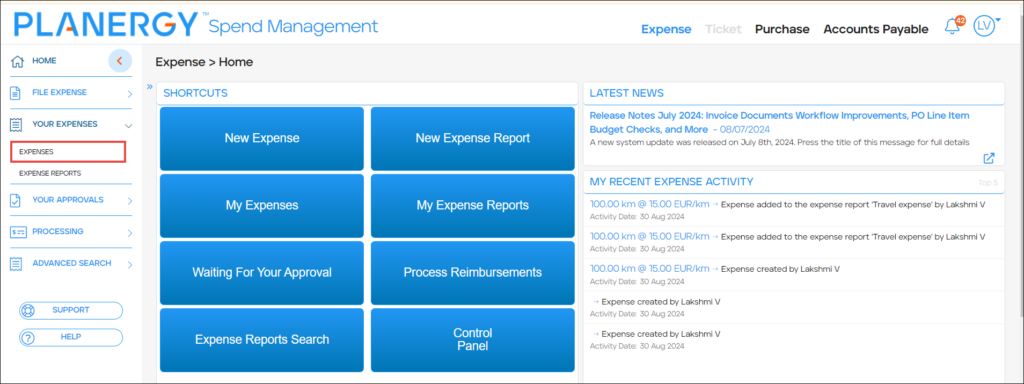
- On the Expense > Home page, press Your Expenses.
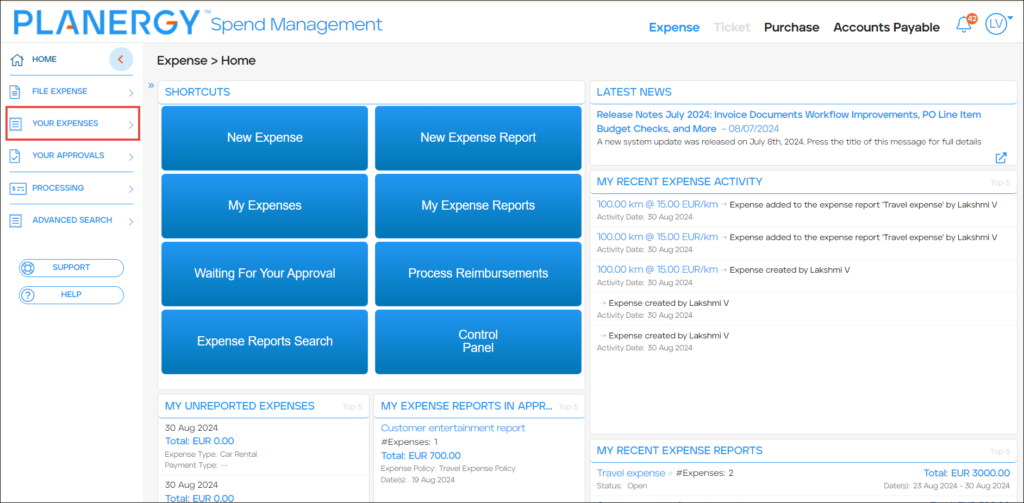 The Your Expenses dropdown list is displayed.
 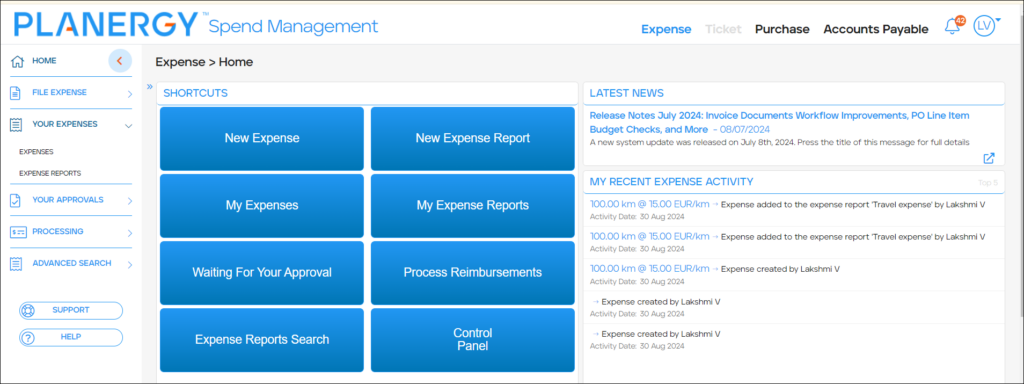 For more information, please refer to the following sections:
- How to View an Expense Details
- How to Add a Comment on an Expense
- How to Search Expenses
- How to Edit an Expense
- How to Add/Remove an Expense in a Report
- How to View Expense Reports
- How to Add Expenses within an Open Expense Report
- How to Cancel a Report
- How to Submit a Report
- How to Search Expense Reports
How to View Expense Details
To view details of an expense, follow the steps below.
- Press Your Expenses > Expenses on the left navigation panel.
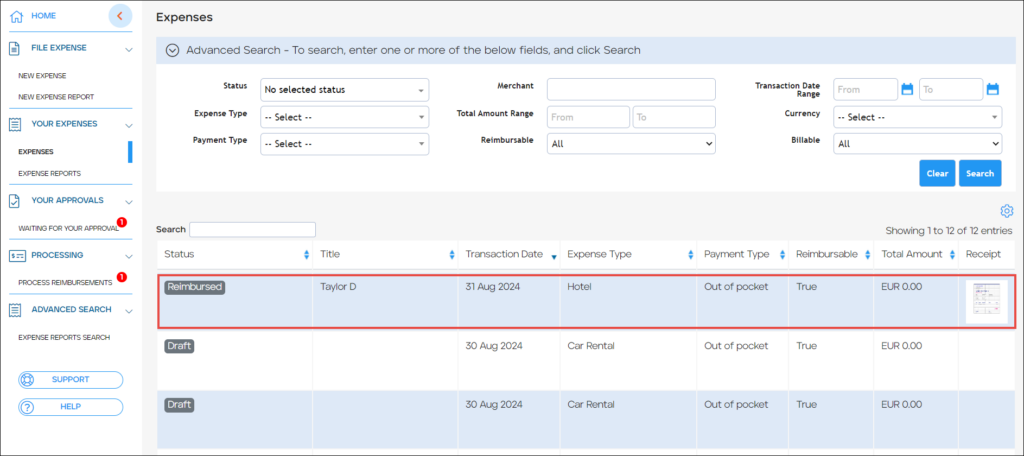
Alternatively, press My Expenses on the Shortcuts widget.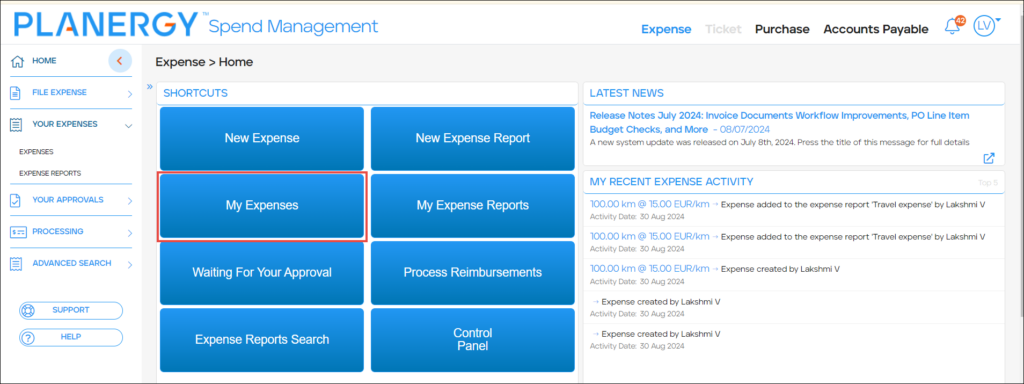 The Expenses page is displayed.
- Press anywhere in the row of the expense you wish to view the details.
The View Expense > Details page is displayed.
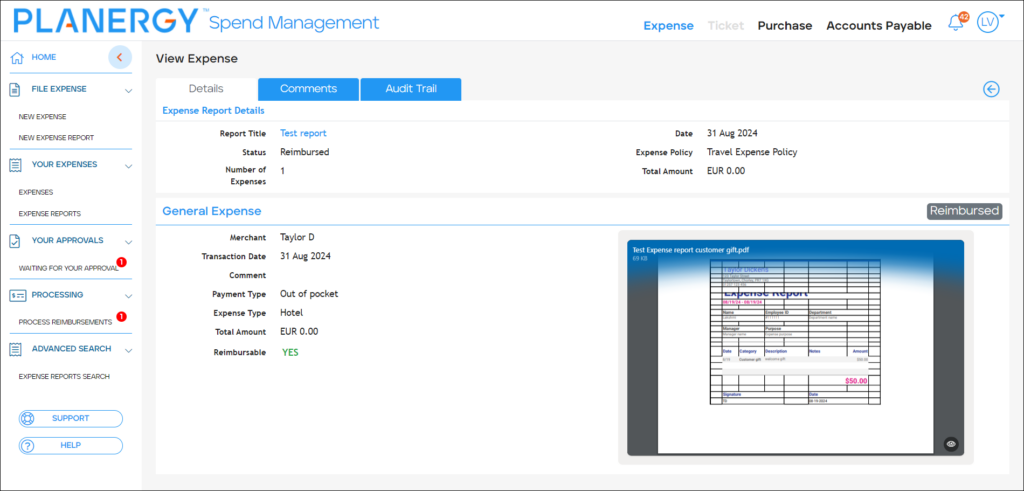
The Details page lets you view the details of expense reports and general expenses.
- Press Comments.
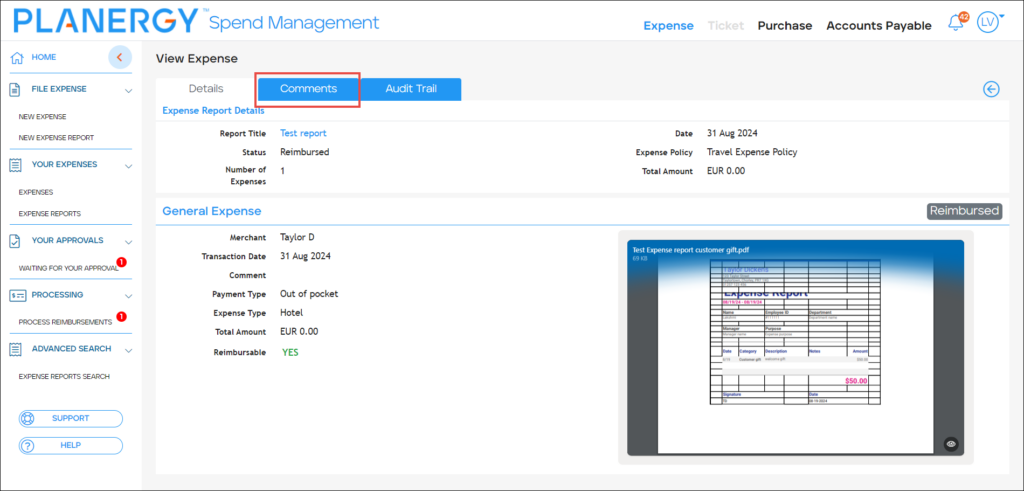 The View Expense > Comments page is displayed.

You can view all the comments added to the expense or add a new comment. For more information regarding adding a new comment, please refer to How to Add a Comment on an Expense. - Press Audit Trail.
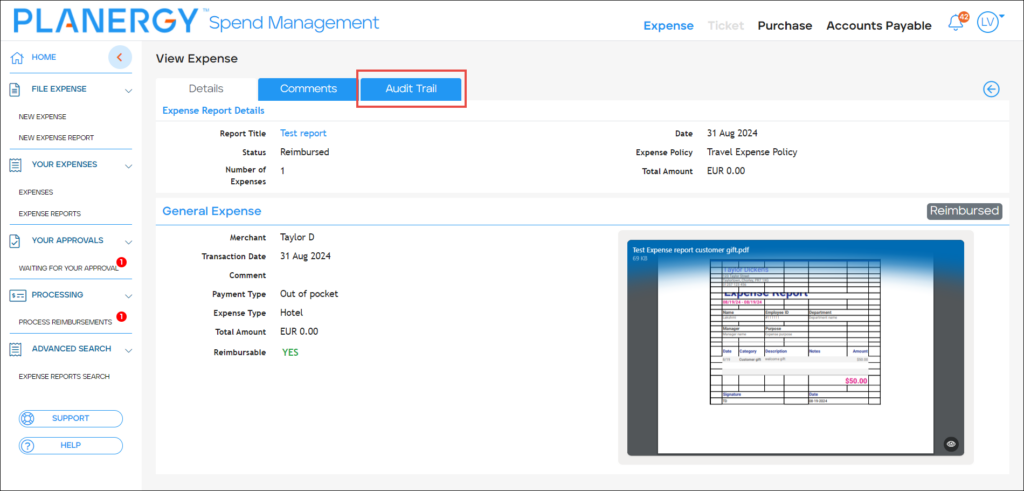 The View Expense > Audit Trail page is displayed.
Here, you can view the chronology of significant events, including dates, actions performed, and corresponding comments for each entry listed.
How to Add a Comment on an Expense
To add a comment to an expense, follow the steps below.
- Press Your Expenses > Expenses on the left navigation panel.
 Alternatively, press My Expenses on the Shortcuts widget.
 The Expenses page is displayed.
- Press anywhere in the row of the expense you wish to view the details.
 The View Expense > Details page is displayed.
 The Details page lets you view the expense report details and general expenses.
- Press Comments.
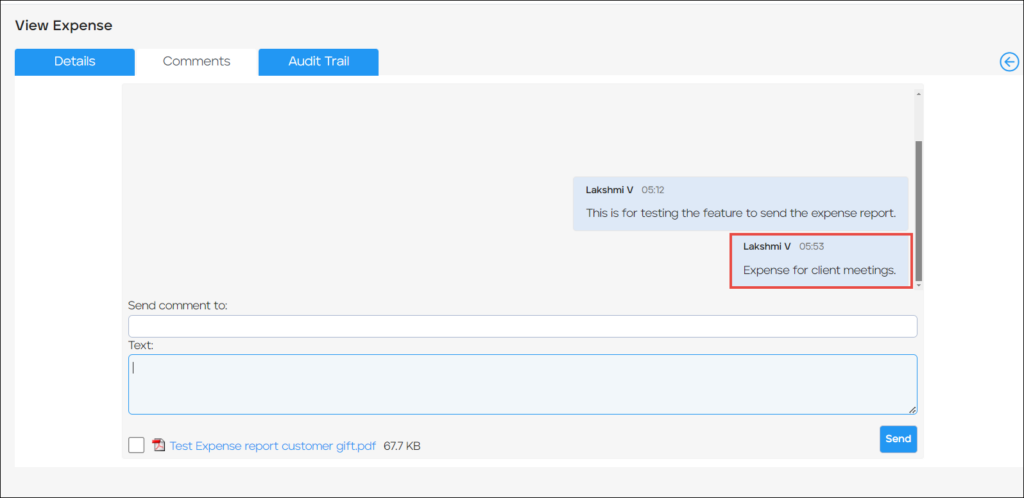
 The View Expense > Comments page is displayed.
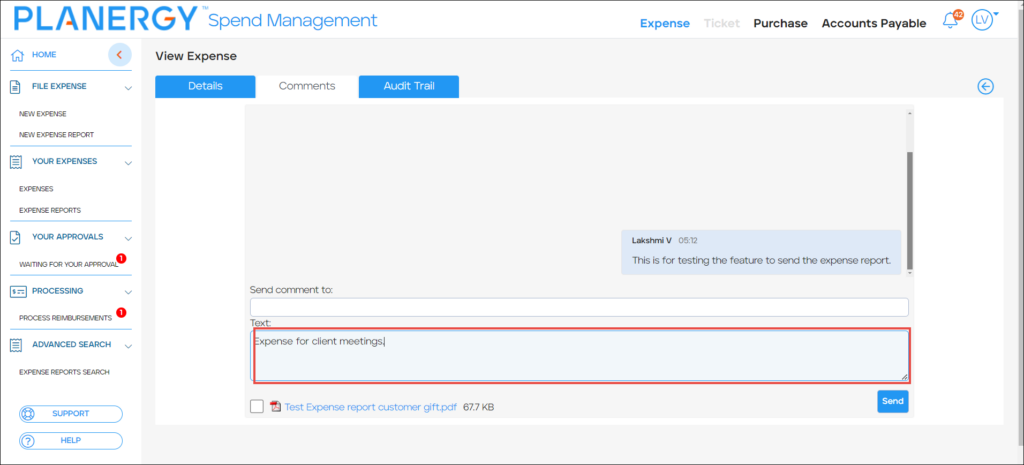
 - Enter a brief note or information regarding the expense in the Text field.
- Press Send.
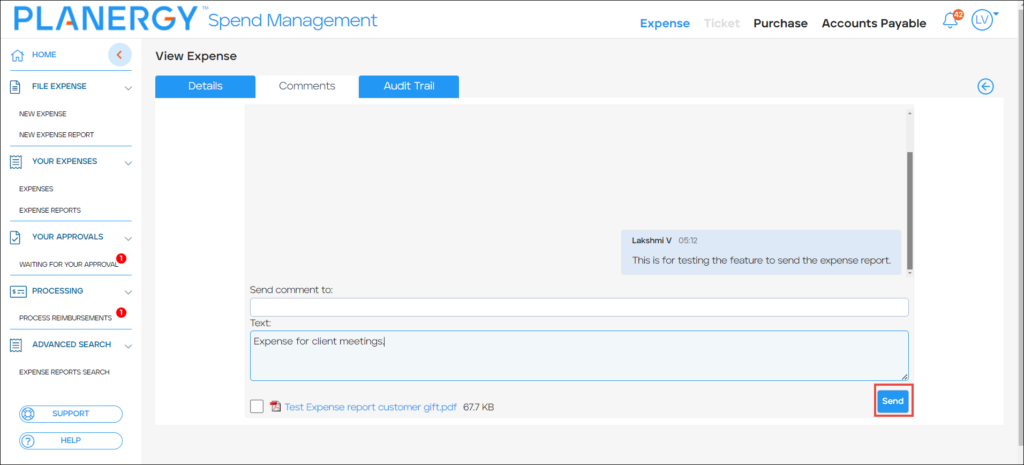 The comment is added.
Note
You can upload the expense receipt to the comment by selecting the available document checkbox.
How to Search Your Expenses
To search for expenses you have created, follow the steps below.
- Press Your Expenses > Expenses on the left navigation panel.
 Alternatively, press My Expenses on the Shortcut widget.
The Expenses page is displayed.
You can search for expenses using one of the following:
Quick Search
You can use the quick Search feature to locate a specific expense easily.
- On the Expenses page, enter a character from the Title of the expense in the Search field.
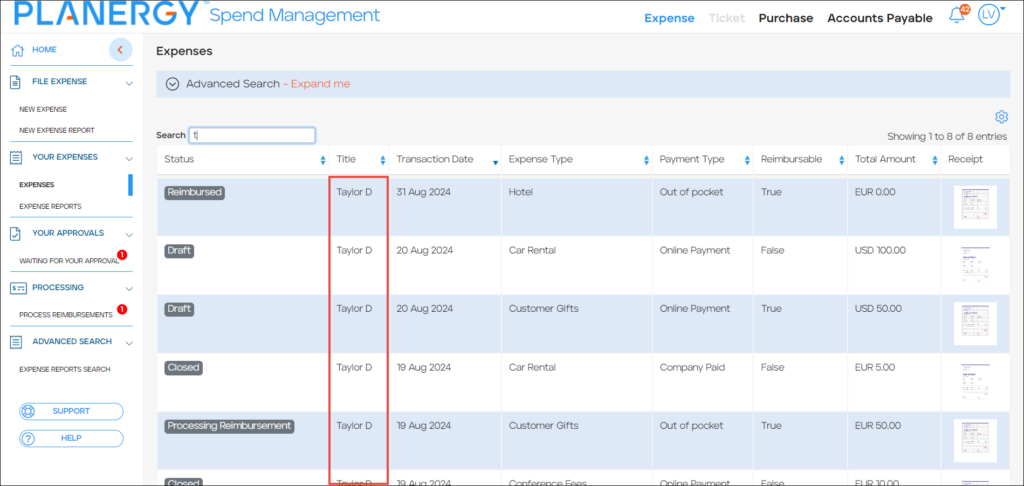
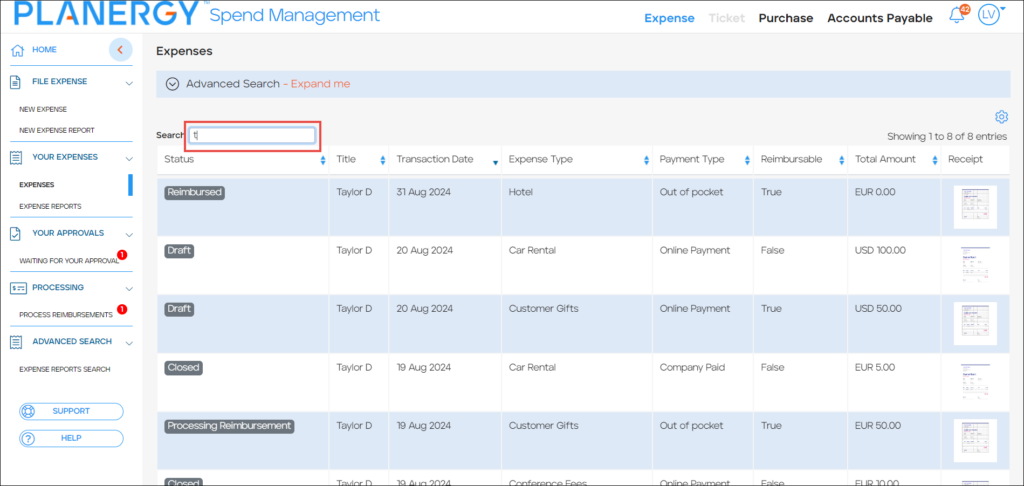 Immediately after you enter a character(s) in the Search field, all the expenses with titles matching the character(s) are listed.
Advanced Search
Using the Advanced Search feature, you can refine the expense list, enabling you to locate a specific expense.
- On the Expenses page, press Advanced Search.
 The Advanced Search filters are displayed.
You can use all or any combination of filters needed to locate a specific expense.
- Select or enter the required criteria in the filter field(s) for refining the expense search. The available filters are as follows:
-
- Status – This is a multi-select dropdown list, allowing you to select the necessary current statuses of the expenses to be included in the search.
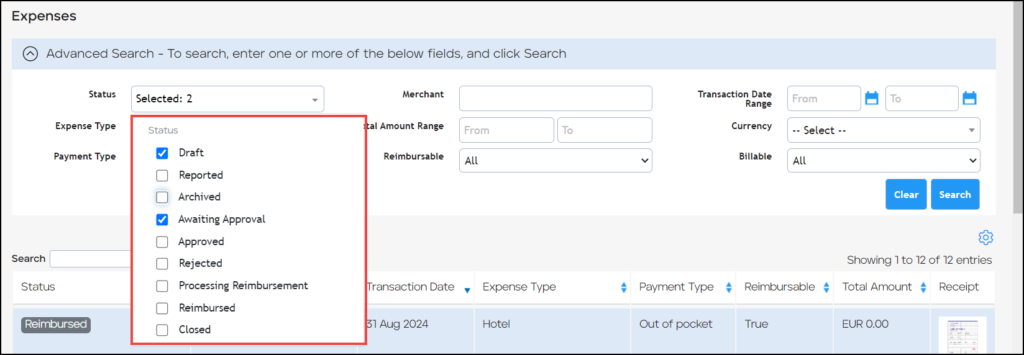
- Expense Type – This is a single-select dropdown list, allowing you to refine the expense search based on the type of expense.
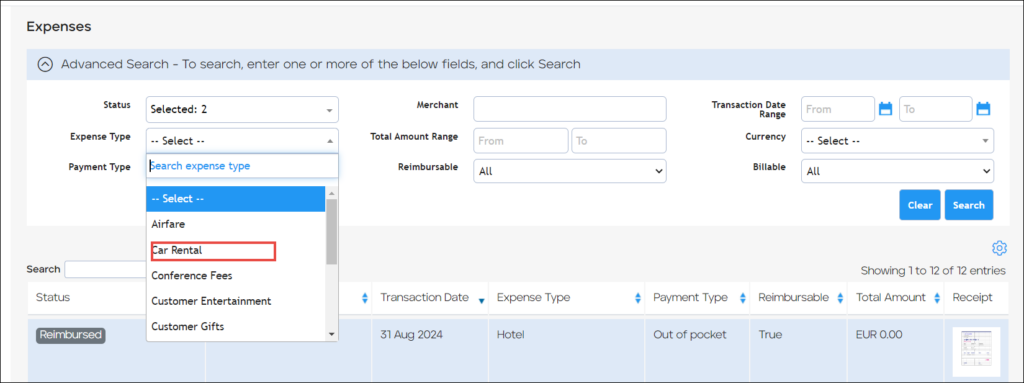
- Payment Type – This is a single-select dropdown list, allowing you to refine the expense list based on the payment method.

- Merchant – This field allows you to filter the results by refining expense merchants.

- Total Amount Range – This filter enables you to refine the expense search results by setting a range for the total amount. The From field lets you set the starting amount, and the To field allows you to define the final total amount.
Note
If the From field is blank, the starting amount will default to 0. If the To field is blank, the final amount will default to 999999.
- Reimbursable – This filter is a single-select dropdown list, allowing you to filter the search results using the reimbursable flag values – All/No/Yes.

- Transaction Date Range – This filter allows you to define a date range for refining your expense search based on when the transactions occurred. The From field lets you set the starting transaction date, and the To field allows you to define the ending date.
Note
If the From field is blank, the value defaults to 01/01/0001, and if the To field is left blank, it defaults to 31/12/9999.
- Currency – This filter is a single select dropdown list with all active currency, allowing you to refine the expense search based on a specific active currency in the system.

- Billable – This filter is a single-select dropdown list with All/No/Yes values for filtering the expenses based on the billable flag.

- Status – This is a multi-select dropdown list, allowing you to select the necessary current statuses of the expenses to be included in the search.
- Press Search.
Note
In the following example, we have used a combination of Status filter criteria and Total Amount Range filter criteria to refine the expense search. You can similarly set other filters or a combination of filters to refine the search. All expenses matching the filter criteria are displayed.
How to Edit an Expense
You can only edit the details of an expense if the current status is Draft.
- Press Your Expenses > Expenses on the left navigation panel.
 Alternatively, press My Expenses on the Shortcut widget.
  The Expenses page is displayed.
- Press anywhere in the desired expense row with Draft as its current status to edit it.
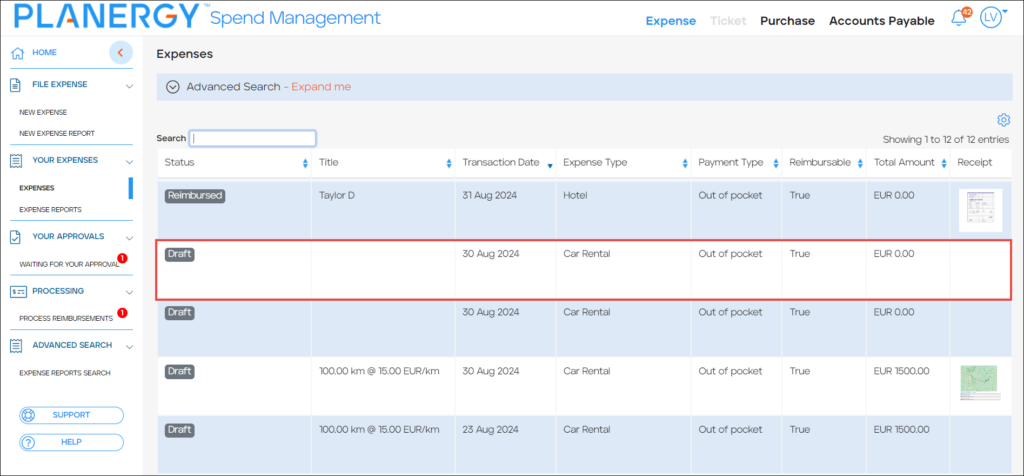 The Edit Expense page is displayed.
- Make the necessary changes to the fields. For more information regarding the fields, please refer to How to Create a New General Expense.
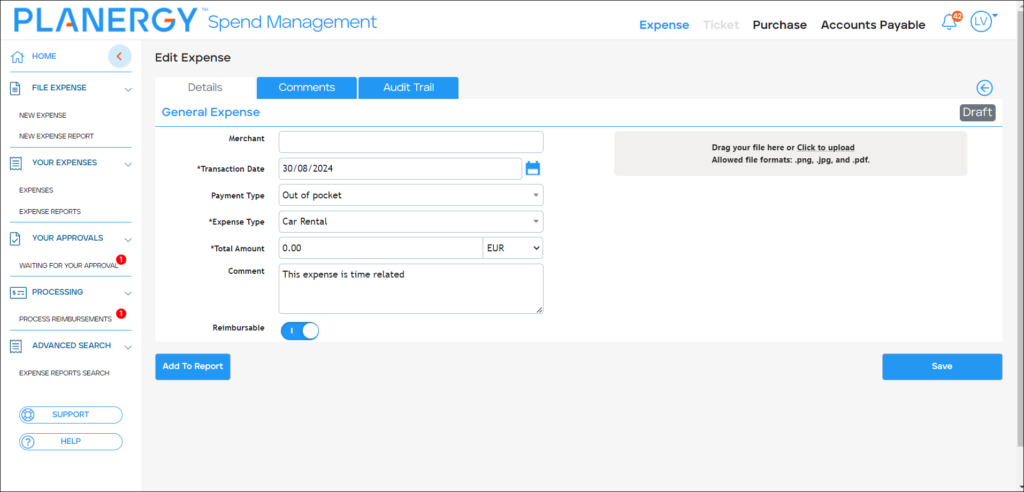
- Press Save.
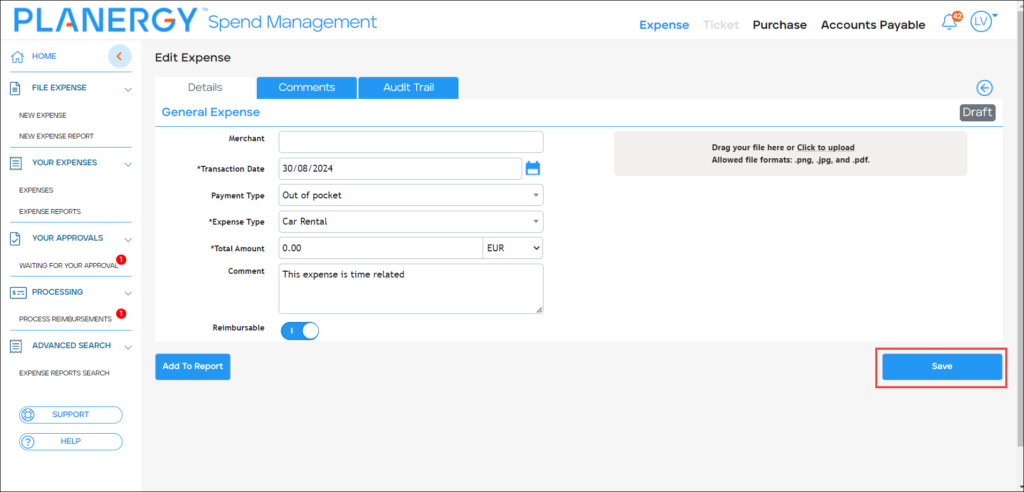 The changes are saved.
How to Add/Remove an Expense in a Report
You can add the newly created expenses to an expense report if they are in the Draft status and not previously added to another expense report.
- Press Your Expenses > Expenses on the left navigation panel.
 Alternatively, press My Expenses on the Shortcut widget.
  The Expenses page is displayed.
 - Press anywhere in the desired expense row with Draft as its current status to edit it.
 The Edit Expense page is displayed.
Note
The Add To Report button is visible only if the expense is not added to any expense report.
- Press Add to Report.
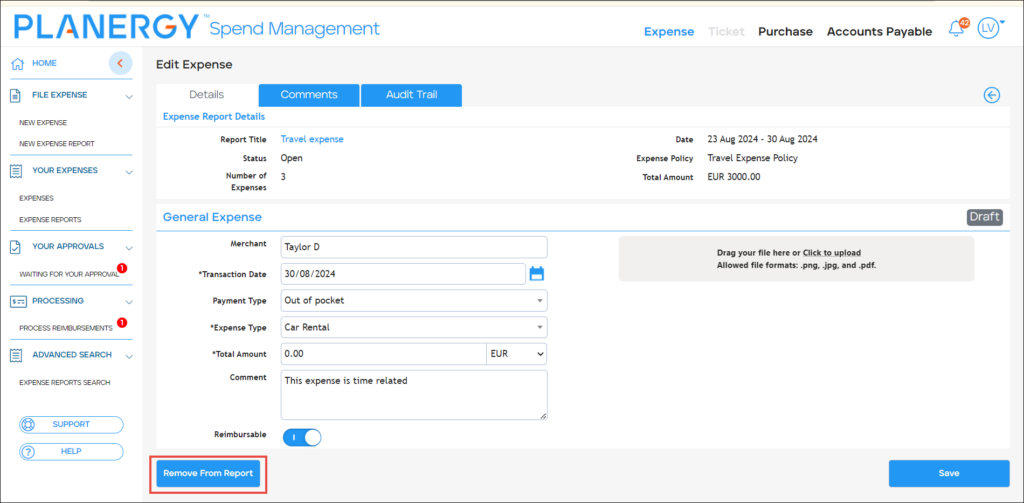 The Select Expense Report dialog is displayed.
 - Choose the desired report from the available list in the Select Expense Report dialog.
 The expense is successfully added to the selected expense report.
Note
- After an expense is successfully added to an expense report, the Expense Report Details section will be displayed above the General Expense details in the Details tab.
- The Remove From Report button is visible only if the expense is added to an expense report and is currently in Draft status.
- To remove an expense from an expense report, press Remove From Report.
 The Remove Expense From Report dialog is displayed.
 - Press Confirm.
 The expense is successfully removed from the selected expense report.
 Note
After the expense is successfully removed from an expense report, the Expense Report Details section will be removed from the Edit Expense page.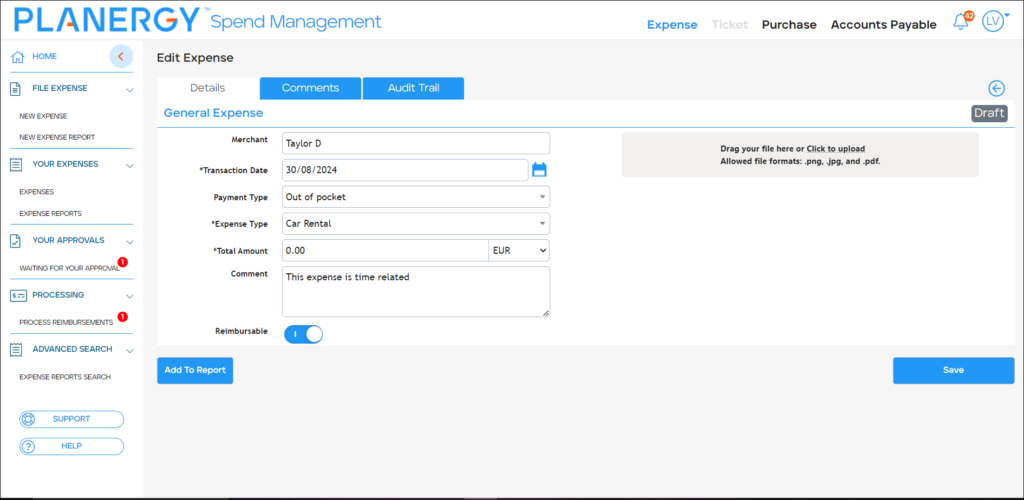
How to View Expense Reports
To view details of an expense report, follow the steps below.
- Press Your Expenses > Expenses on the left navigation panel.
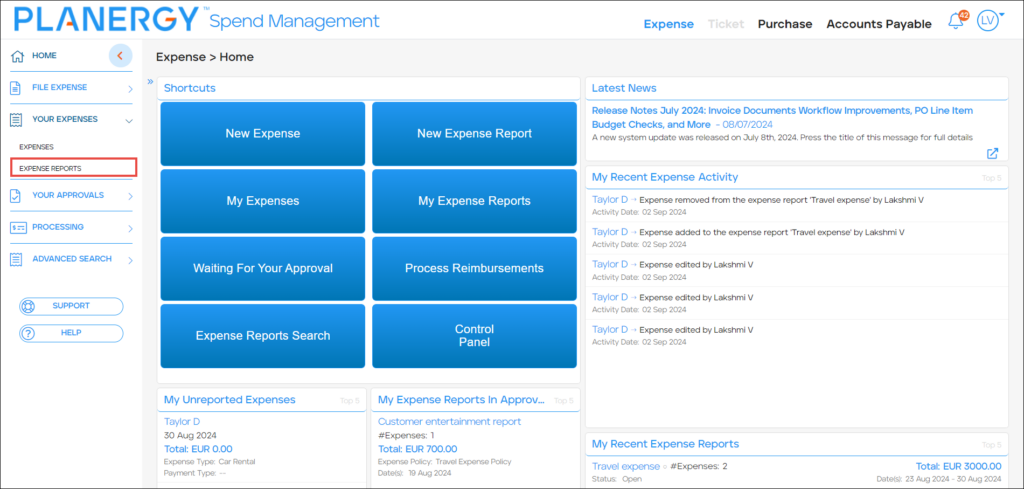 Alternatively, press My Expense Reports on the Shortcuts widget.
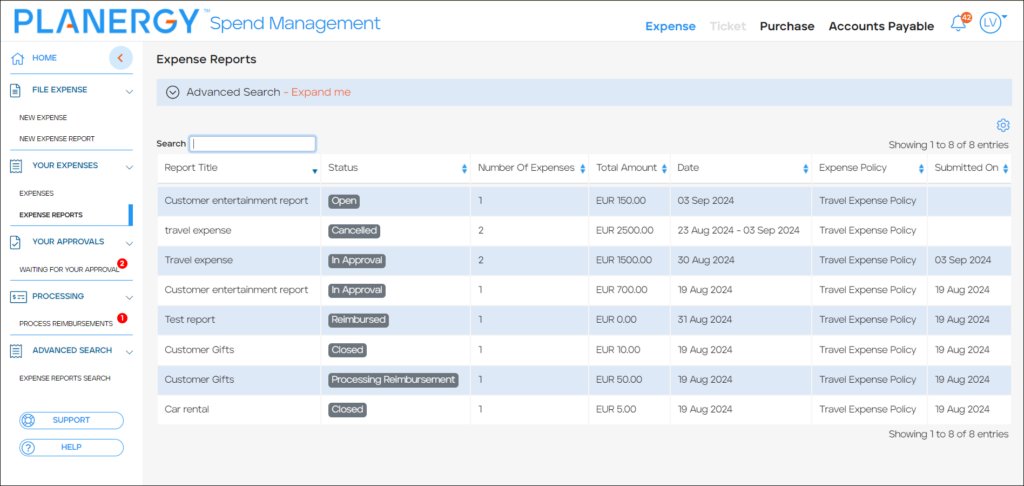
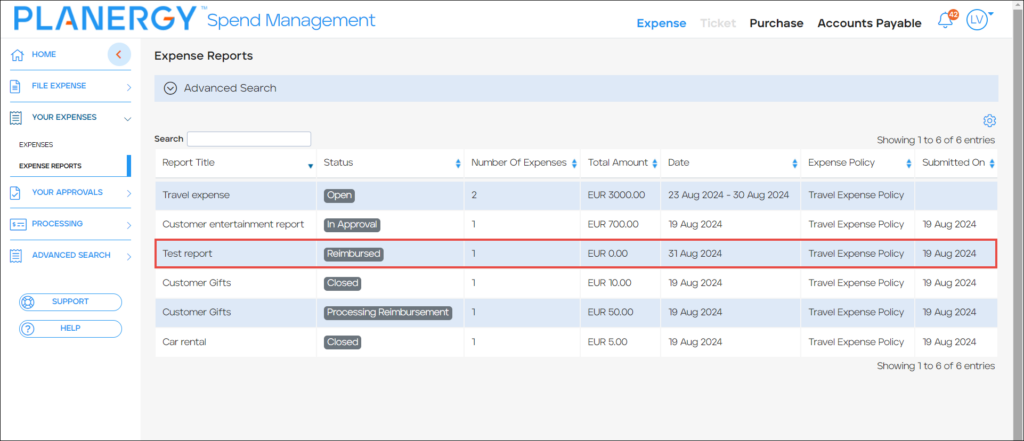
 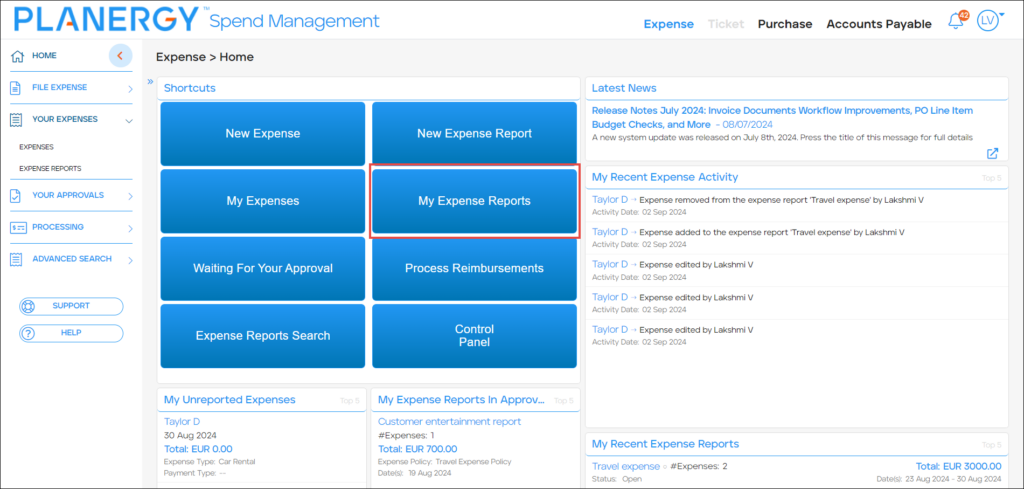 The Expense Reports page is displayed.
 - Press anywhere in the row of the desired expense report.
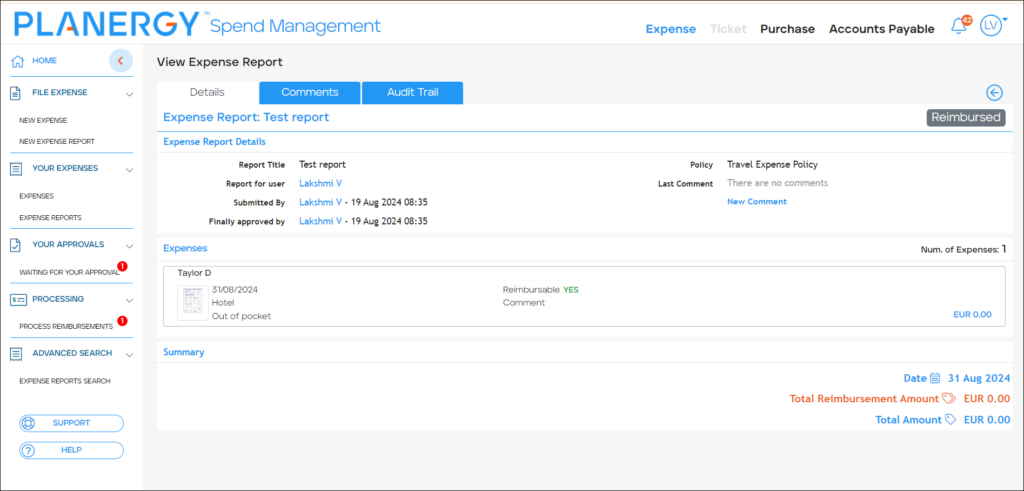
 The View Expense Report > Details page is displayed.The Details page lets you view the detailed expense report and the corresponding Expenses added to it.
- Press Comments.
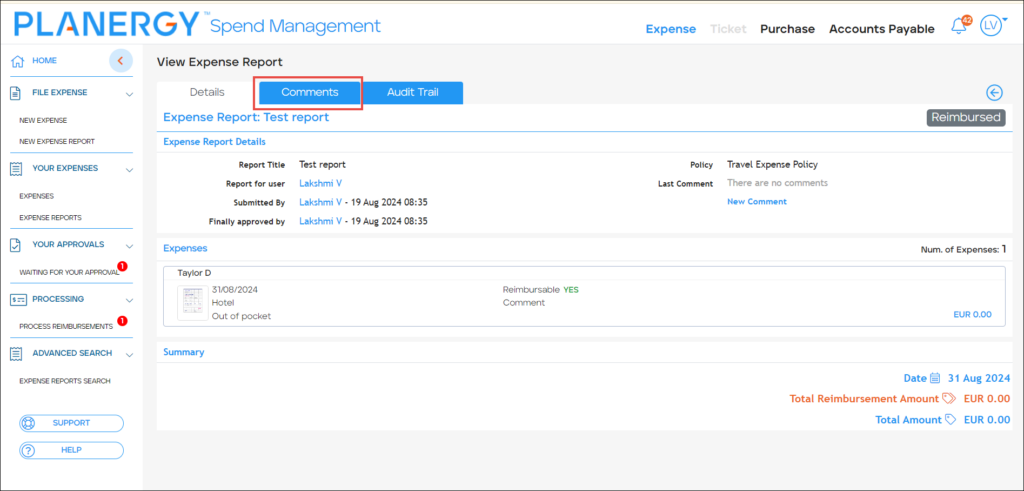 The View Expense Report > Comments page is displayed.
You can view all the comments added to the expense report or add a new comment. The steps to add comments to an expense report are the same as those for expenses. For more information regarding adding a new comment, please refer to How to Add a Comment on an Expense.
- Press Audit Trail.
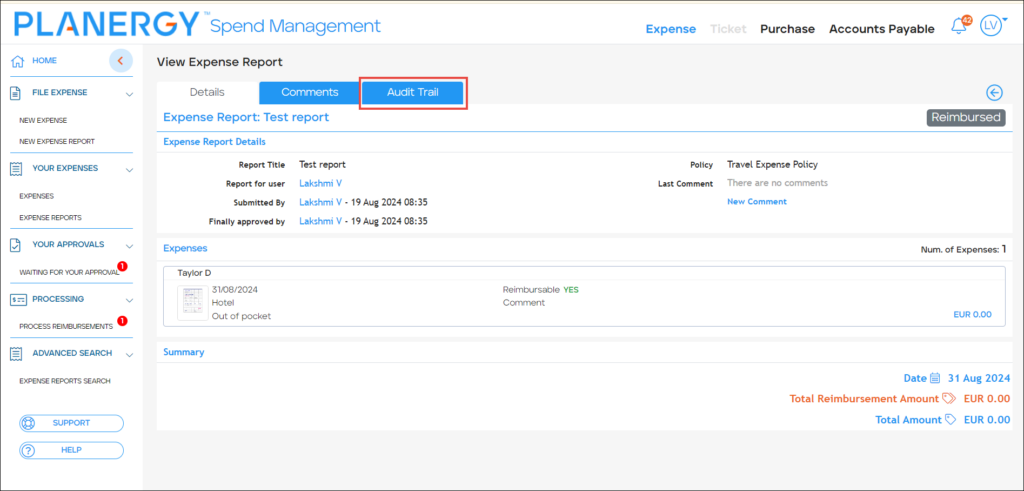 The View Expense Report > Audit Trail page is displayed.
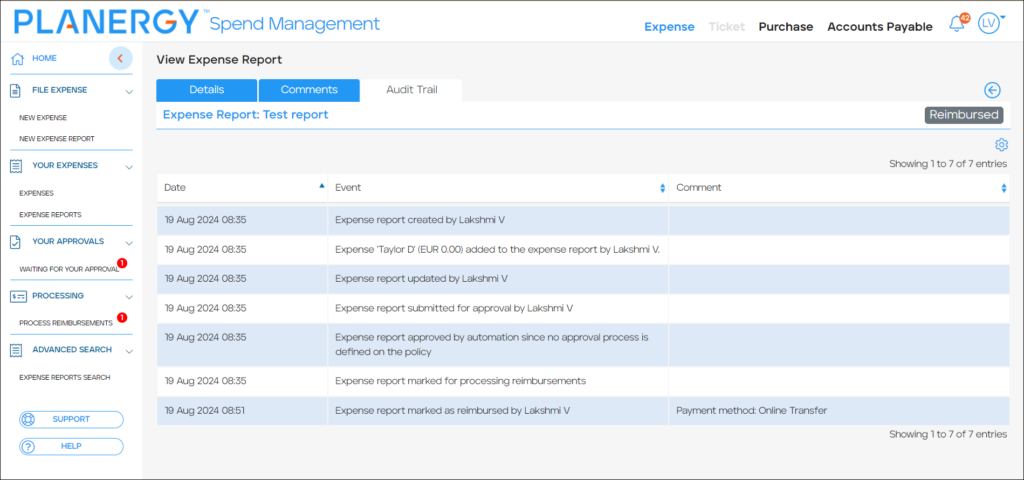
Here, you can view the chronological events, including dates, actions performed, and corresponding comments for each entry listed.
How to Add Expenses within an Open Expense Report
You can add expenses to an expense report that has the current status as Open.
- Press Your Expenses > Expense Report on the left navigation panel.
 Alternatively, press My Expense Reports on the Shortcuts widget.
  The Expense Reports page is displayed.
- Press anywhere in the row of the desired expense report with the current status as Open.
 The Edit Expense Report page is displayed.
- Press Add Expenses.
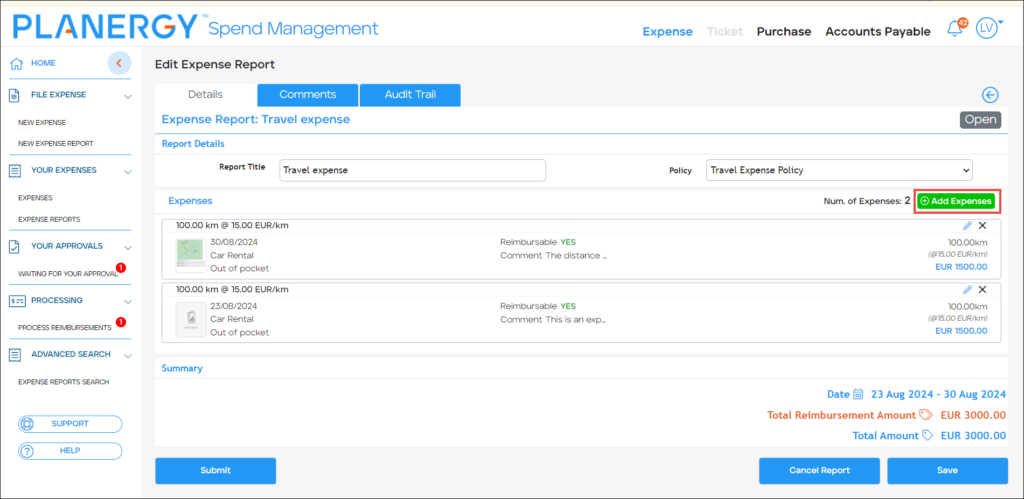 The Select Expenses dialog is displayed.
- Check the box(es) in the row of the expenses you wish to add to the expense report.

- Press Add Selected Expenses To Report.
 The Select Expenses dialog is displayed.The expenses are successfully added and listed in the expense report.
Note
- By pressing the edit icon in the expense row, the Edit Expense page is displayed, allowing you to edit its details. For more information, please refer to How to Edit an Expense.
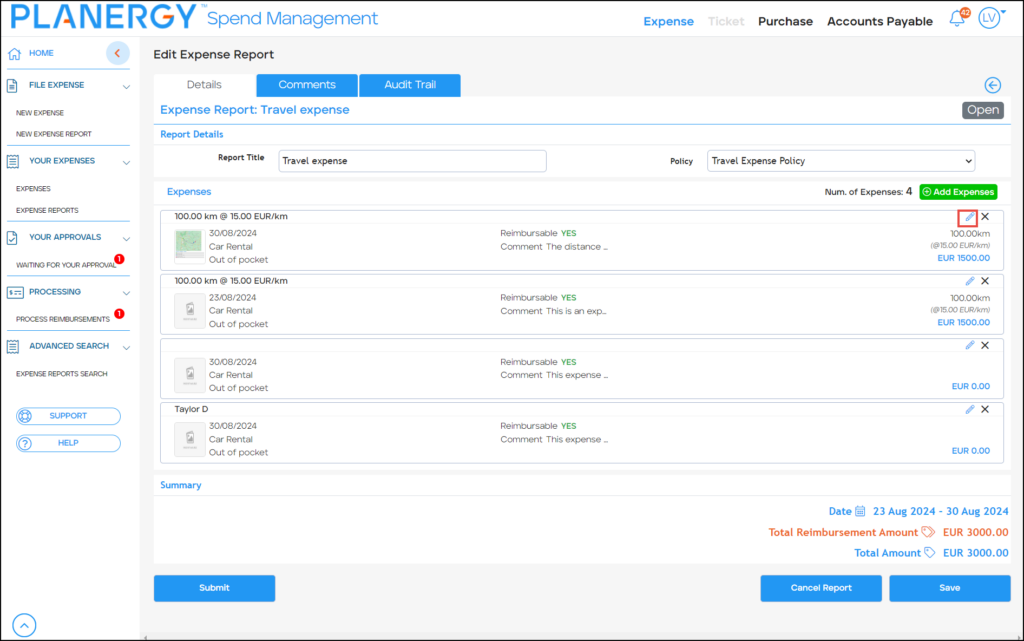
- Press the Close icon in the row of an expense to remove it from the expense report.

Once the expense(s) is removed from the expense report, the Total Amount within the expense report is automatically recalculated.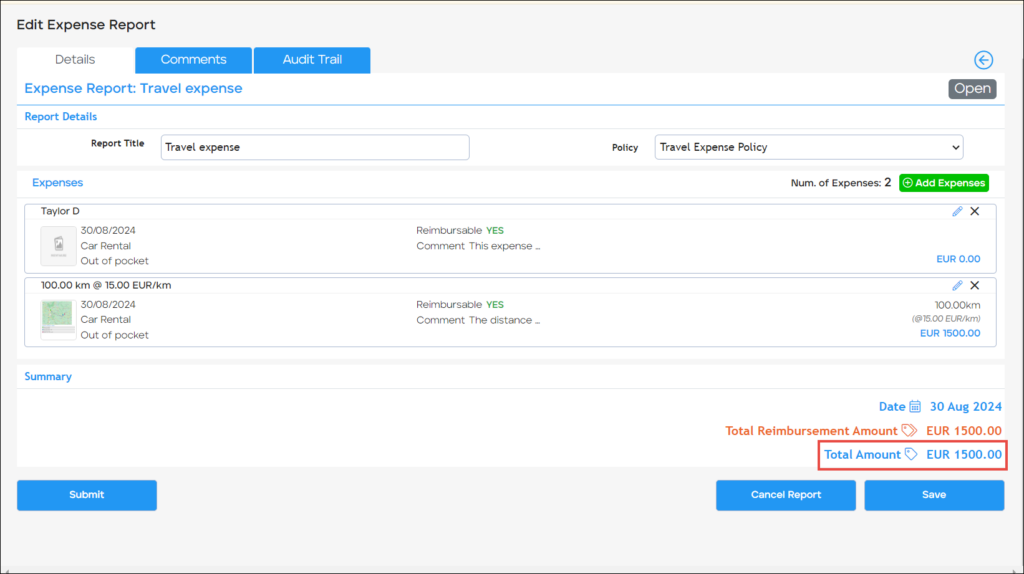
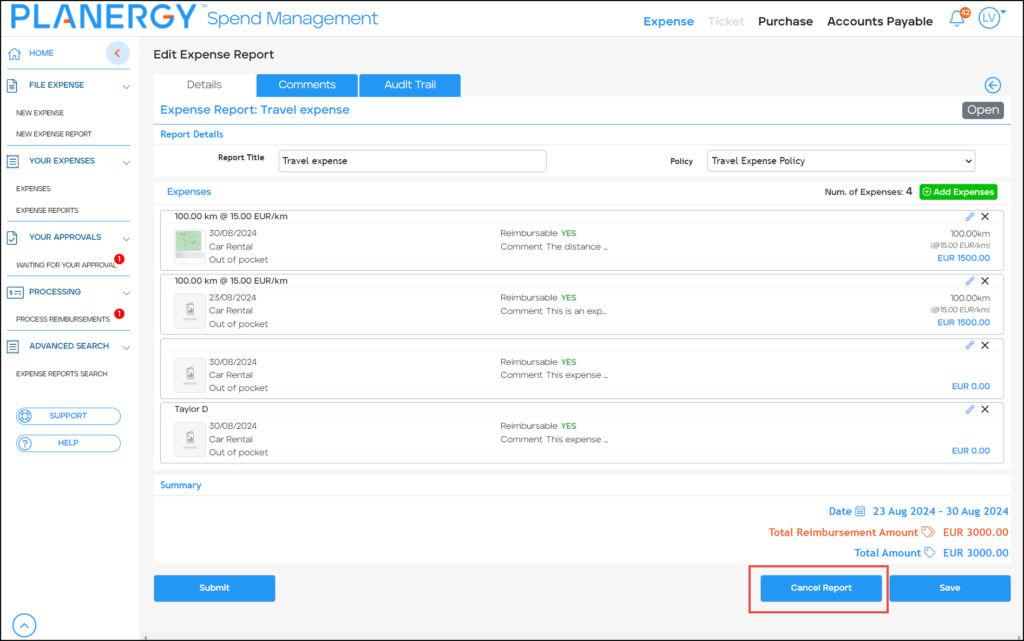
- You can cancel a report by pressing Cancel Report. For more information, please refer to How to Cancel a Report.
- You can submit a report by pressing Submit. For more information, please refer to How to Submit a Report.
- For all expenses in currencies different from the reporting currency (the currency defined by the main company), the exchange rate is locked at the moment of adding and will be visible on the UI.
- Any changes to the exchange rate, after the expense is added to an expense report, will not affect the expense nor the expense report total values.
- By pressing the edit icon in the expense row, the Edit Expense page is displayed, allowing you to edit its details. For more information, please refer to How to Edit an Expense.
How to Cancel a Report
You can cancel the report if you no longer need to process it further.
Note
- Press Your Expenses > Expense Report on the left navigation panel.
 Alternatively, press My Expense Reports on the Shortcuts widget.
  The Expense Reports page is displayed.
 - Press anywhere in the row of the desired expense report with the current status as Open.
 The Edit Expense Report page is displayed.
 - Press Cancel Report.
 The Cancel Expense Report dialog is displayed.
 - Press Confirm.
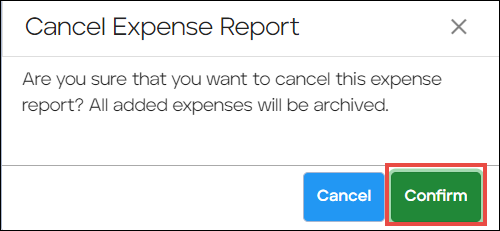 The success notification is displayed. The expense report status changes to Canceled and all the expenses added to the expense report are archived.
How to Submit a Report
You can submit the expense report to initiate the approval process.
Note
- Press Your Expenses > Expense Report on the left navigation panel.
 Alternatively, press My Expense Reports on the Shortcuts widget.
  The Expense Reports page is displayed.
- Press anywhere in the row of the desired expense report with the current status as Open.
 The Edit Expense Report page is displayed.
- Press Submit.
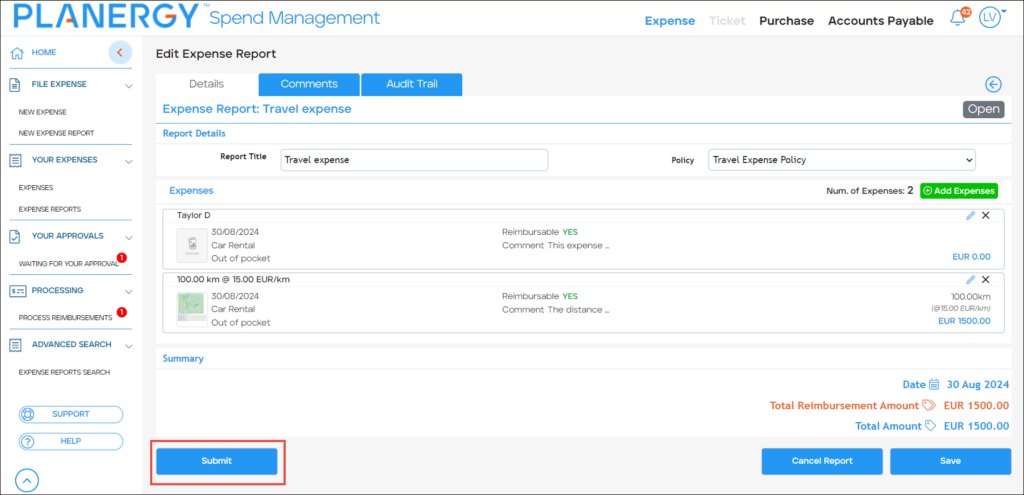 The Submit For Approval dialog is displayed.
- Press Confirm.
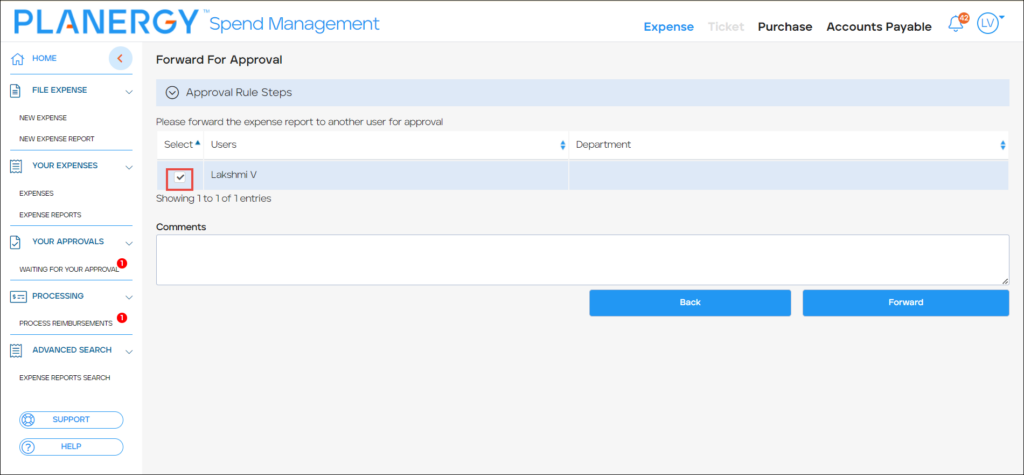
 The Forward For Approval page is displayed.
Note
This page is displayed only if approval rules are set for expense reports and the approval process is manual where approval requests need to be manually forwarded to approvers.
For automated approval processes, the user is navigated to back to the Home page.
- Check the box next to the user you want to forward the expense report for approval.
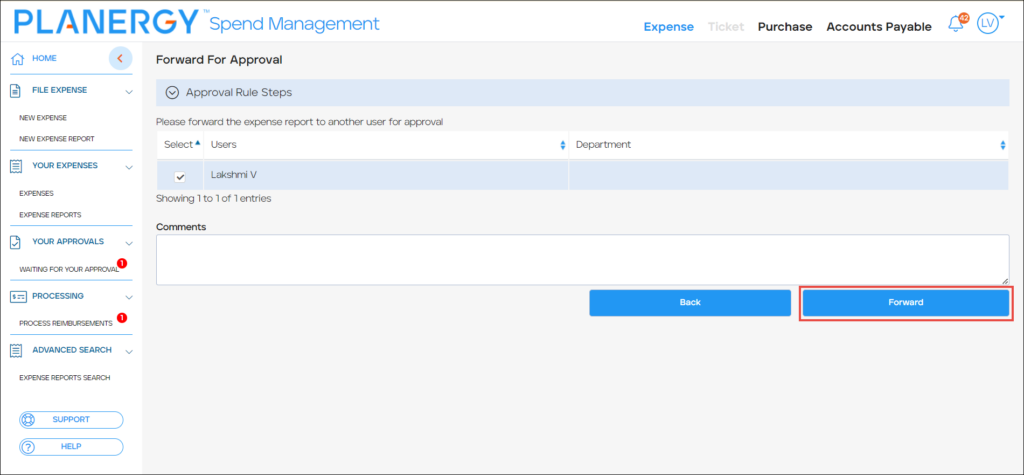
- Press Forward.
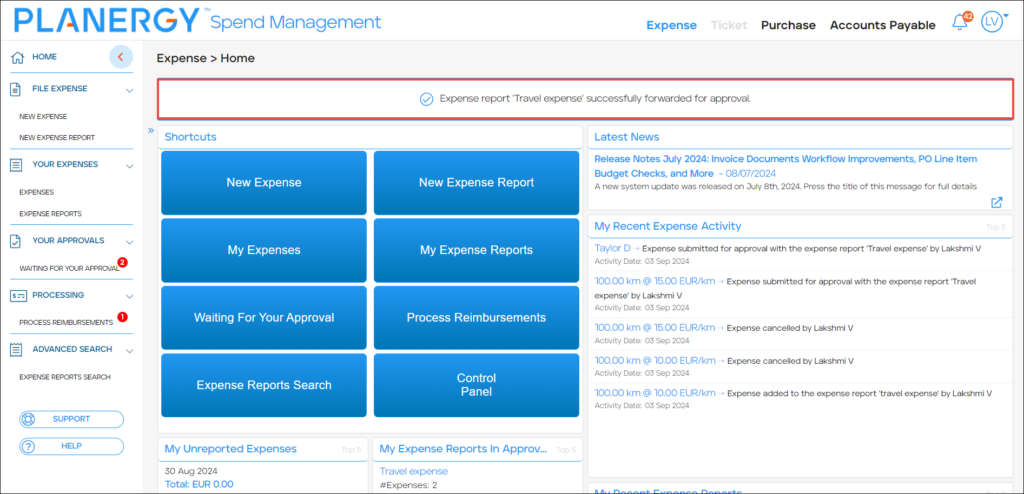
 The success notification is displayed.
How to Search Your Expense Reports
To search for expense reports you have created, follow the steps below.
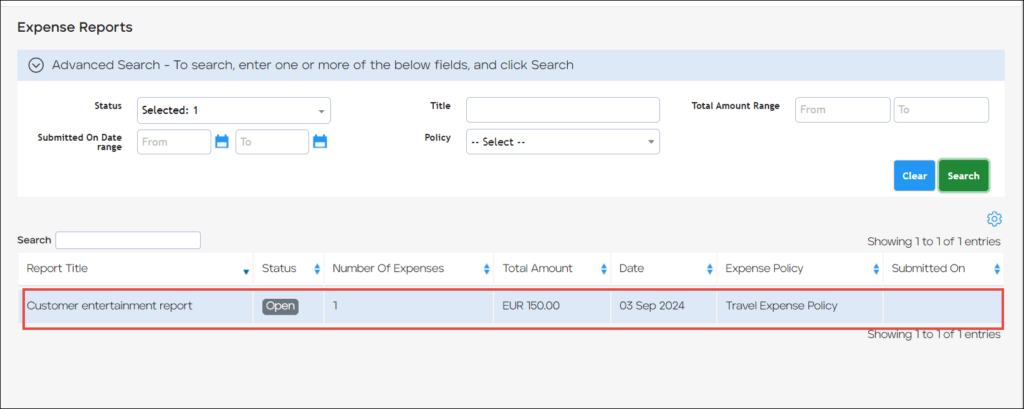
Press Your Expenses > Expense Report on the left navigation panel. Alternatively, press My Expense Reports on the Shortcuts widget.
  The Expense Reports page is displayed.
You can search for expense reports using one of the following:
Quick Search Expense Reports
You can use the quick Search feature to locate a specific expense.
- On the Expense Reports page, enter a character(s) from the Title of the expense in the Search field.
 Immediately after you enter the character in the Search field, all the expenses with titles matching the search criteria are listed.
Expense Report Advanced Search
The advanced search feature allows you to refine your search results to locate a specific expense report.
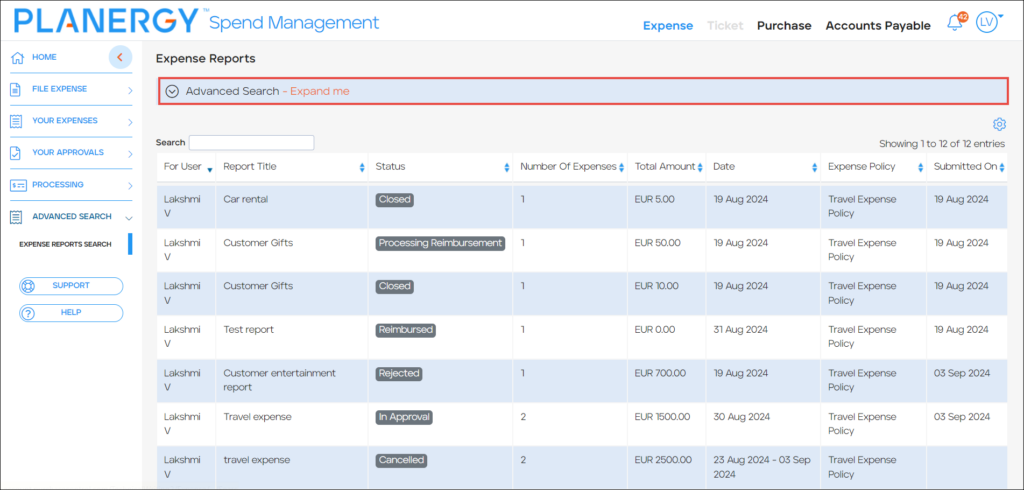
- On the Expense Reports page, press Advanced Search.
 The Advanced Search filters are displayed.
You can use all or any combination of filters needed to locate a specific expense report.
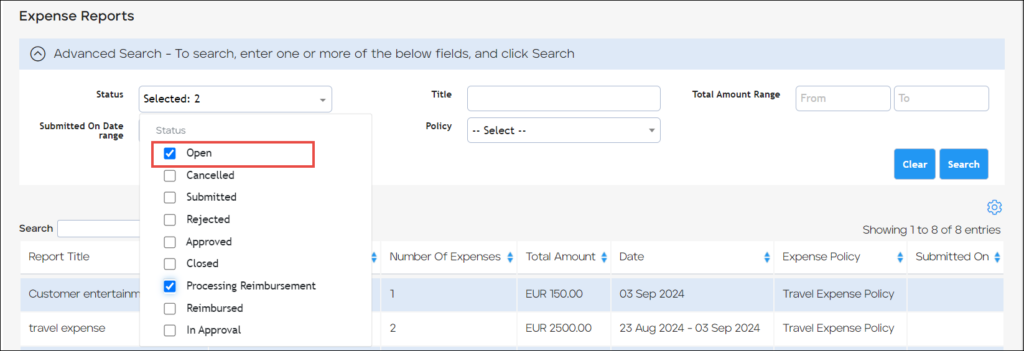
- Select or enter the required criteria in the filter field(s) for refining the report search. The available filters are as follows:
-
- Status – This is a multi-select dropdown list that allows you to select the necessary current statuses of the expense reports to be included in the search.
- Submitted on Date Range – This filter allows you to define a date range for refining your search based on when the expense report was submitted. The From field lets you set up the starting transaction date and the To field lets you set up the ending date.
Note
If the From field is left blank, the value defaults to 01/01/0001; if the To field is left blank, it defaults to 31/12/9999.
- Title – This filter is an input field, allowing you to refine the expense report search based on the title of the reports.

- Policy – This filter is a single-select dropdown list, allowing you to select the related expense policy based on which the expense reports are filtered.

- Total Amount Range – This filter enables you to set a range for the total amount to refine expense report search results. The From field lets you set up the starting amount and the To field lets you input the final total amount.
Note
If the From field is left blank, it will default to 0, and if the To field is left blank, it will default to 999999.
- Status – This is a multi-select dropdown list that allows you to select the necessary current statuses of the expense reports to be included in the search.
- Press Search.
Note
We demonstrate setting the status filter criteria to refine the expense report search. You can similarly use the other filter criteria or a combination of filter criteria to refine the search.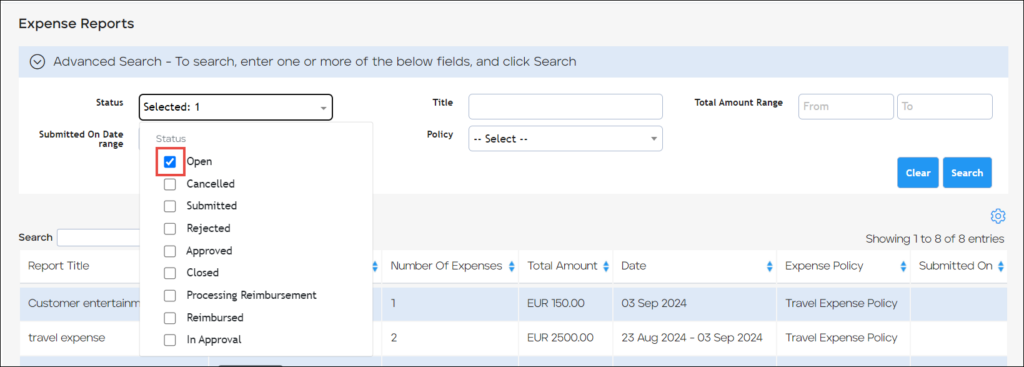
All expenses matching the filter criteria are displayed.