The File Expense section allows you to create new expenses and expense reports. These expenses are generated based on receipts provided by the employee, but they can also be generated based on distance traveled distance or time spent on a job.
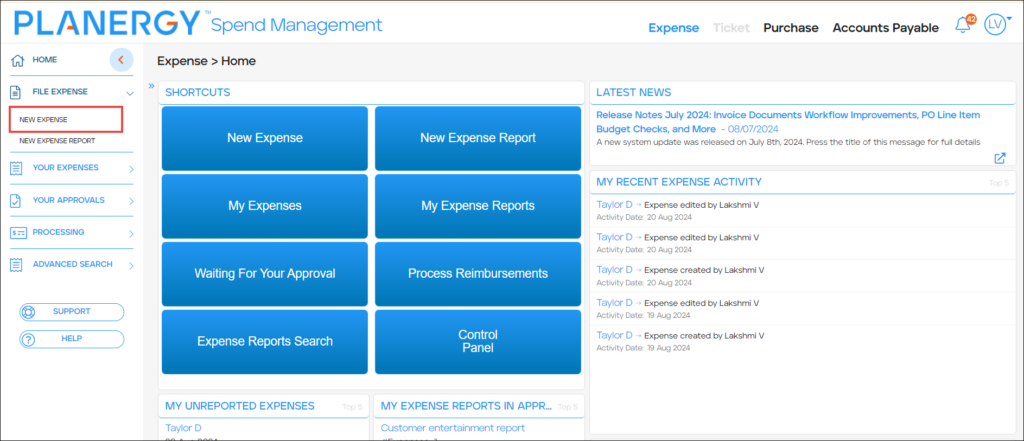
On the Expense > Home page, press File Expense. The File Expense dropdown list is displayed.
For more information, please refer to the following sections:
- How to Create a New General Expense
- How to Create a New Distance Expense
- How to Create a New Time Expense
- How to Create a New Expense Report
How to Change the Default Expense Policy on New Expenses
You can change the default expense policy when creating a new expense.
- Press File Expense > New Expense on the left navigation panel.
Note
Alternatively, press New Expense on the Shortcuts widget within the Expense > Home page.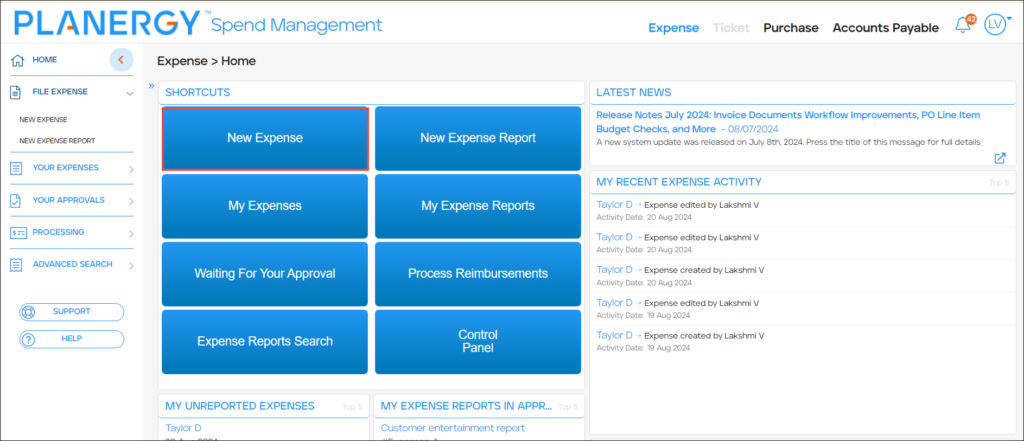
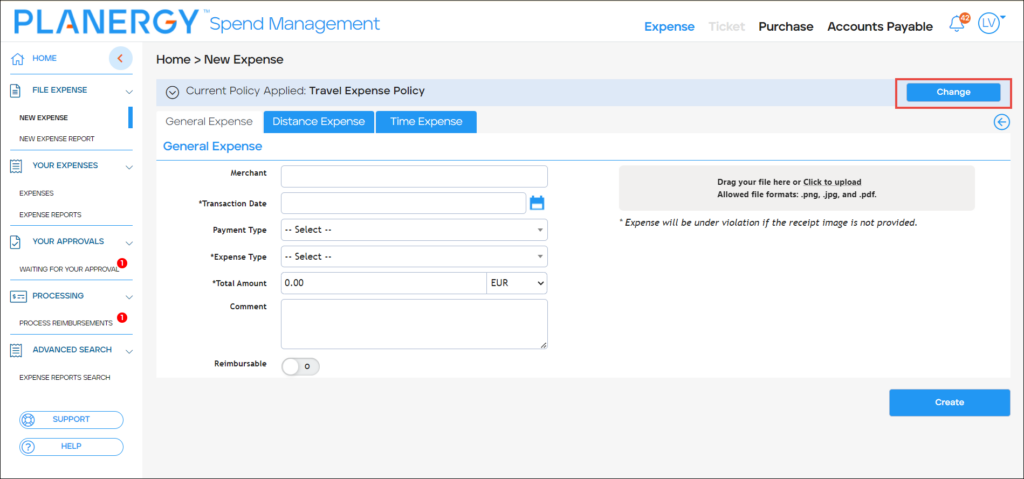
The New Expense > General Expense form is displayed.
- Press Change corresponding to the Current Policy Applied.
 The Select Default Expense Policy dialog is displayed.
- Press and select the desired policy from the User’s Default Policy dropdown list.

- Press Change.

The default policy is changed and the page is refreshed to reflect the policy change.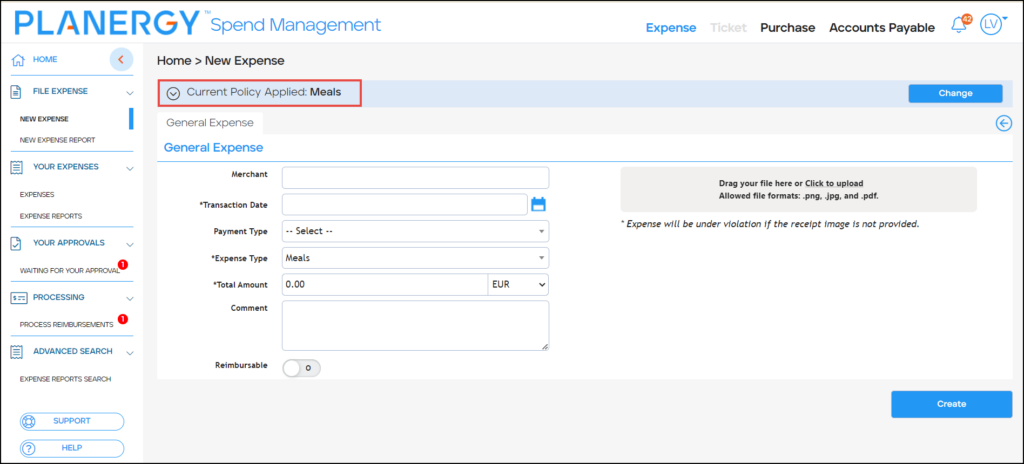
How to Create a New General Expense
You can create a general expense to record and manage any expense based on a printed receipt.
- Press File Expense > New Expense on the left navigation panel.
 Alternatively, press New Expense on the Shortcuts widget within the Expense > Home page.
 The New Expense > General Expense form is displayed.
Note
You can change the default policy for the expense by pressing Change associated with the Current Policy Applied row. This is optional. For more information, please refer to How to Change the Default Expense Policy on New Expenses.
- Enter the name of the merchant in the Merchant field.
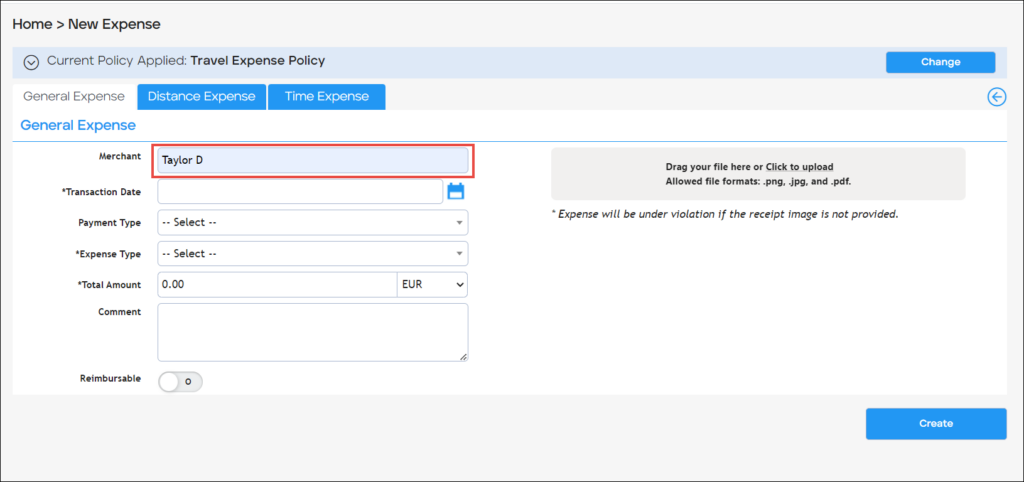
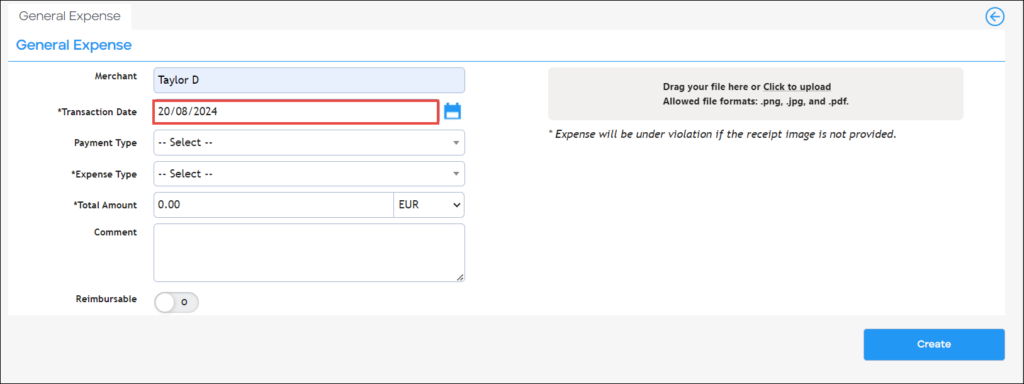
- Select the date of the transaction from the Transaction Date dropdown calendar.
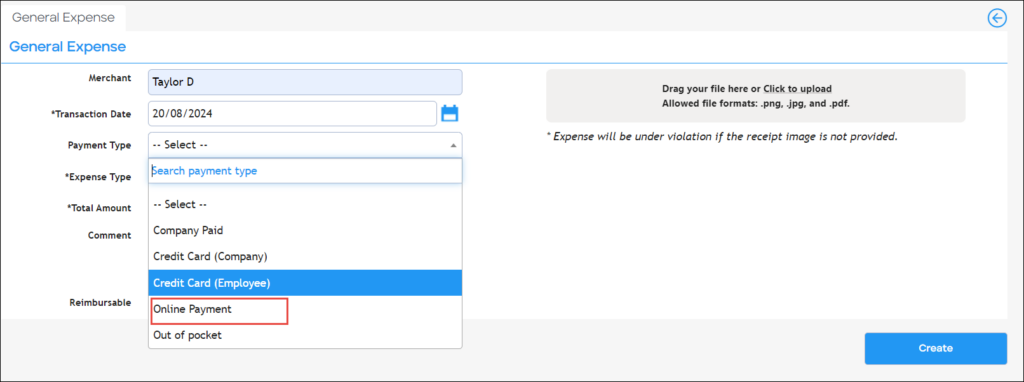
- Press and select the type of payment from the Payment Type dropdown list.
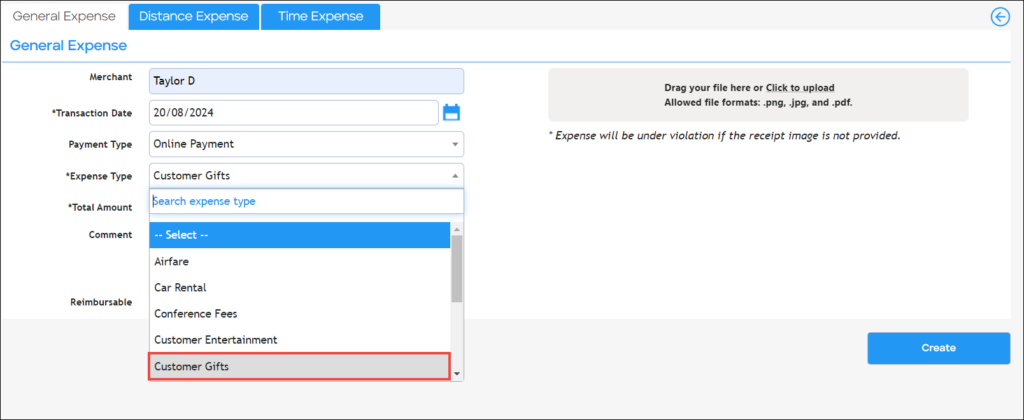
- Press and select the type of expense from the Expense Type dropdown list.
- Enter the amount of expense in the Total Amount field.
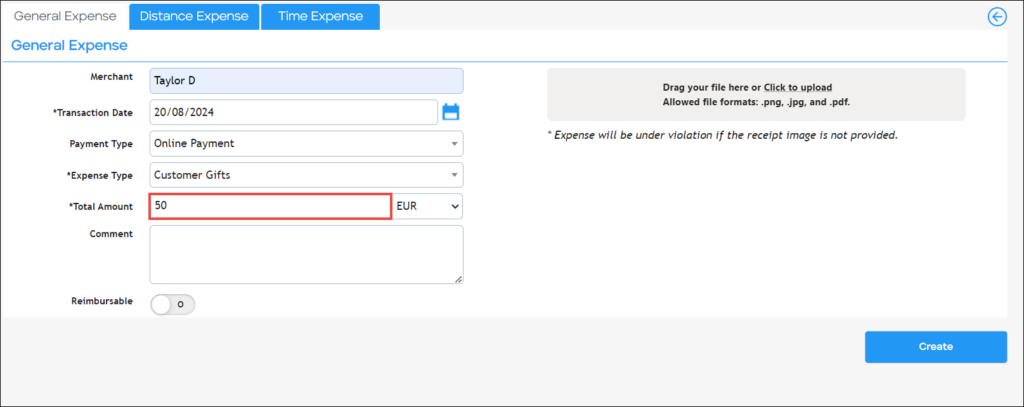
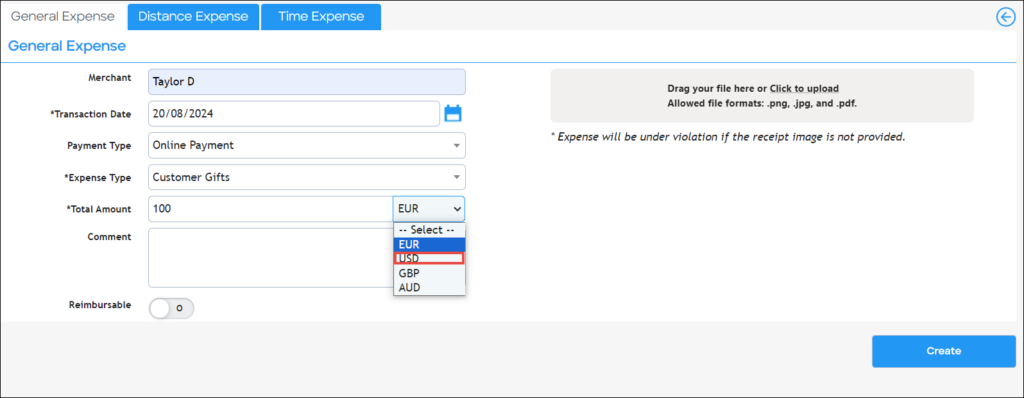
- Press and select the currency on the expense from the Currency dropdown list.
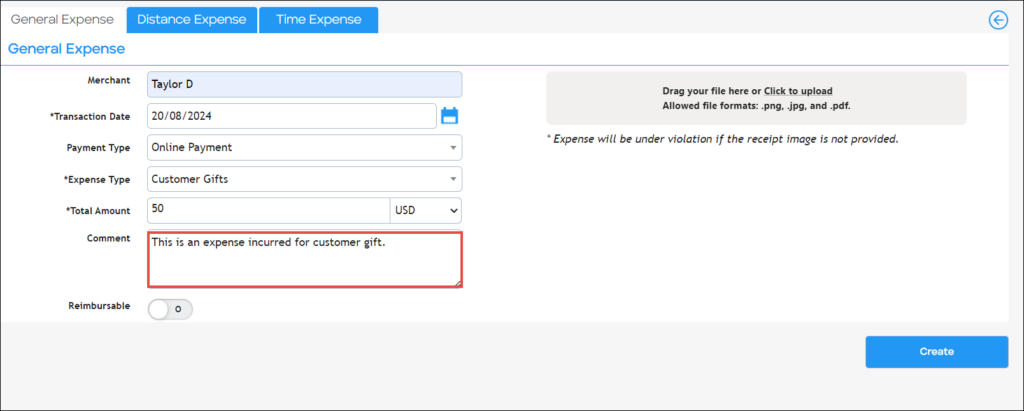
- Enter a comment regarding the expense in the Comment field.
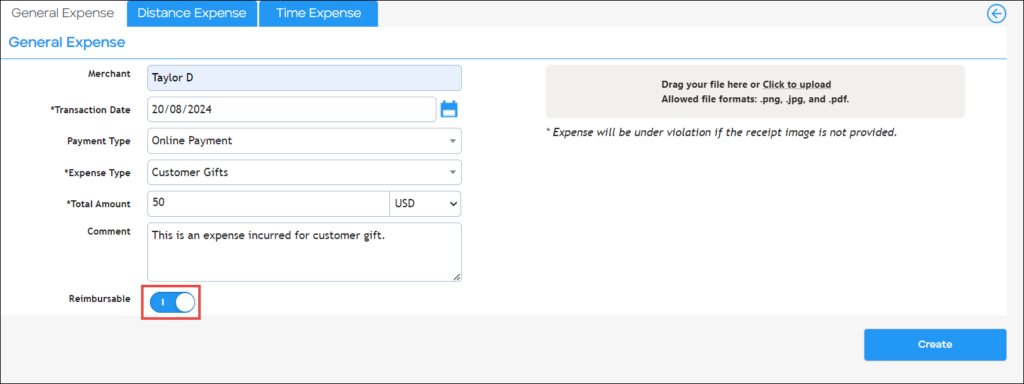
- Enable the Reimbursable button if the expense should be reimbursed.
- Press and select or drag and upload the receipt image from your system in the Drag your file here field.
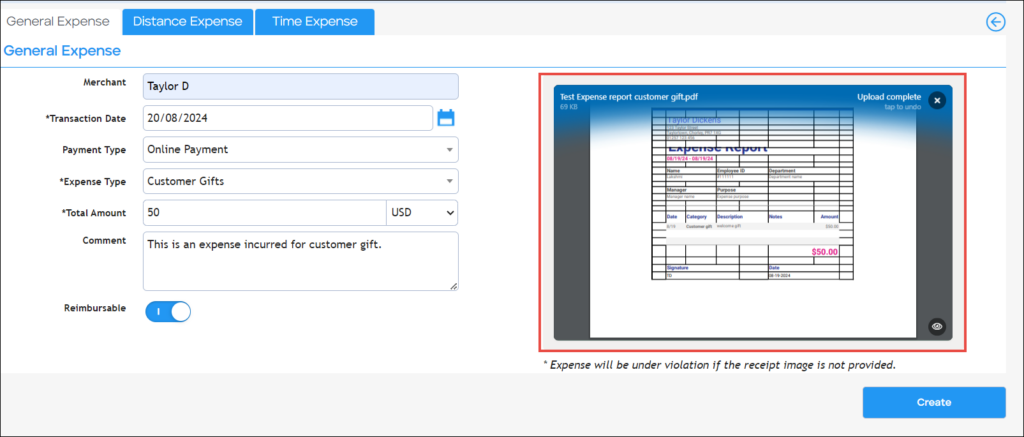
- Press Create.
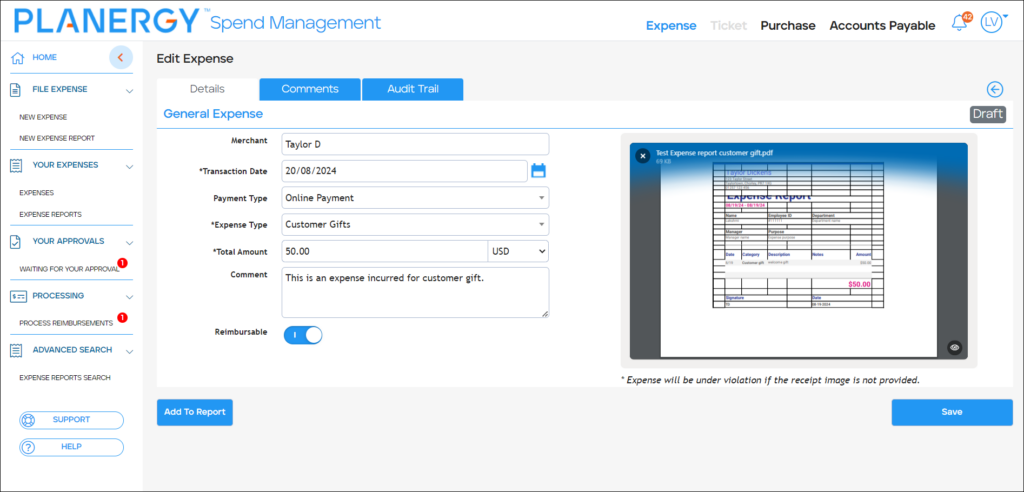
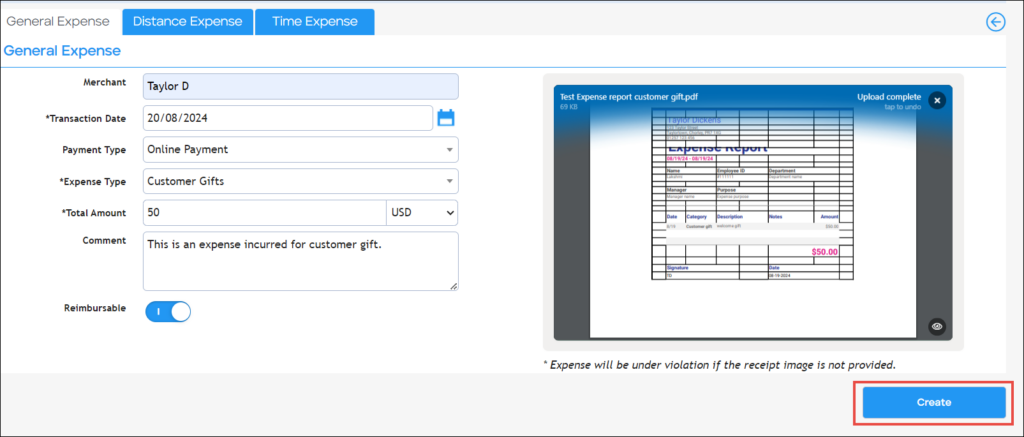 The expense draft is successfully created.
Note
You can access the expenses created under the Your Expenses > Expenses section. For more information, refer to How to View Expense Details.
How to Create a New Distance Expense
You can create a new distance expense to record and manage travel-related costs.
- Press File Expense > New Expense on the left navigation panel.
 Alternatively, press New Expense on the Shortcut widget within the Expense > Home page.
  The New Expense > General Expense form is displayed.
 Note
You can change the default policy for the expense by pressing Change associated with the Current Policy Applied row. This is optional. For more information, please refer to How to Change the Default Expense Policy on New Expenses. - Press the Distance Expense tab.
The Distance Expense tab is visible only if the user permission is configured accordingly and if it is enabled on the Default Expense policy for the current user. For more information, please refer to the following sections: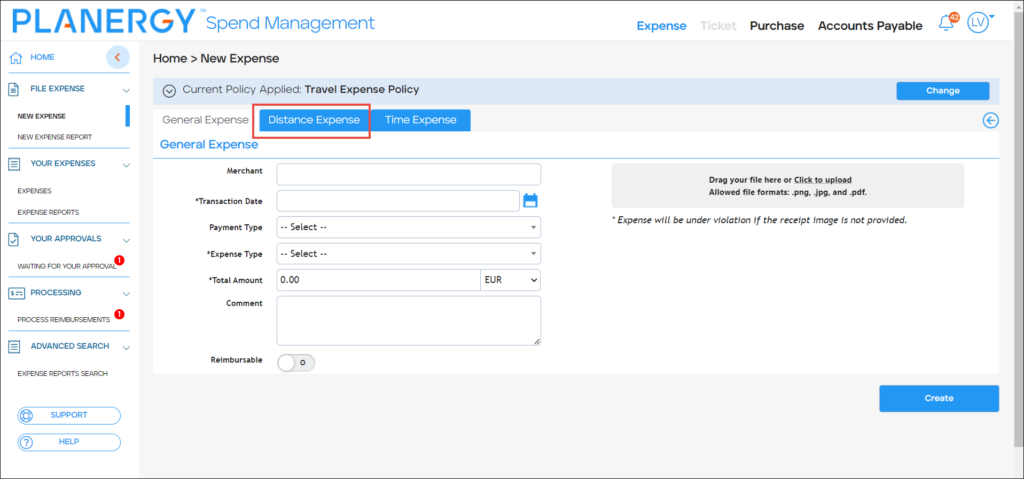 The New Expense > Distance Expense section is displayed.
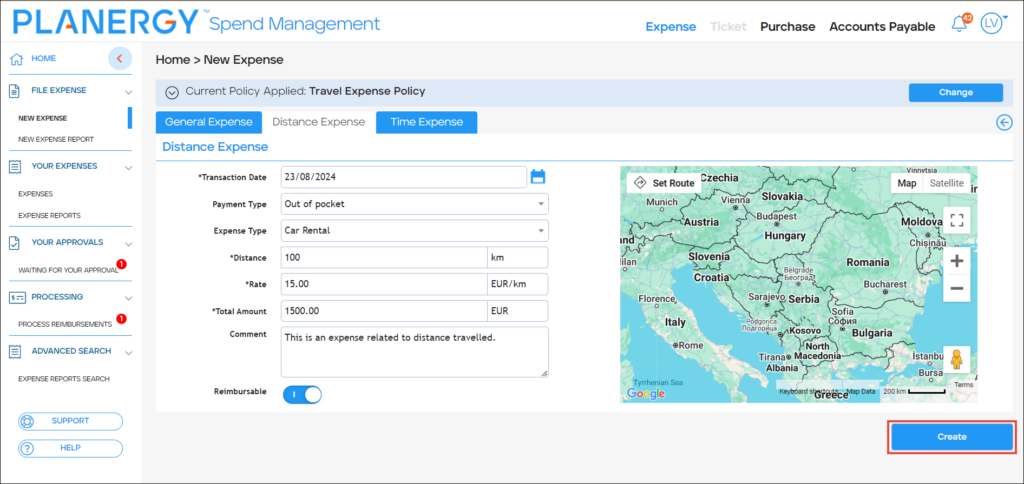 You can create the Distance Expense in 2 ways:
Manually Entering the Distance Data
To manually enter the data related to the distance to create the distance expense, follow the steps below.
- Navigate to the New Expense > Distance Expense section.
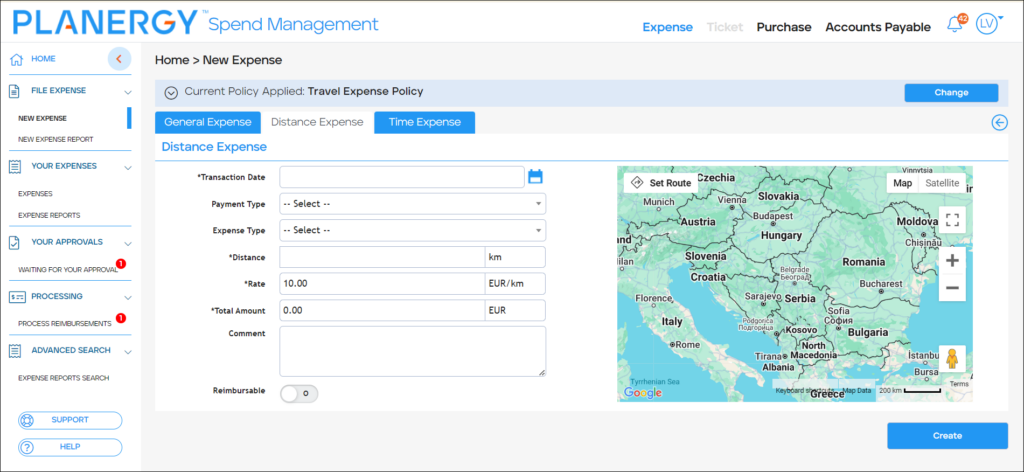
- Press and select the date of the transaction from the Transaction Date dropdown calendar.
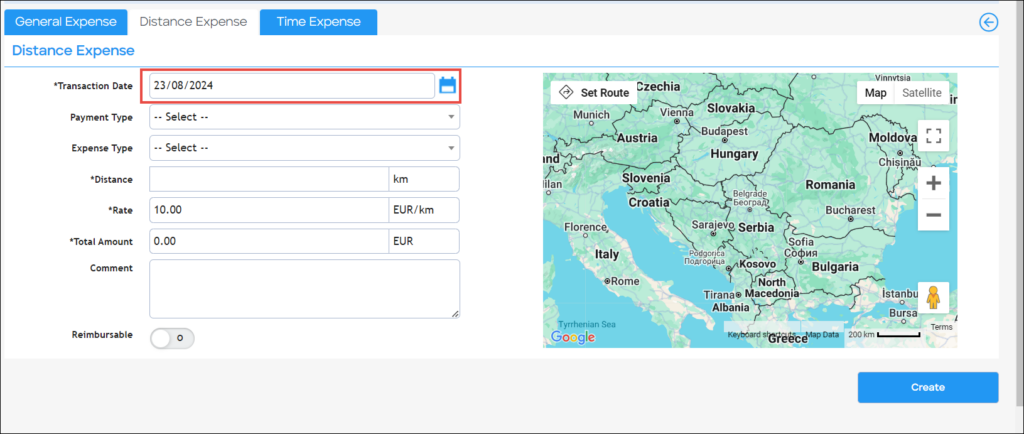
- Press and select the type of payment from the Payment Type dropdown list.
Note
The available payment types are active and defined in the Control Panel > Expense > Payment Types.
- Press and select the type of expense from the Expense Type dropdown list.
Note
The available expense types are active and defined in the Control Panel > Expense > Expense Types.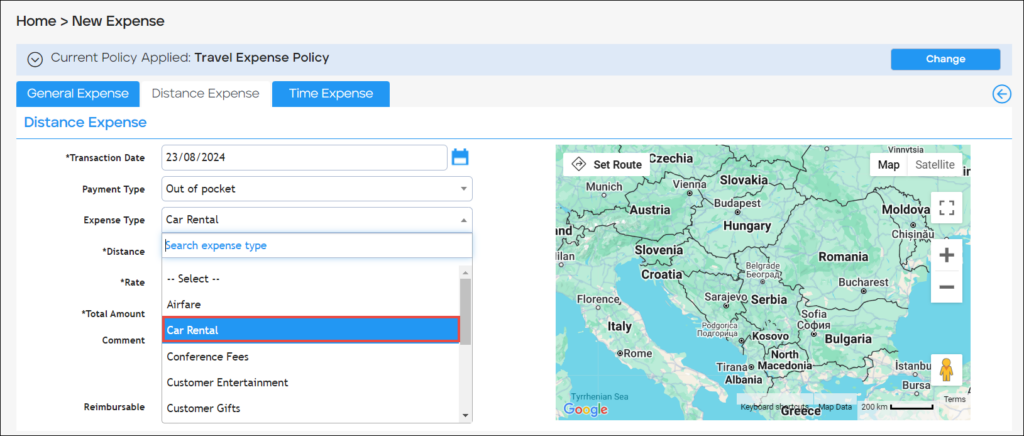
- Enter the distance covered in the Distance field.
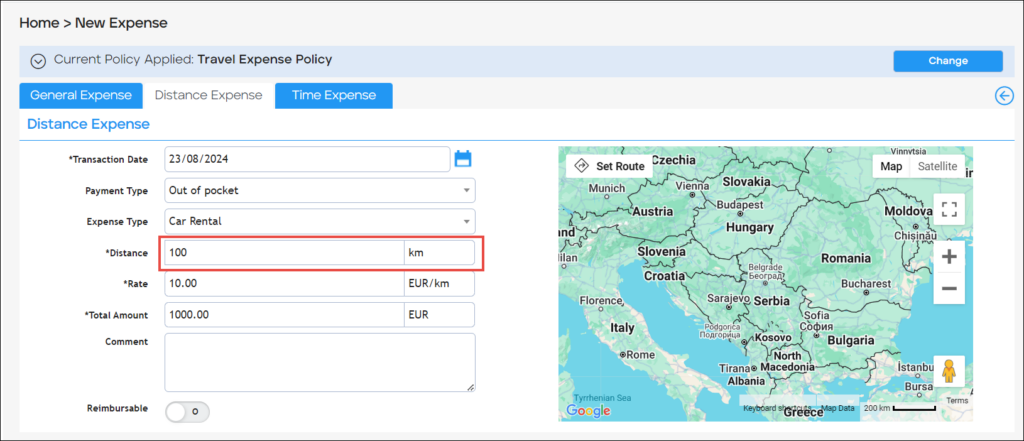
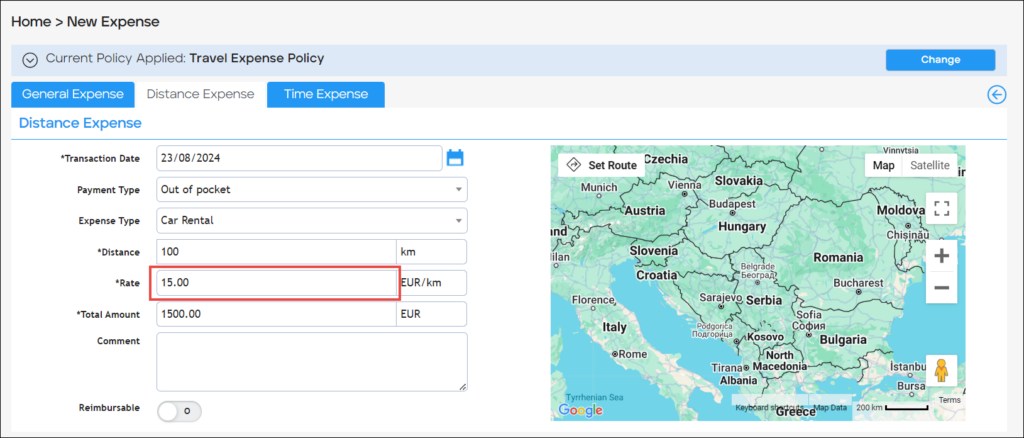
- Enter the rate per unit of measure in the Rate field. By default, the rate set in the default expense policy is auto-populated.
The Total Amount is autogenerated based on the Distance traveled and Rate per unit of measure.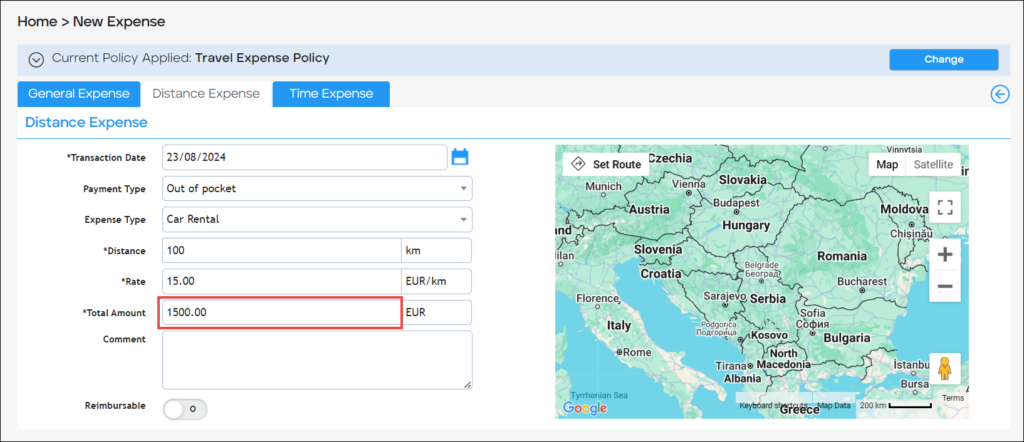
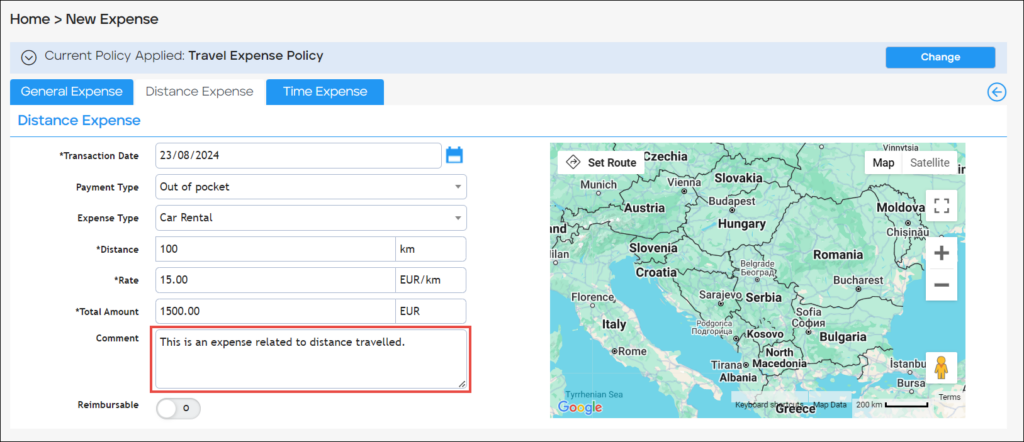
- Enter a brief text regarding the distance expense in the Comment field.
- Enable the Reimbursable toggle button if the expense has to be reimbursed to the user.
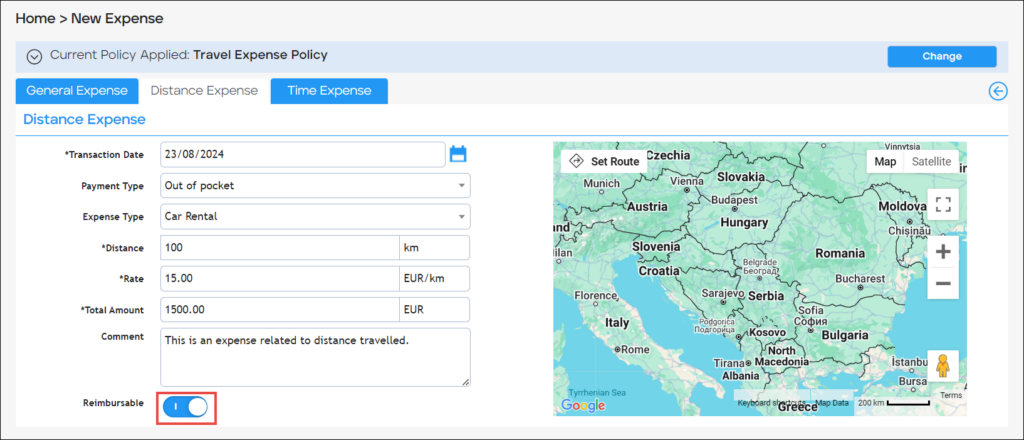
- Press Create.
 The Draft of Distance Expense is displayed.
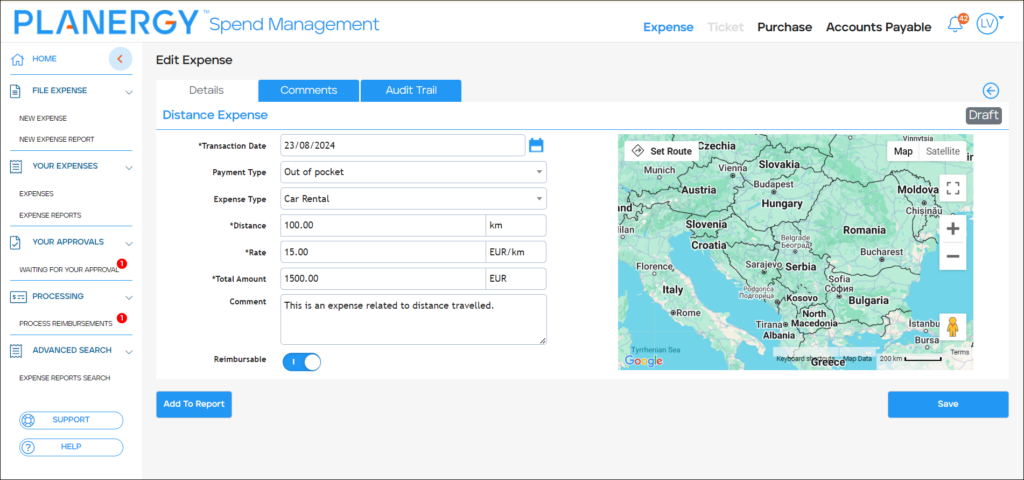
Setting Up the Distance Using Map
To manually enter the data related to the distance to create the Distance Expense, follow the steps below.
- Navigate to the New Expense > Distance Expense section.

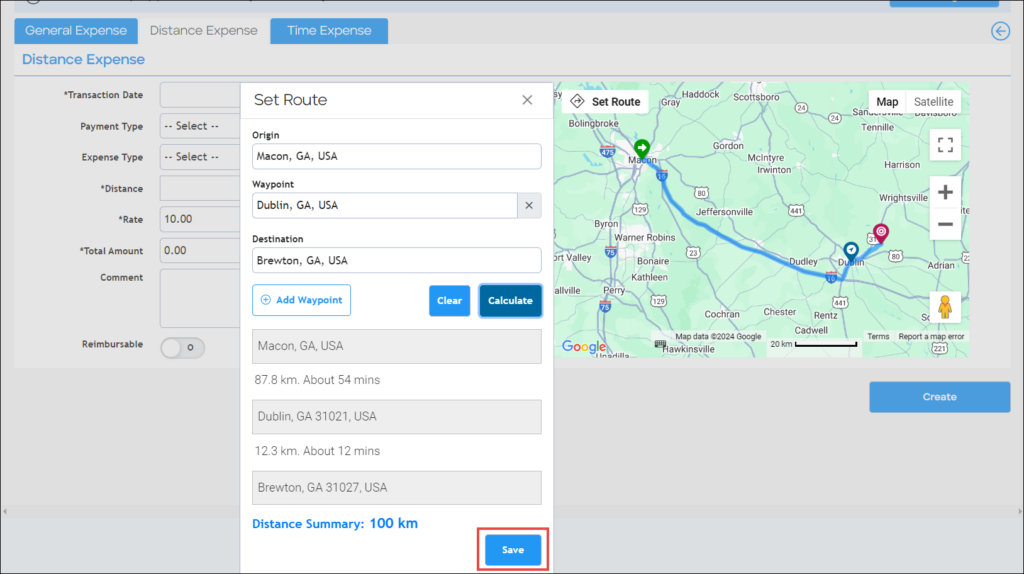
- Press Set Route.
 The Set Route dialog is displayed.
- Enter the point of journey commencement in the Origin field to calculate the distance.

- Enter the journey’s endpoint in the Destination field to calculate the distance.

Note
Press Add Waypoint if you wish to add an intermediate location.
The Waypoint field is displayed where you can enter the intermediate location of the journey.
- Press Calculate.
 The distance is calculated and the route is represented on the map.
Note
For longer journeys, multiple routes may be offered for selection. When this occurs, a new section is added to the Set Route dialog, allowing the users to choose their preferred route.
- Press Save.
 This Distance field is auto-populated with the distance calculated via the map.
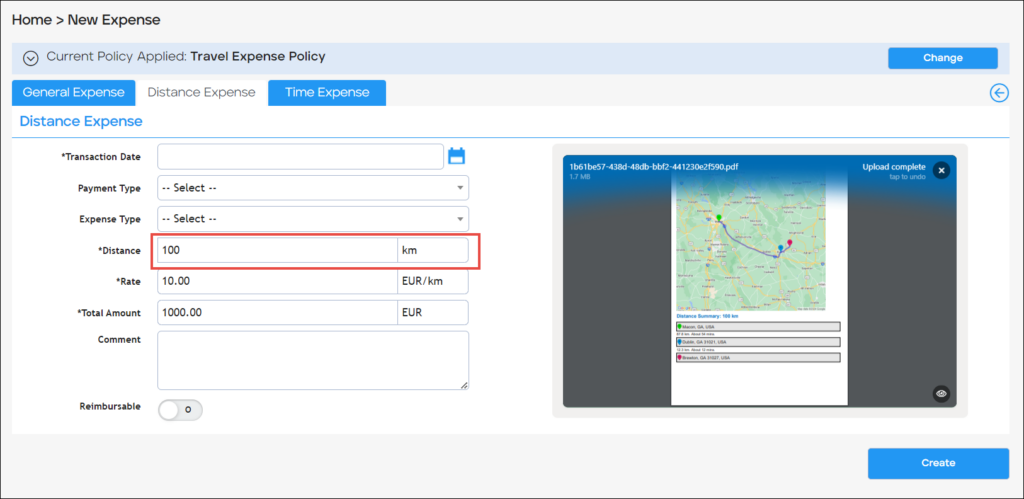
- Press and select the date of the transaction from the Transaction Date dropdown calendar.

- Press and select the type of payment from the Payment Type dropdown list.
Note
The available payment types are active and defined in the Control Panel > Expense > Payment Types.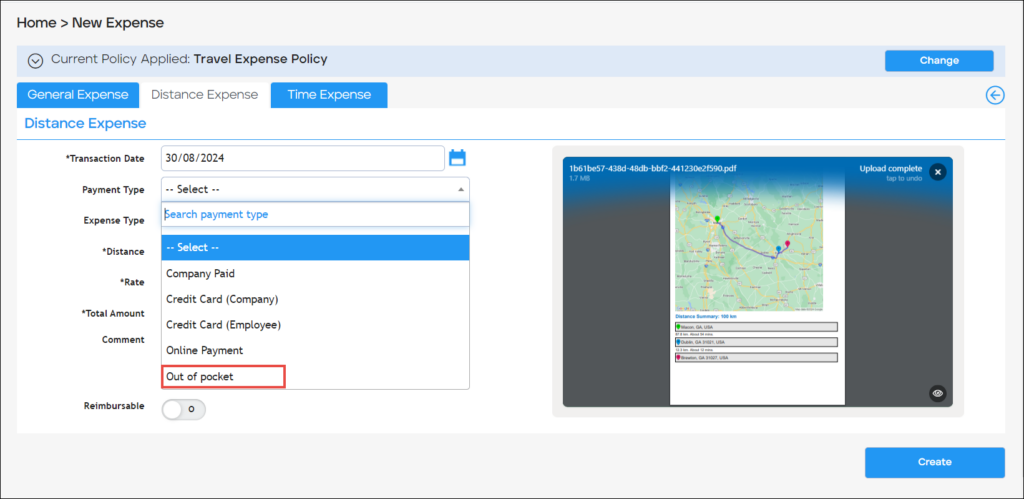
- Press and select the type of expense from the Expense Type dropdown list.
Note
The available expense types are active and defined in the Control Panel > Expense > Expense Types.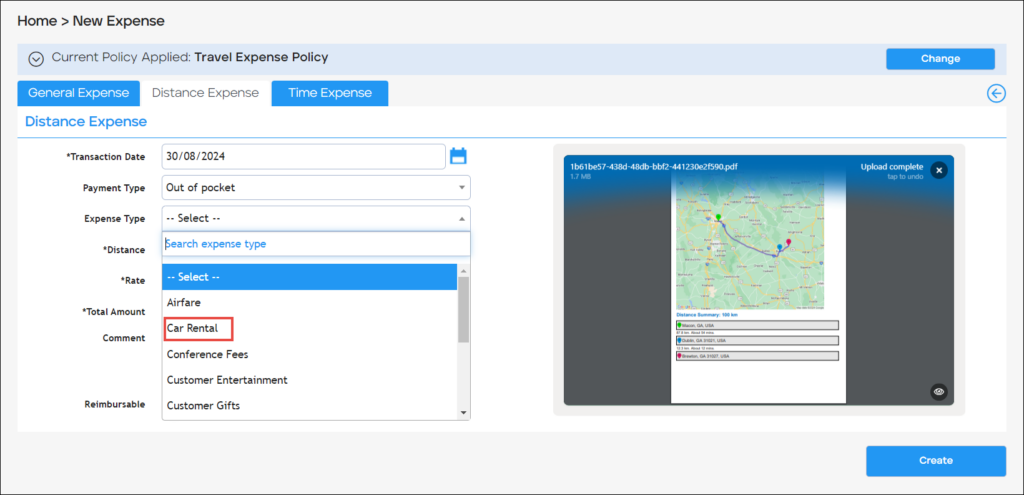
- Enter the rate per unit of measure in the Rate field. By default, the rate set in the default expense policy is auto-populated.
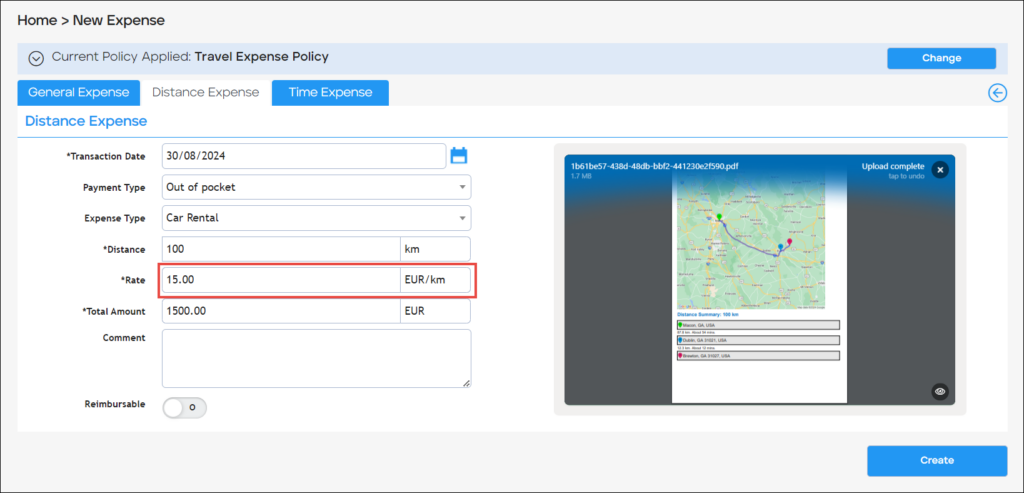
The Total Amount is autogenerated based on the Distance traveled and Rate per unit of measure.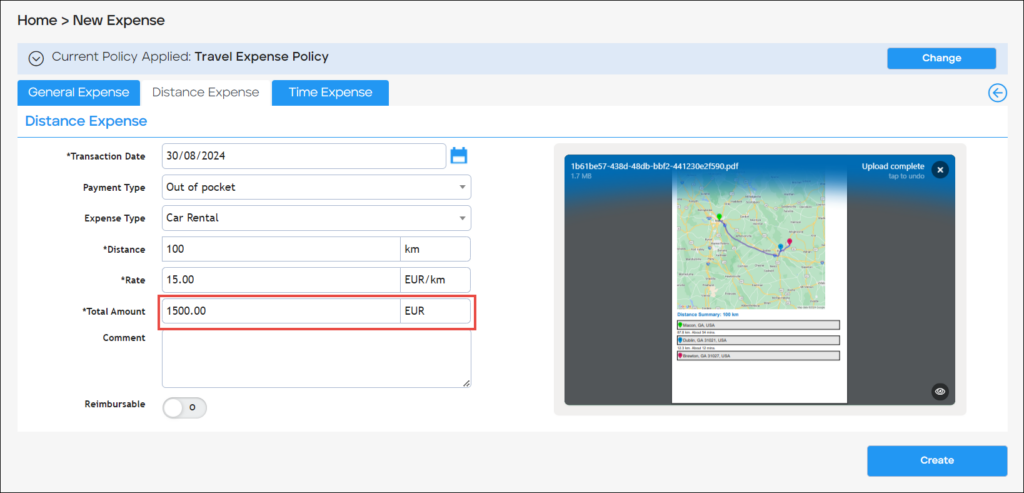
- Enter a note regarding the distance expense in the Comment field.
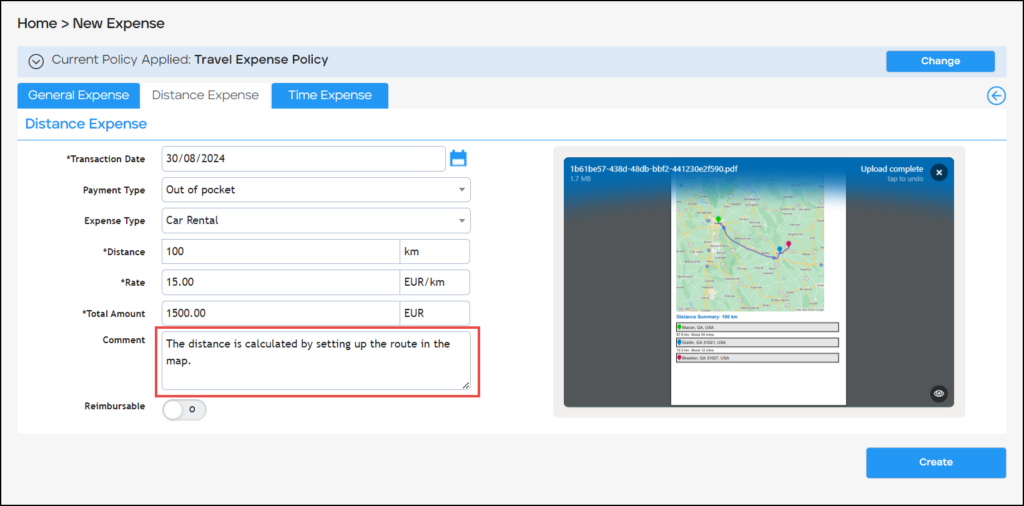
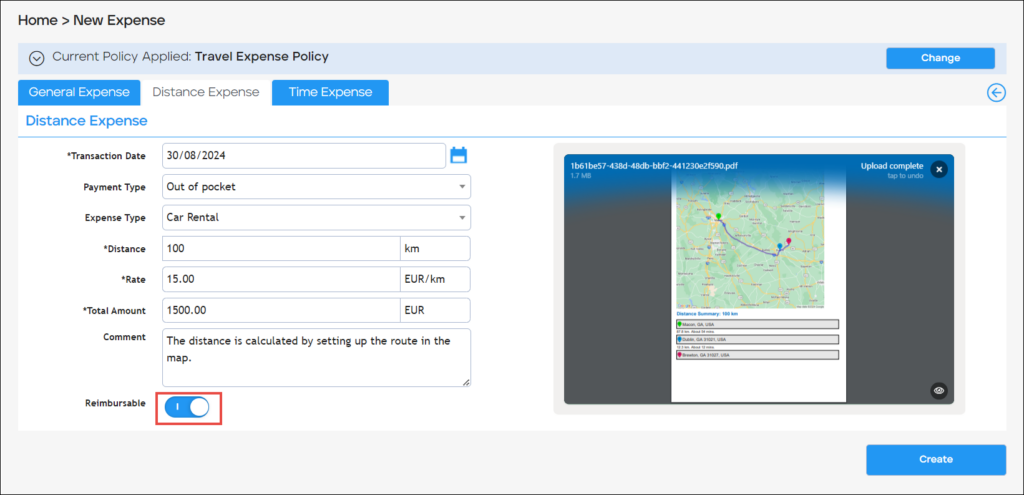
- Enable the Reimbursable toggle button if the expense has to be reimbursed to the user.
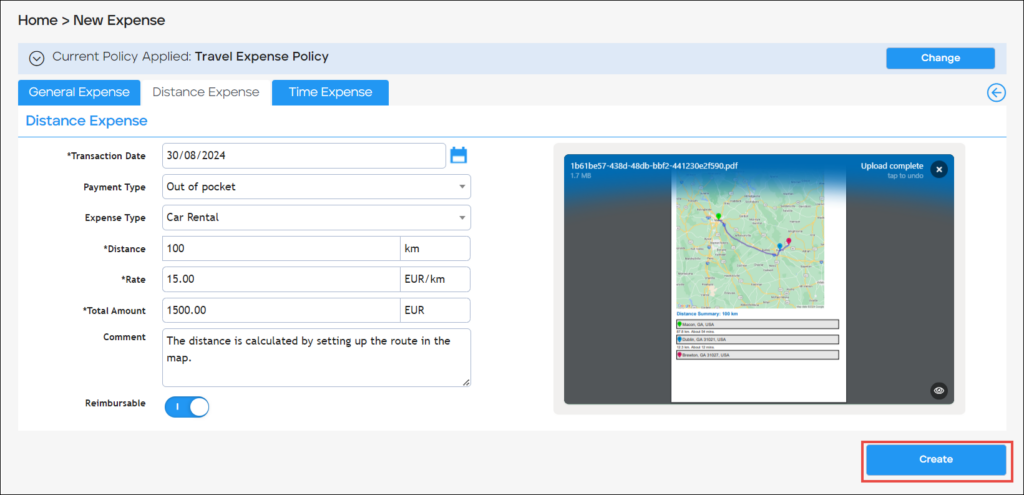
- Press Create.
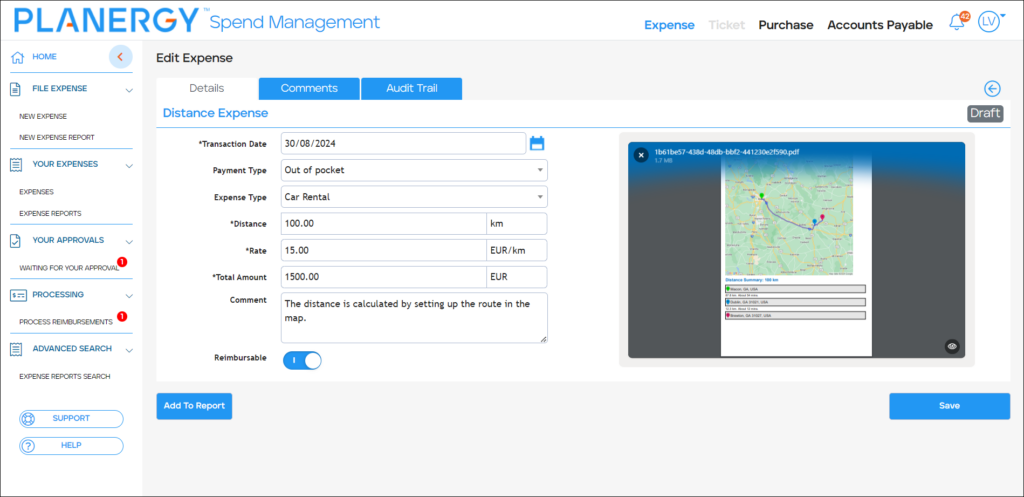
 The Draft of Distance Expense is displayed.
How to Create a New Time Expense
You can create a new time expense to record and manage time-related costs.
- Press File Expense > New Expense on the left navigation panel.
 Alternatively, press New Expense on the Shortcuts widget within the Expense > Home page.
The New Expense > General Expense form is displayed.
Note
You can change the default policy for the expense by pressing Change associated with the Current Policy Applied row. This is optional. For more information, please refer to How to Change the Default Expense Policy on New Expenses.
- Press the Time Expense tab.
The Time Expense tab is visible only if the user permission is configured accordingly. For more information, please refer to Setting Up User Permissions For Expenses.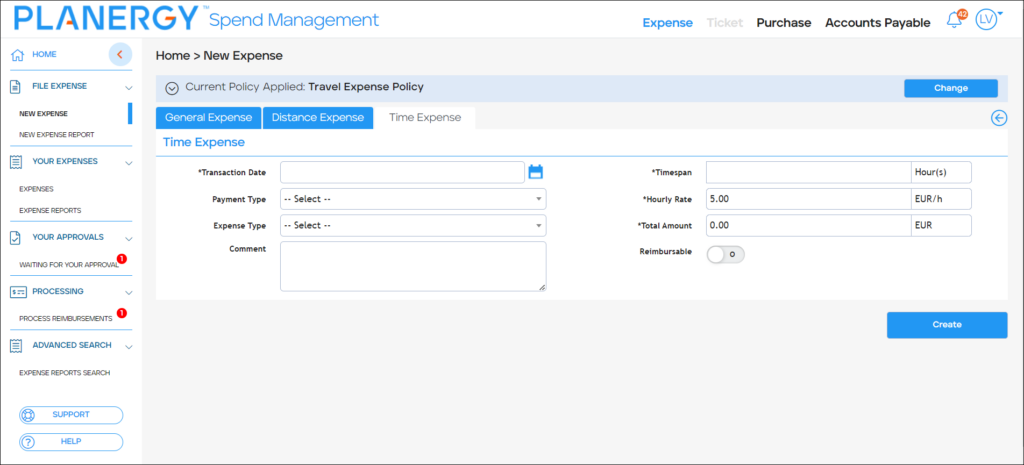
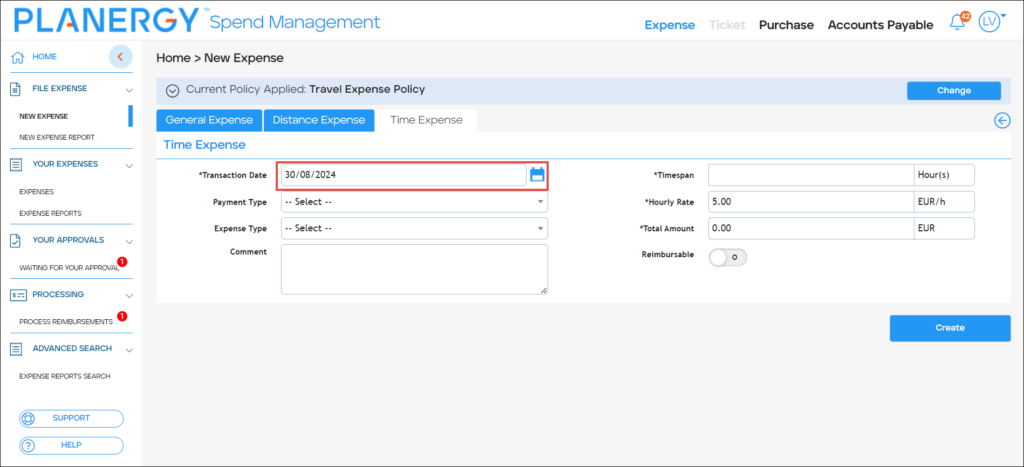
- Press and select the date of the transaction from the Transaction Date dropdown calendar.
- Press and select the type of payment from the Payment Type dropdown list.
Note
The available payment types are active and defined in the Control Panel > Expense > Payment Types.
- Press and select the type of expense from the Expense Type dropdown list.
Note
The available expense types are active and defined in the Control Panel > Expense > Expense Types.
- Enter a brief text regarding the time expense in the Comment field.

- Enter the duration in hours in the Timespan field.
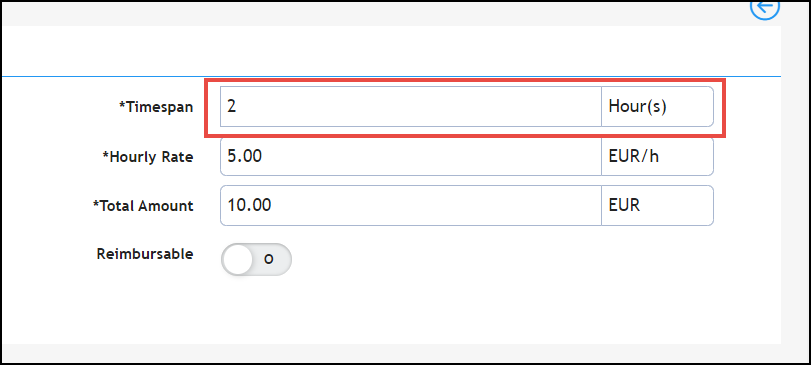
- Enter the rate per hour in the Hourly Rate field. By default, the rate set in the default expense policy is auto-populated.

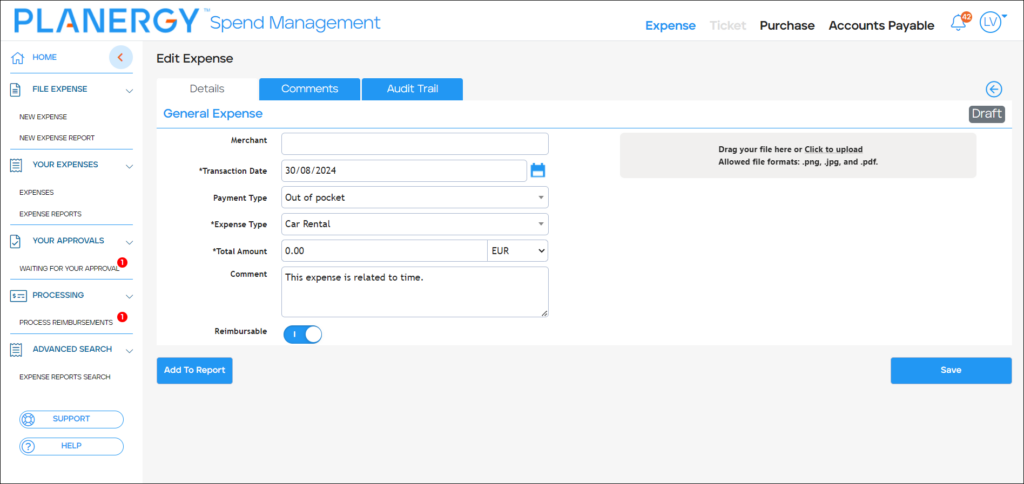
The Total Amount is autogenerated based on the Timespan and Hourly Rate per unit of measure.
- Enable the Reimbursable toggle button if the expense has to be reimbursed to the user.

- Press Create.
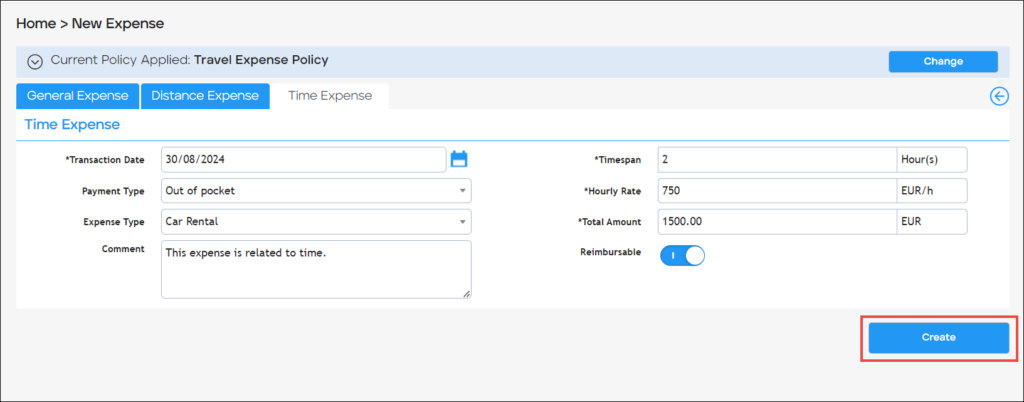 The Draft of Time Expense is displayed.
How to Create a New Expense Report
You are required to create a new expense report to track and aggregate several individual Expenses, allowing them to be approved and/or reimbursed.
Note
- Press File Expense > New Expense Report on the left navigation panel.

Alternatively, press New Expense Report on the Shortcuts widget within the Expense > Home page.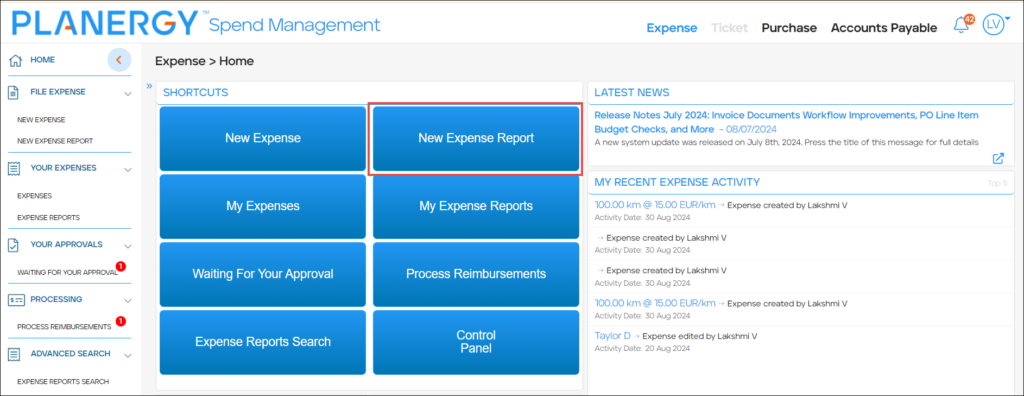 The New Expense Report page is displayed.
- Press Add Expenses.
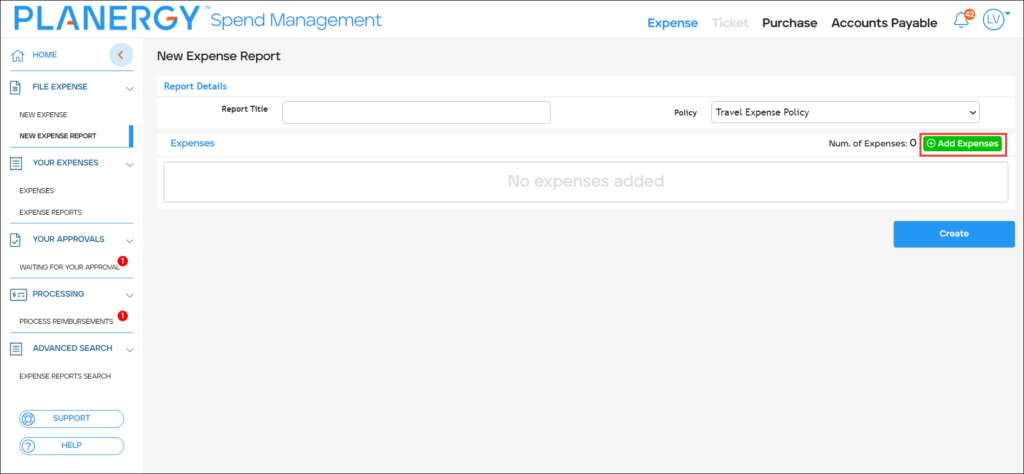 The Select Expenses dialog is displayed.
 - Check the box corresponding to the expenses you wish to add to the expense report.
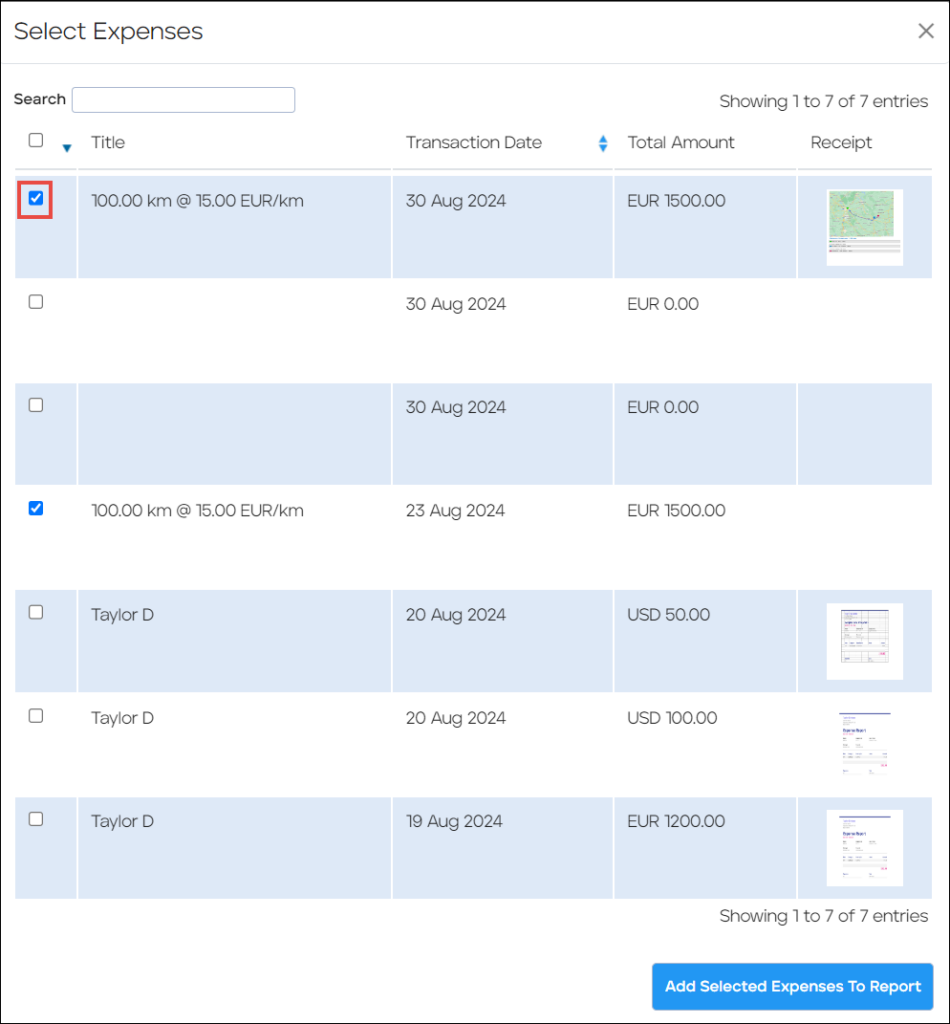
- Press Add Selected Expenses To Report.
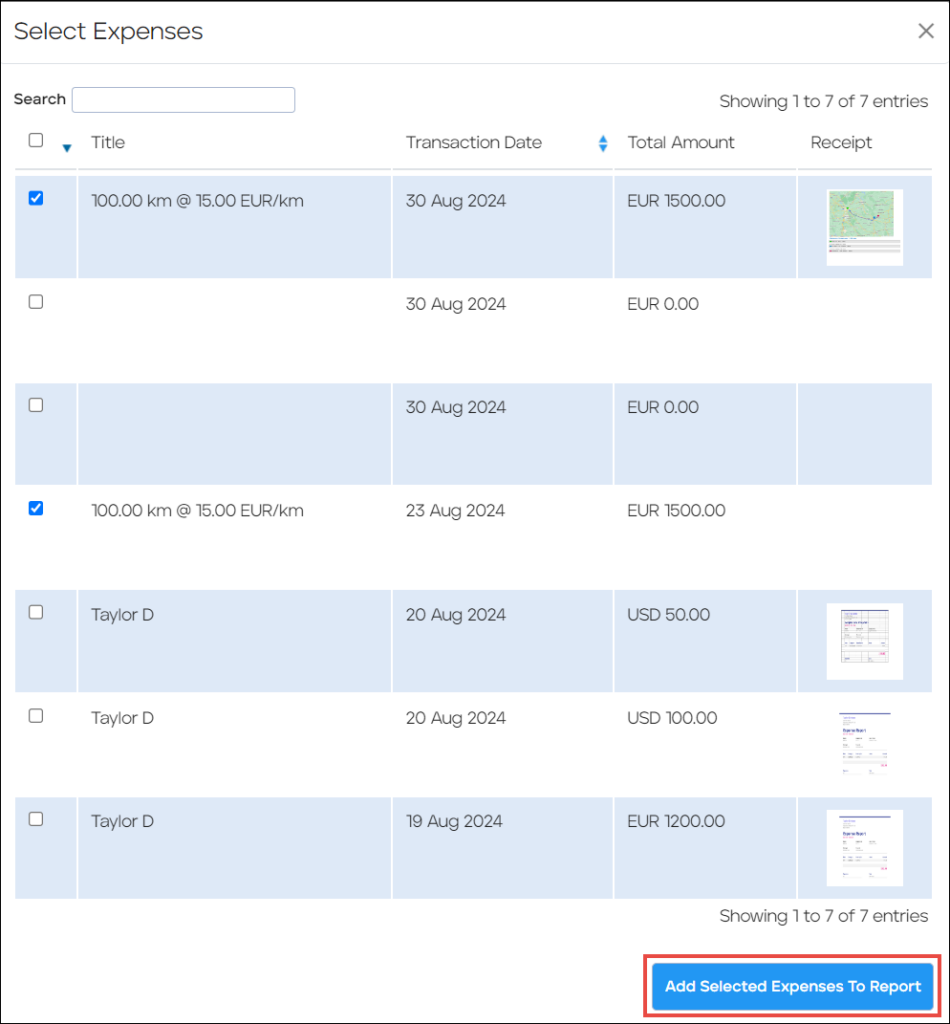 The selected expenses are added.
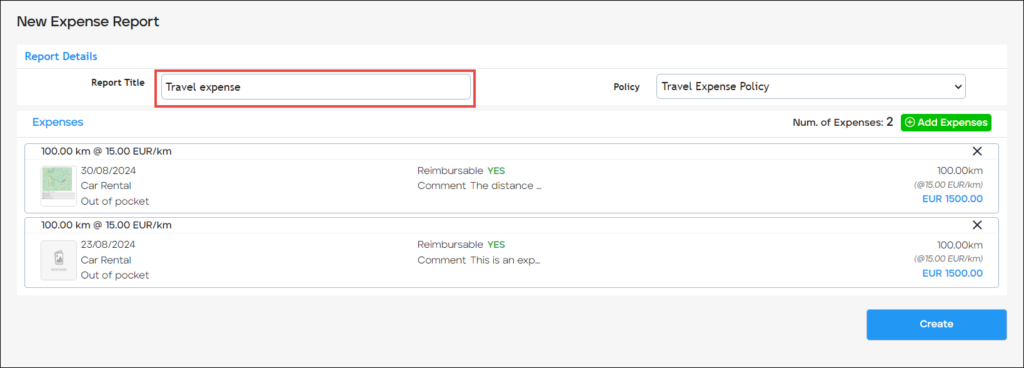
 - Enter the name of the report in the Report Title field.
Note
You can modify the value by changing the expense policy from the default policy by pressing Change associated with the Current Policy Applied row. Please refer to How to Change the Default Expense Policy on New Expenses.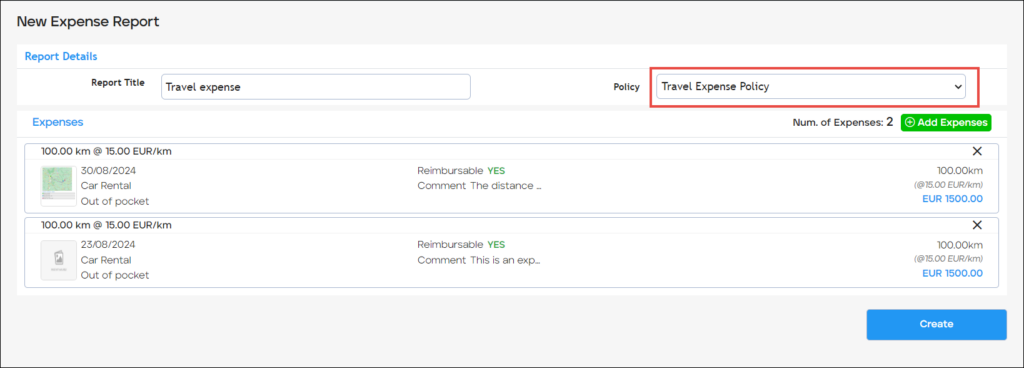
- Press Create.
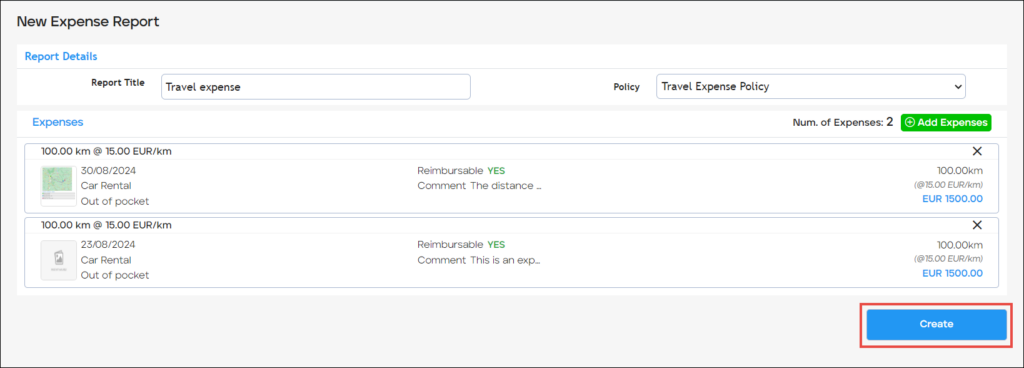 The Expense Report has been created and has the status as Open.
The Expense Report is listed under the Your Expense > Expense Reports section.
