The Purchase module Home page is a customizable landing page that allows quick visibility for key data a user may require and access to the various sections in the Purchase module.
You can customize the Home page and add a maximum of 8 panels of your choice on the page at a time.
- Navigate to PLANERGY > Purchase.
The Purchase module Home page is displayed.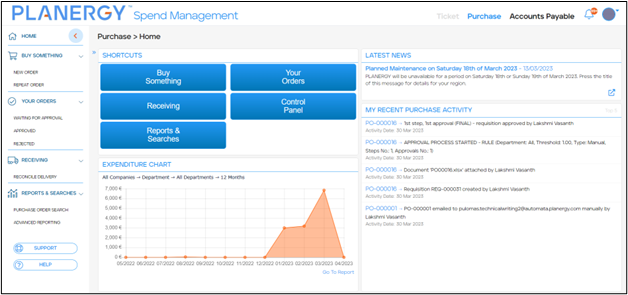
For more information, refer to the following sections:
How To Customize the Home Page
You can customize your Purchase > Home page based on your need to access the data. You can
Add a Dashboard Panel
You can add a maximum of 8 panels at a time to the Purchase Home page. To add a panel, follow the steps below.
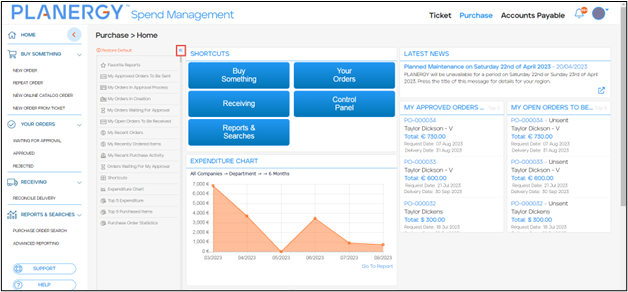
- On the Purchase module Home page, press the Add New Panel icon.
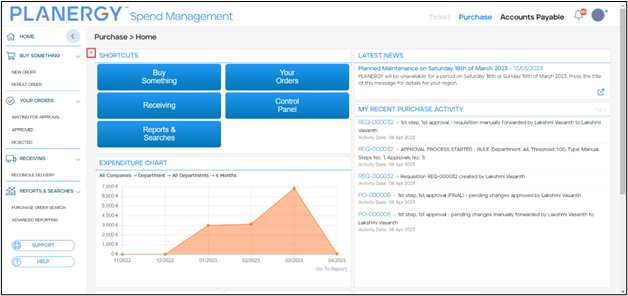 The list of available panels are displayed.
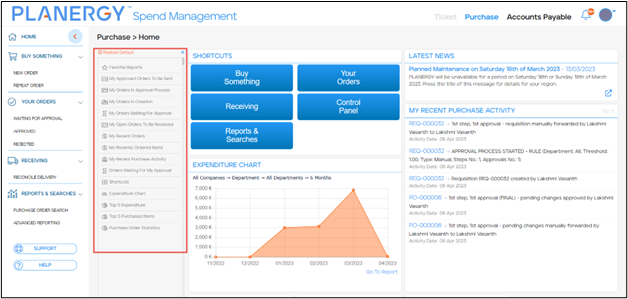
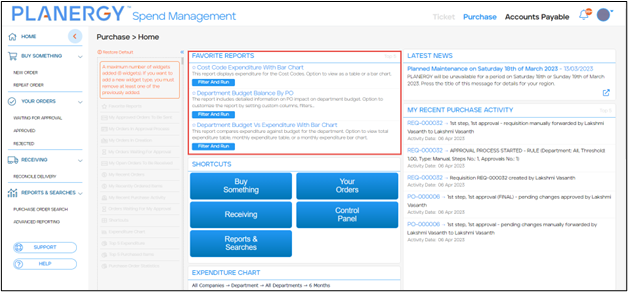
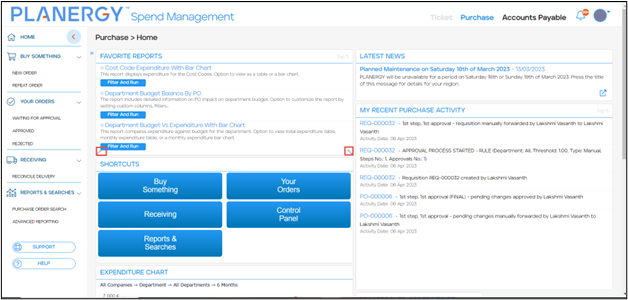
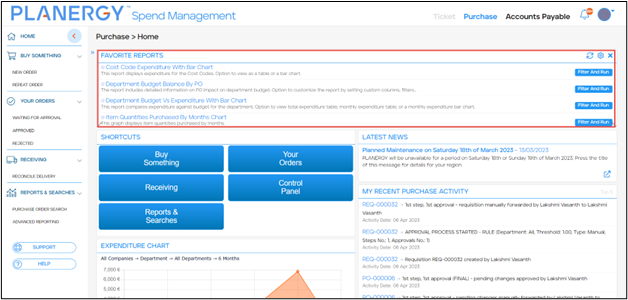
- On mouseover in the dropdown list, the Move icon is displayed on the panel. Press and hold the panel you wish to add, and then drag and drop it to the dashboard. In the following example, we have added the Favorite Reports panel.
- Press the Close icon to hide the list of panels.
Resize a Panel
To resize a panel, follow the steps below.
- On the Purchase > Home page, mouse over the panel. The Resize icon is displayed in the corners of the panel.
- To reduce/enlarge the size of the panel, press and hold the Resize icon down and drag the panel to the size as needed. The panel is resized.
Note
You can drag and drop the panel anywhere on the dashboard to rearrange it as needed.
The Move Panel icon is visible when you move the cursor on the top part of the panel. Press the icon down and drag the panel to the space you wish to move it.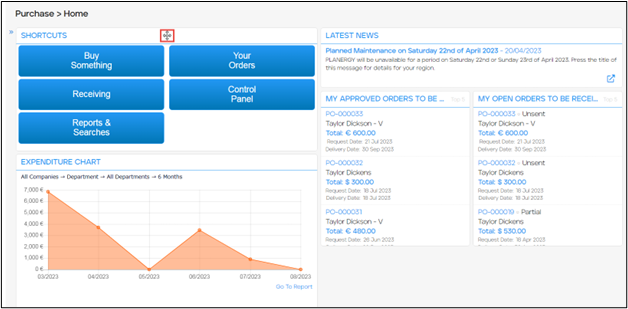
Remove a Panel
To remove a panel, follow the steps below.
- On the Purchase > Home page, mouse over the top of the panel. The Close icon is displayed.

- Press the Close icon. The panel is removed.

Note
You can at any time set the panels back to default by pressing Restore to Default in the list of panels. The Restore Default dialog is displayed. Press Restore Default to set the Home page back to the default setting.
Home Page Dashboard Panels
The various dashboard panels on the Purchase module Home page help with quick easy access to the various sections. The available panels are:
- Favorite Reports
- My Approved Orders To Be Sent
- My Orders in Approval Process
- My Orders in Creation
- My Orders Waiting for Approval
- My Open Orders to be Received
- My Recent Orders
- My Recently Ordered Items
- My Recent Purchase Activity
- Orders Waiting for My Approval
- Shortcuts
- Expenditure Chart
- Top 5 Expenditure
- Top 5 Purchase Items
- Purchase Order Statistics
Note
- You can access the data by pressing the PO number/report name on all the panels except Shortcuts, Expenditure Chart, Top 5 Expenditure, Top 5 Purchase Items, and Purchase Order Statistics.
- By default, the top 5 purchase orders/reports are displayed on panels. You can change the settings to display up to 30 POs/reports by pressing the Settings icon on the right top corner of the respective panel.
- You can refresh panels to get the updated most recent data by pressing the Refresh icon on the right top corner of the respective panel.
Favorite Reports
The Favorite Reports panel allows easy access to all the reports that are marked as favorite in Advanced Reporting.

My Approved Orders To Be Sent
The My Approved Orders To Be Sent panel displays your most recent purchase orders that are approved but yet to be sent to the suppliers.
The order details such as the PO number, supplier name, date of PO request, the total PO amount, and the delivery date are displayed on the panel.

My Orders In Approval Process
The My Orders In Approval Process panel displays your most recent purchase requisitions that are in the approval process.
The order details such as the order number, supplier name, date of request, the total order amount, and the delivery date are displayed on the panel.

My Orders In Creation
The My Orders In Creation panel displays your most recent purchase requisitions that are in creation and are saved. These orders are not yet sent for approval.
The order details such as the order number, supplier name, date of request, the total order amount, and the delivery date are displayed on the panel.

My Orders Waiting For Approval
The My Orders Waiting For Approval panel displays your most recent purchase requisitions that are waiting to be approved by you or other approvers.
The order details such as the order number, supplier name, date of request, the total order amount, and the delivery date are displayed on the panel.

My Open Orders To Be Received
The My Open Orders To Be Received panel displays your most recent purchase orders that are open and yet to be received.
The order details such as the PO number, supplier name, date of PO request, the total PO amount, and the delivery date are displayed on the panel.

My Recent Orders
The My Recent Orders panel displays all your most recent requisitions and purchase orders regardless of the status.
The order details such as the PO number, supplier name, date of PO request, the total PO amount, and the delivery date are displayed on the panel.

My Recently Ordered Items
The My Recently Ordered Items panel displays the data of all the recently ordered items.
The ordered item details such as the Item name, order number, supplier name, date of request, the total order amount, quantity, unit cost, and total of the items are displayed on the panel.

My Recent Purchase Activity
The My Recent Purchase Activity panel displays all your recent activities that were performed on the purchase orders/requisitions.
The purchase order/requisition details such as the order number, the action performed, and the activity date are displayed on the panel.

Orders Waiting For My Approval
The Orders Waiting For My Approval panel displays all the purchase requisitions that are waiting for your approval.
The purchase requisition details such as the order number, supplier name, name of the user requesting approval, the total order amount, and the date of approval request are displayed on the panel.

Shortcuts
The Shortcuts panel has buttons that give easy access to Buy Something, Your Orders, Receiving, Reports & Searches, and Control Panel. You can press any of the buttons to get redirected to the specific section.

Expenditure Chart
The Expenditure Chart panel is the graphical representation of all the expenditures over a period of time.

On mouse over the chart, the total expenditure for the specific month is displayed.

On mouse over on the top right-hand corner of the panel, press the Settings icon to set the filters to display the specific data required on the panel.

You can filter the data on the Expenditure Chart based on the Category, Cost Code, Department, Item, Location, Supplier, or User.

In the following example, we are showing Department as the filter criteria.

Similarly, you can also filter the Expenditure Chart based on a specific company.
Note

Also, the data of the Expenditure Chart can be filtered based on a specific Department.

You can also filter the data on the Expenditure Chart for the period of 3 months, 6 months, or 12 months.

Press Go To Report on the right bottom of the panel to view the expenditure report details. The Purchase > Reports page is displayed. For more information, refer to Expenditure Report.
Top 5 Expenditure
The Top 5 Expenditure panel displays a donut chart that represents the data of the top 5 expenditures, by default classified by the departments in the last year.
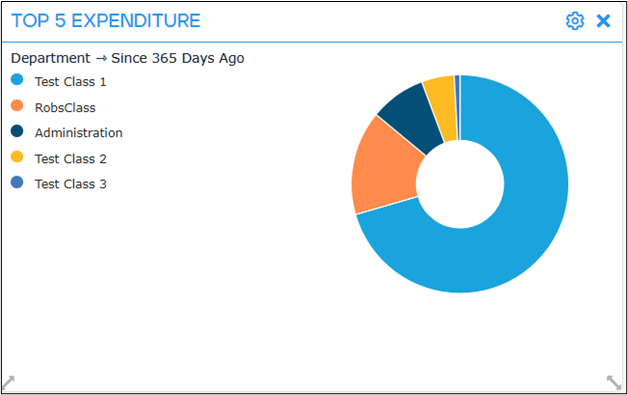
On mouse over the chart, the total amount of expenditure by the specific department is displayed.

On mouse over on the top right-hand corner of the panel, press the Settings icon to set the filters to display the specific data required on the panel.

The expenditure data on the Top 5 Expenditure panel can be displayed based on the Category, Cost Code, Department, Item, Location, Supplier, or User. By default, the expenditure data for Department is displayed. You can select the required criteria on which you wish to display the expenditure data from the dropdown list.

The data on the Top 5 Expenditure panel can be refined based on a specific timeframe by selecting the required period from the Period dropdown list.
Note

You can hide/remove data that you do not wish to display on the panel by pressing the corresponding legend on the panel.

Note
Top 5 Purchase Items
The Top 5 Purchase Items panel displays a donut chart representing the data by default classified by the top 5 items purchased across all departments from all companies.

On mouse over the chart, the total purchased quantity of the specific item is displayed.

On mouse over on the top right-hand corner of the panel, press to set the filters to display the specific data required on the panel.

You can also filter the data on the Top 5 Purchase Items panel based on a specific company by selecting it from the Company dropdown list.
Note

The data on the Top 5 Purchase Items panel can also be filtered based on a Department, Cost Code, or Supplier by selecting it from the dropdown list.

The data on the Top 5 Purchase Items panel can also be filtered based on a specific department by selecting it from the Department dropdown list. By default, the All Departments option is selected.

The data on the Top 5 Purchase Items panel can be refined based on a specific timeframe that is selected from the Period dropdown list.
Note

- Press Go To Report on the right bottom of the panel to view the expenditure report details.
 The Purchase > Reports page is displayed. For more information, refer to Purchasing Report
- You can hide/remove data which you do not wish to display on the panel by pressing the corresponding legend on the panel.
 Note that when the legend is pressed, it will be striked out and the corresponding data will be removed from the chart.
Purchase Order Statistics
The Purchase Order Statistics panel displays a donut chart representing the data of all orders classified based on their status.

On mouse over the chart, the total number of orders in the specific status is displayed.

On mouse over on the top right-hand corner of the panel, press the Settings icon to set the filters to display the specific data required on the panel.

You can also filter the data on the Purchase Order Statistics panel based on a specific company by selecting it from the Company dropdown list.
Note

The data can also be filtered based on a specific department by selecting it from the dropdown list.
Note

The data on the Purchase Order Statistics panel can be refined based on a specific timeframe that is selected from the Period dropdown list.
Note
