PLANERGY allows you to integrate with your Sage Intacct account.
Syncing data between the two systems ensures PLANERGY maps to the structure set up in your Sage Intacct account to maintain consistency of your chart of accounts, etc.
The integration allows you to use PLANERGY to manage your business spend and streamline accounts payable.
Invoices authorized in PLANERGY will be sent to Sage Intacct as bills with relevant attachments ready to be processed for payment.
The integration between PLANERGY and Sage Intacct is free of cost.
How PLANERGY and Sage Intacct Work Together 
How Data Is Mapped Between PLANERGY And Sage Intacct
Data mapping between PLANERGY and Sage Intacct is outlined in the diagram below. 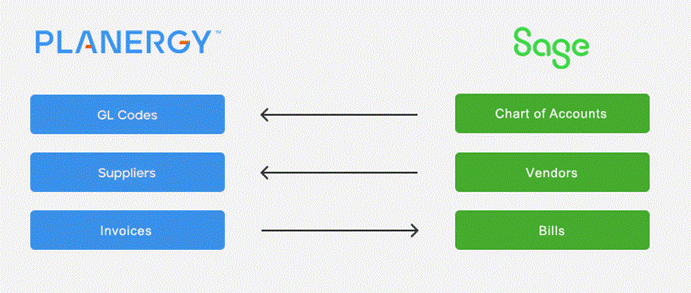
Other dimension mapping will be covered by request. Please speak to the support team about your specific field mapping requirements.
How To Prepare Sage Intacct To Integrate PLANERGY
Prerequisites
Subscribe to Web Services
Add your company’s Sender ID to Sage Intacct’s allowed list.
- Company A Subscriptions
- Find Web Services and click on it to Subscribe
- Ignore the warning about additional charges

IP Address
Add your company’s IP Address to Sage Intacct’s allowed list. [This is the IP address from which you will launch API requests]
- Company A Company Info
- Click EDIT
- Click on the Security tab
- Go to the field labeled Enforce IP address filters and click the Edit icon

Sender ID
Add your company’s Sender ID to the allowed list.
Note
- Company A Company Info
- Click EDIT
- Click on the Security tab
- Go to the section labeled Web Services authorizations and add the Sender ID

Users
Instructions vary slightly depending on the client defining their security as Role-Based or User-Based.
Create User with Role-Based Security 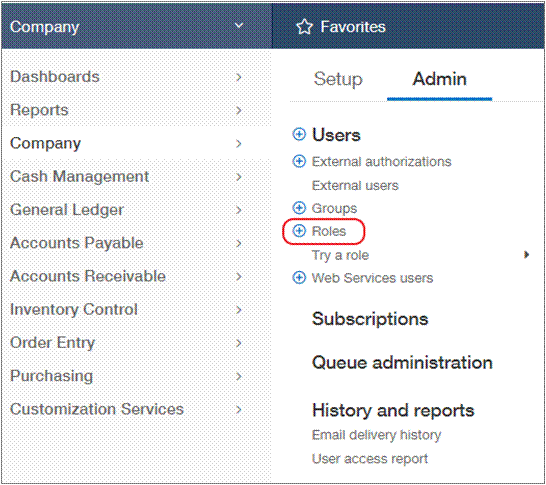
Create a Role
- Company A Roles
- Click ADD
- Input a Name
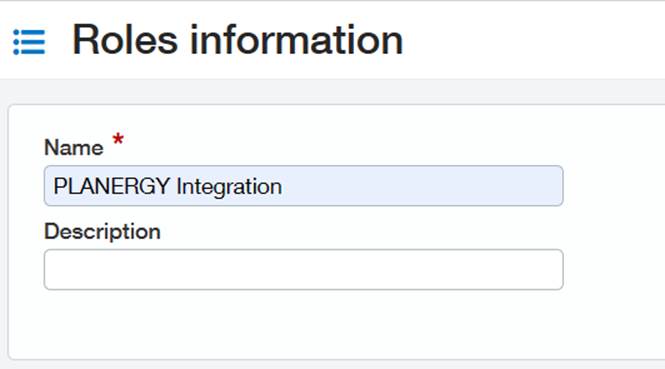
- Click SAVE
- Click on the necessary Permissions for each applicable module

- Company Permissions

- General Ledger Permissions

- Accounts Payable Permissions

- Company Permissions
- Click SAVE
Create Web Service User
- Company A Web Service User
- Click NEW
- Input values for these fields
- User ID
- Last name
- First name
- Email address
- Make sure the User Type = Business User
- Click on the Roles information tab and select the Role created in the prior step.
- Click SAVE
- Ignore any warning that there will be a charge for creating the User


How To Integrate PLANERGY with Sage Intacct
You can set up the Sage Intacct integration in your PLANERGY account in two steps.
Note
Enable Sage Intacct Integration
To enable the Sage Intacct integration for PLANERGY, follow the steps below.
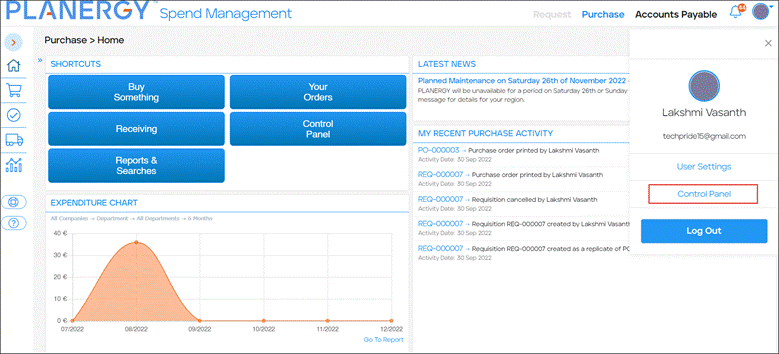
- On the Home page, press the Profile icon in the top right corner.
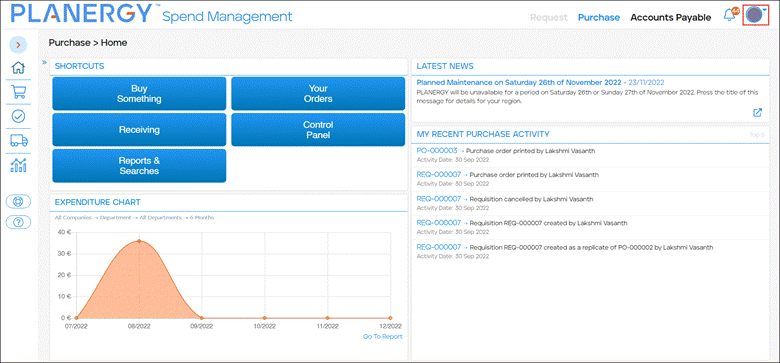 The Profile menu is displayed.
 - Press Control Panel in the Profile menu.
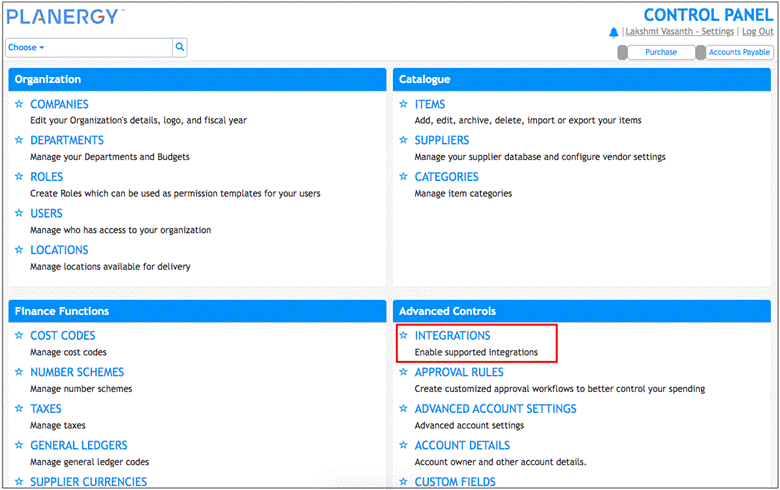
 The Control Panel is displayed.
- Press Integrations in the Advanced Controls section.
Note
Only Account Owner users can view this option.
The Integration Settings page is displayed.
- Press the Setup button in the row of the Sage Intacct integration.
 The integration is now enabled and the Sage Intacct Settings page is displayed.
Connect Sage Intacct With PLANERGY
To connect Sage Intacct with PLANERGY, follow the steps below.
- Enter the credentials.

- Press Save.

- Press Synchronize With Sage Intacct.

Note
It is important to ensure you have the same Company Name in PLANERGY as Entity Name in Sage Intacct to connect the two systems.
The Sage Intacct Integration History section will update to include a record of the connection.
Note
How To Import Data From Sage Intacct
When first integrating PLANERGY with Sage Intacct you must import all data after the accounts are synchronized.
Note
There are three options to import data from Sage Intacct to PLANERGY.
- Import All Sage Intacct Data Manually
- Import Individual Sage Intacct Data Sets Manually
- Schedule Automated Imports of All Sage Intacct Data
Import All Sage Intacct Data Manually
To import all data from Sage Intacct:
- On the Home page, press the Profile icon in the top right corner.
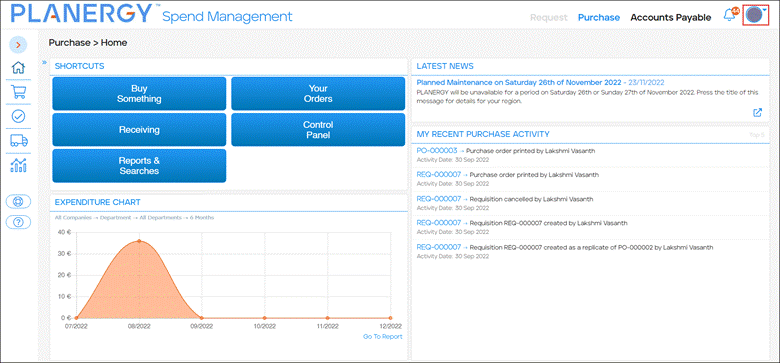 The Profile menu is displayed.
 - Press Control Panel in the Profile menu.
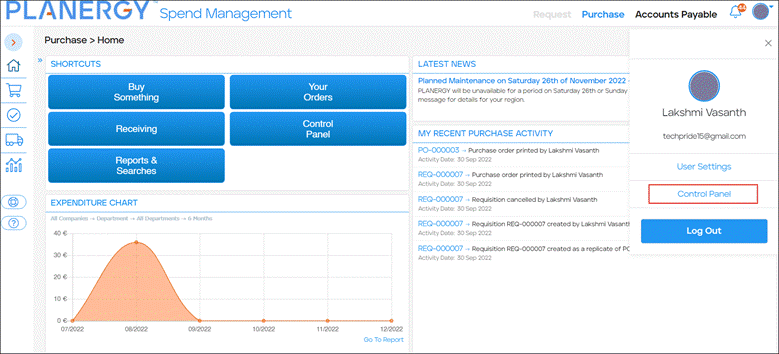 The Control Panel is displayed.
 - Press Sage Intacct Settings in the Advanced Controls section.
 The Sage Intacct Settings page is displayed.
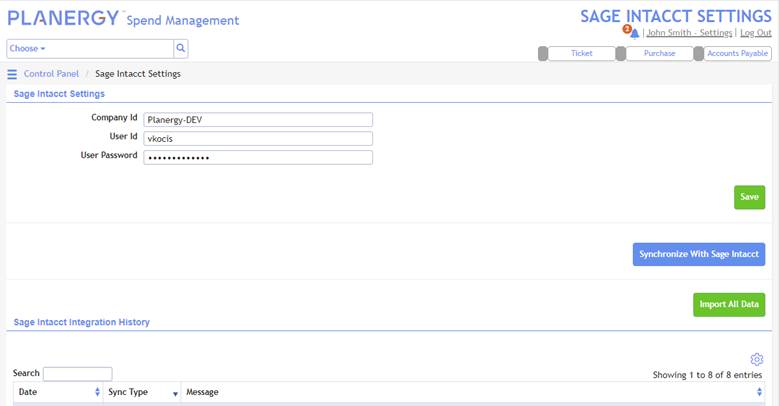
- Press Import All Data
 The import process has started. You will see a confirmation message on screen.
- When the import is completed, you will receive an email confirmation for each piece of data imported.
 If there are any errors during the import process, they can be reviewed by clicking on the To see the details of this import click here link in the email.
This will open the Integration History-Details page. You can also view the Integration History-Details page by clicking on the particular log under the Sage Intacct Integration History.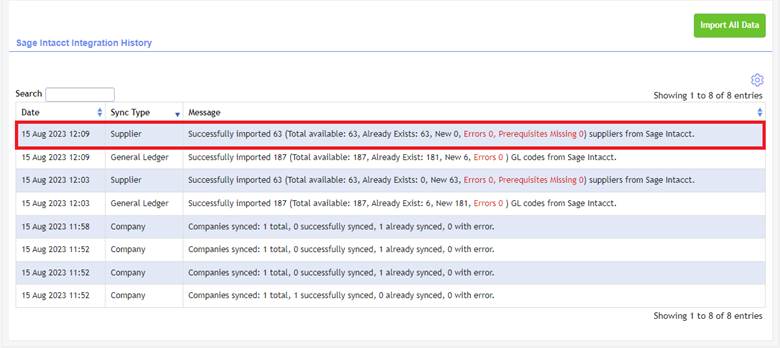 Integration History-Details page is displayed.
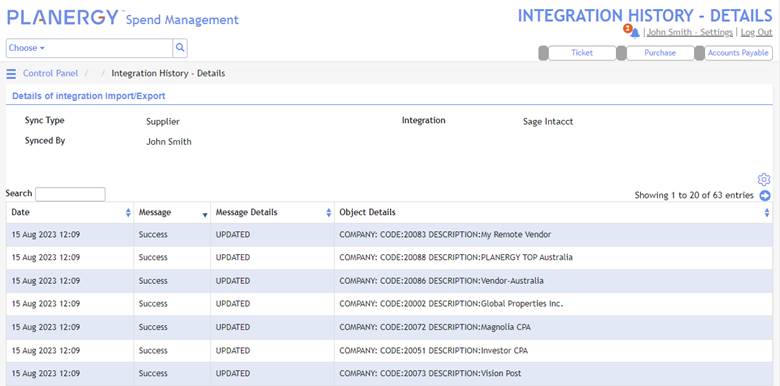 To learn more about the Integration History section you can read this article. Common errors for the Sage Intacct integration are explained here.
Note
Import Individual Sage Intacct Data Sets Manually
You can import and update a single data set from Sage Intacct. This option is useful when you have added a specific piece of data in Sage Intacct that you now require in your PLANERGY account. For example, a new Supplier.
In the following example we will import updates to GL Codes. You can also import Suppliers.
To import General Ledger codes from Sage Intacct, follow the steps below.
- On the Home page, press the Profile icon in the top right corner.
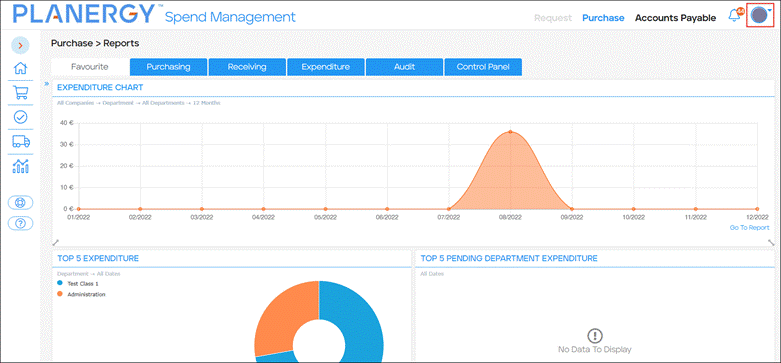 The Profile menu is displayed.
 - Press Control Panel in the Profile menu.
 The Control Panel is displayed.
 - Press General Ledgers in the Finance Functions section.
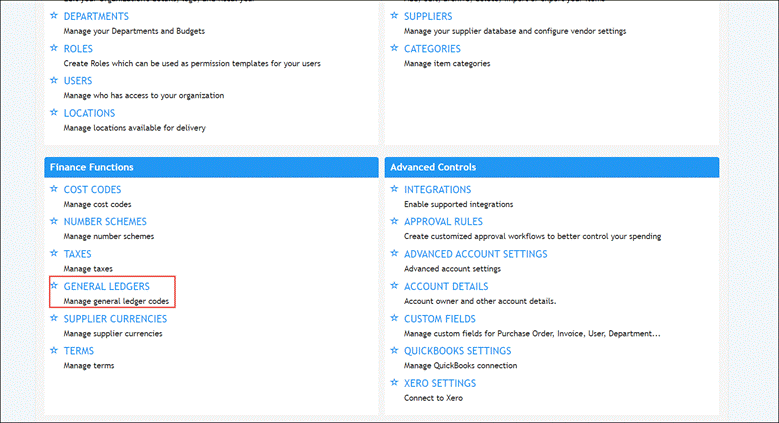 The Search General Ledgers page is displayed.
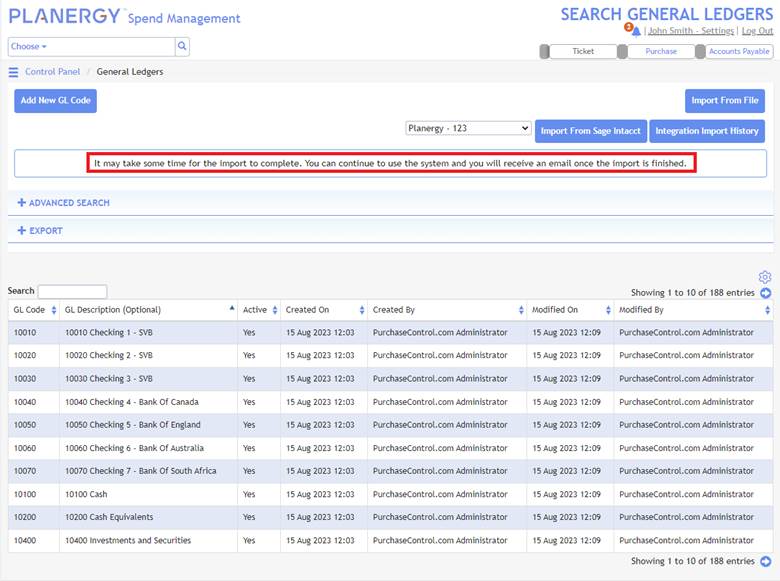
- On multi-company accounts you can select the company you will be importing data from using the drop down menu.

- Press Import from Sage Intacct.
 The import process has started. You will see a confirmation message on screen.
Schedule Automated Imports of All Sage Intacct Data
When you regularly want to update Sage Intacct data to ensure data is regularly synced to PLANERGY, you can schedule automated imports of all Sage Intacct data.
To set up scheduled imports you should contact the support team and they will help get these in place for you. Here is How to create a support ticket.
Common Sage Intacct Import Errors and How To Fix Them
The most common import errors when importing data from Sage Intacct relate to missing currency, credit terms, or some invalid characters included in the name of the imported data. 
Removing the invalid character will resolve the issue. 
This error will not stop the import of the supplier. The supplier will be imported, but the Supplier Currency will not be set automatically for the supplier.
Adding the currency will resolve the issue. 
This error will not stop the import of the supplier. The supplier will be imported, but the Terms will not be set automatically for the supplier.
Adding the currency will resolve the issue.
How to Disable Sage Intacct Integration
You can disable a Sage Intacct connection which means that you are permanently removing the existing connection. If you want to connect again, you need to go through the complete process of integration from scratch.
- On the Home page, press the Profile icon in the top right corner.
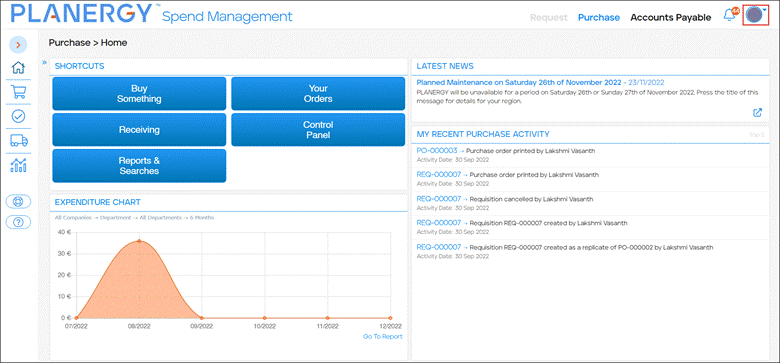 The Profile menu is displayed.
 - Press Control Panel in the Profile menu.
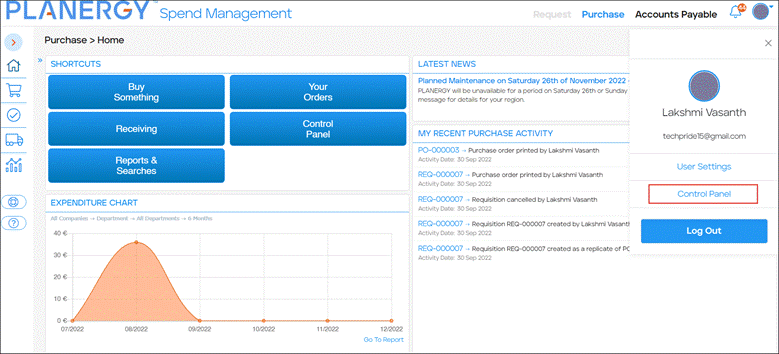 The Control Panel is displayed.
- Press Integrations in the Advanced Controls section.
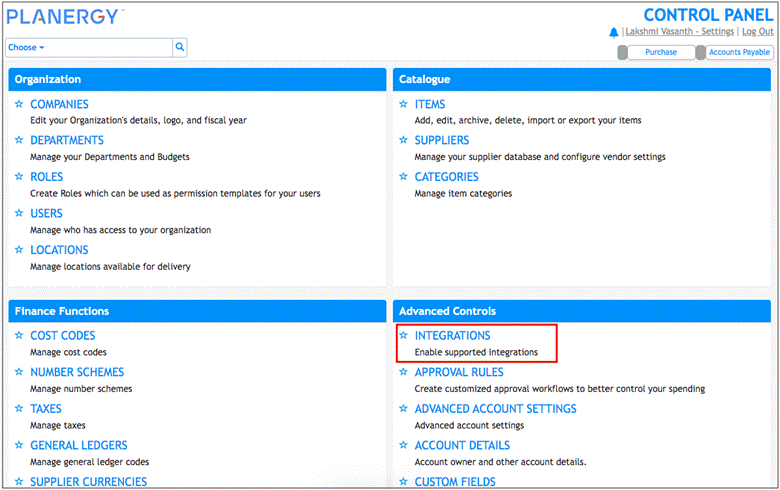
Note
Only Account Owner users can view this option.
The Integration Settings page is displayed.
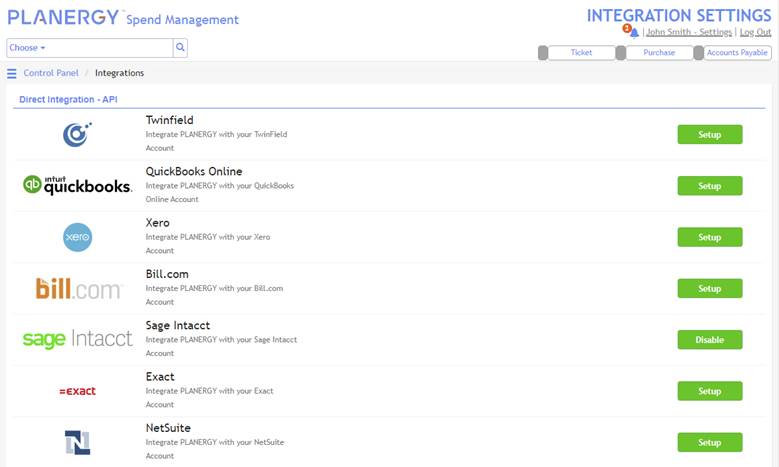
- Press the Disable button in the row of the Sage Intacct integration.
 The integration is completely disabled and the button changes to Setup. You can click Setup, to re-integrate Sage Intacct to PLANERGY.
How to Export Invoices To Sage Intacct
Authorized invoices can be exported to Sage Intacct from PLANERGY. The invoice data and any attached documents will be exported.
There are 3 ways to export invoices to Sage Intacct:
- Export All Invoices with Status ‘Authorized’ To Sage Intacct
- Export a Single Invoice To Sage Intacct
- Automate Export of Authorized Invoices
Note
Export All Invoices with Status ‘Authorized’ to Sage Intacct
- On the Accounts Payable HOME page, press Reports & Searches in the left sidebar menu.
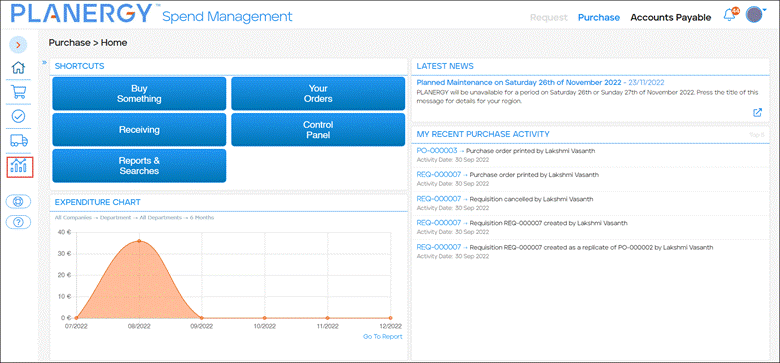
- Press Invoice Search.
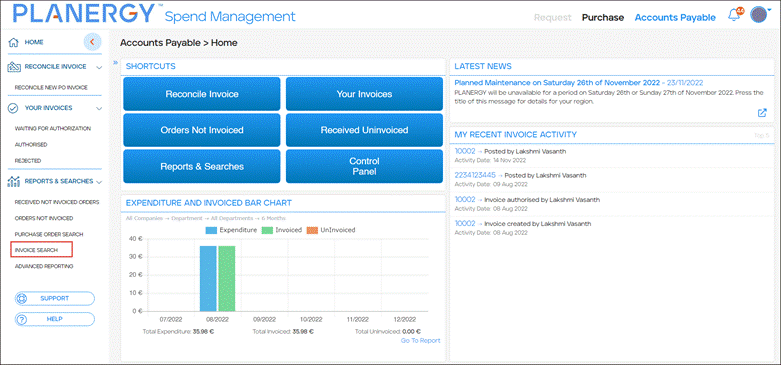 The Invoice Search page is displayed.
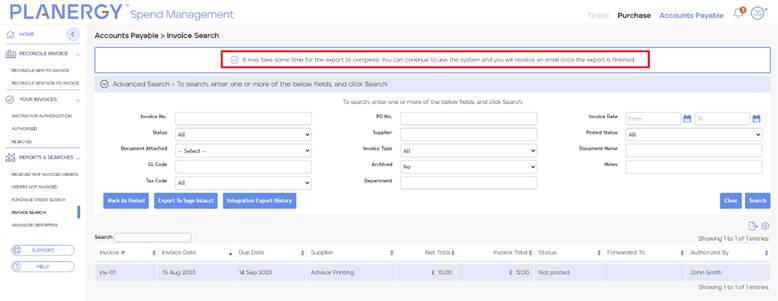
- Press Export To Sage Intacct.

Note
You can use the search filters to export only specific invoices, for example, invoices for a specific company.
- The export process is started and all invoices will be attempted to be exported. You will see a confirmation message on the screen.
Note
Export a Single Invoice To Sage Intacct
On the View Invoice page for any invoice with the status Authorised, Not Postedyou will have the option to export that invoice directly from the page.
- On the Accounts Payable Home page, press Reports & Searches in the left sidebar menu.
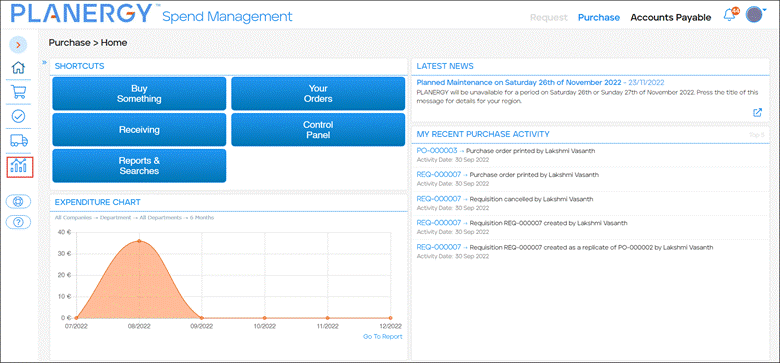
- Press Invoice Search.
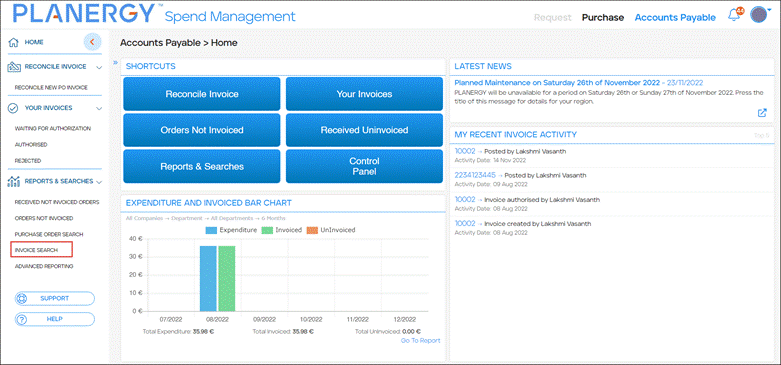 The Invoice Search page is displayed.
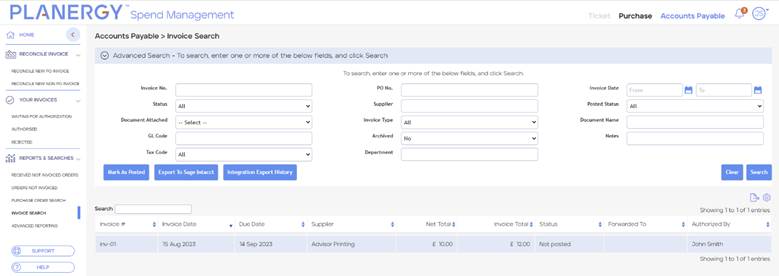
- Select the invoice you want to export from the invoice search.
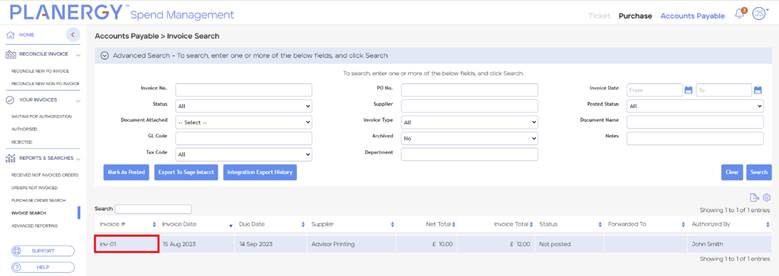 The View Invoice page for the selected invoice will be displayed.
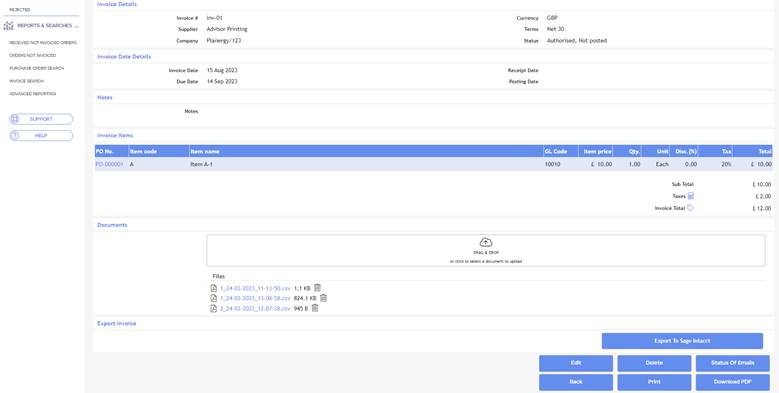
- Press Export to Sage Intacct in the Export Invoice section of the page.
 The invoice will be exported and the status of the invoice changes to Authorised, Posted.
Automate Export of Authorized Invoices To Sage Intacct
When you want to get invoices to Sage Intacct as fast as possible while reducing manual steps, you can set invoices to export automatically as soon as they have been authorized.
To set up scheduled imports you should contact the support team and they will help get these in place for you. Here is How to create a support ticket.
Sage Intacct Integration History keeps track of all imports and exports run in the system, automated or manual. 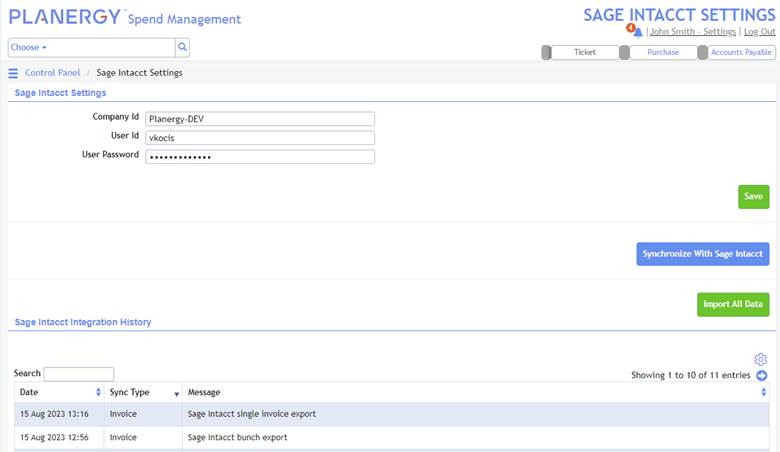
Clicking a specific entry will show more detail about the action. 
The Integration History – Details page is displayed. 
