Integrating with Okta allows you to manage secure access to your PLANERGY account across various computer networks and cloud computing environments. This is achieved through the comprehensive Identity & Access Management and Privileged Identity Management features provided by Okta.
Okta – PLANERGY integration ensures identities associated with users, computers, applications, and resources are safeguarded within a defined security boundary, providing strong protection in diverse networks and cloud environments.
How To Configure PLANERGY with Okta
You can establish strong protection of identities by configuring PLANERGY with Okta, using the single sign-on.
For successful PLANERGY-Okta integration, PLANERGY has to be set up as an attribute for the users in Okta to access PLANERGY.
Note
For more information, refer to the following sections:
Creating PLANERGY Attribute for Users
To access PLANERGY, users must create the PLANERGY attribute.
- Navigate to your Okta account > Users > Profile Editor.
 The Profile Editor page is displayed.
 - Press Profile in the Actions column associated with Okta profile.
 The Profile Settings page is displayed.
 - Press Add Attribute.
 The Add Attribute dialog is displayed.
 - Enter the new profile attribute named PLANERGY with its corresponding values as shown in the image below.
Note
By default, the PLANERGY attribute is set as Read Only. This value can only be edited by the admins, who can permit users to update it by setting it to Read-Write.
- Click Save Attribute.
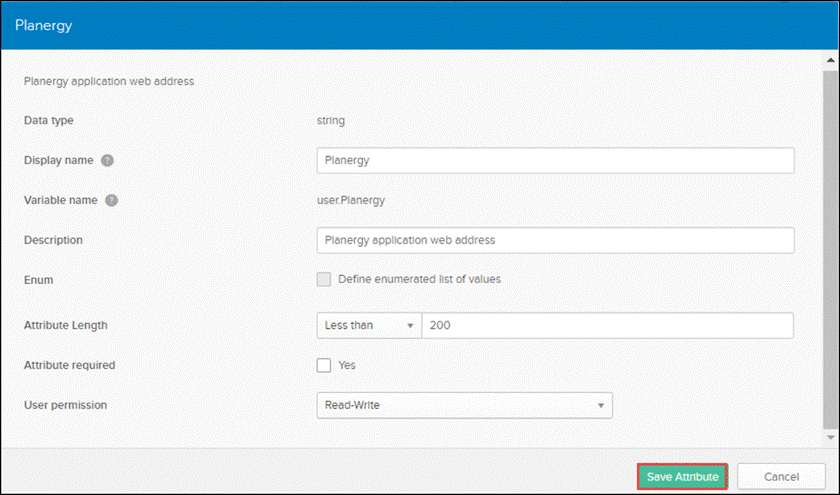 The PLANERGY attribute is added.
 The PLANERGY attribute must be set for each user for proper functioning.
 - On each user that is going to access PLANERGY, set a value for the PLANERGY parameter with the URL of your PLANERGY account.

- Click Save. The parameter value for the PLANERGY attribute for the user is saved.
Configuring PLANERGY Application in Okta
To add the PurchaseControl (PLANERGY) application from Okta Marketplace, follow the steps below:
- Navigate to Applications in your Okta account.
 The Applications page is displayed.
 - In the Quick Search field, enter PurchaseControl (PLANERGY). The PurchaseControl (PLANERGY) application is displayed as a dropdown.
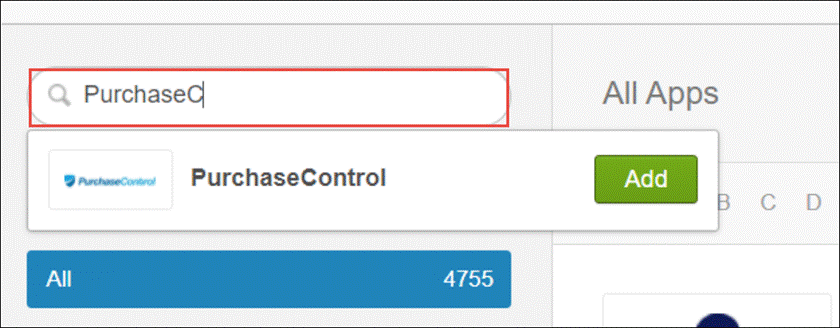
- Click Add associated with the PLANERGY app.
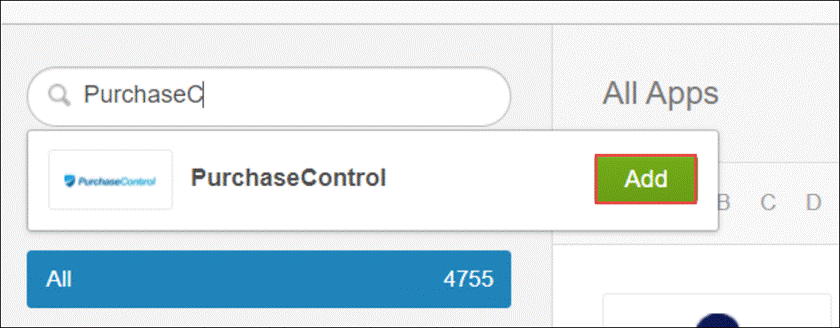 The PurchaseControl (PLANERGY) application is successfully added.
 - Navigate back to Admin Console and switch to Classic UI.

- Navigate to Applications and search for the PurchaseControl application. Then, click the associated Settings icon.
 The Settings dialog is displayed.
 - Click Sign On. The Sign On Methods section is displayed.

- Click View Setup Instructions.
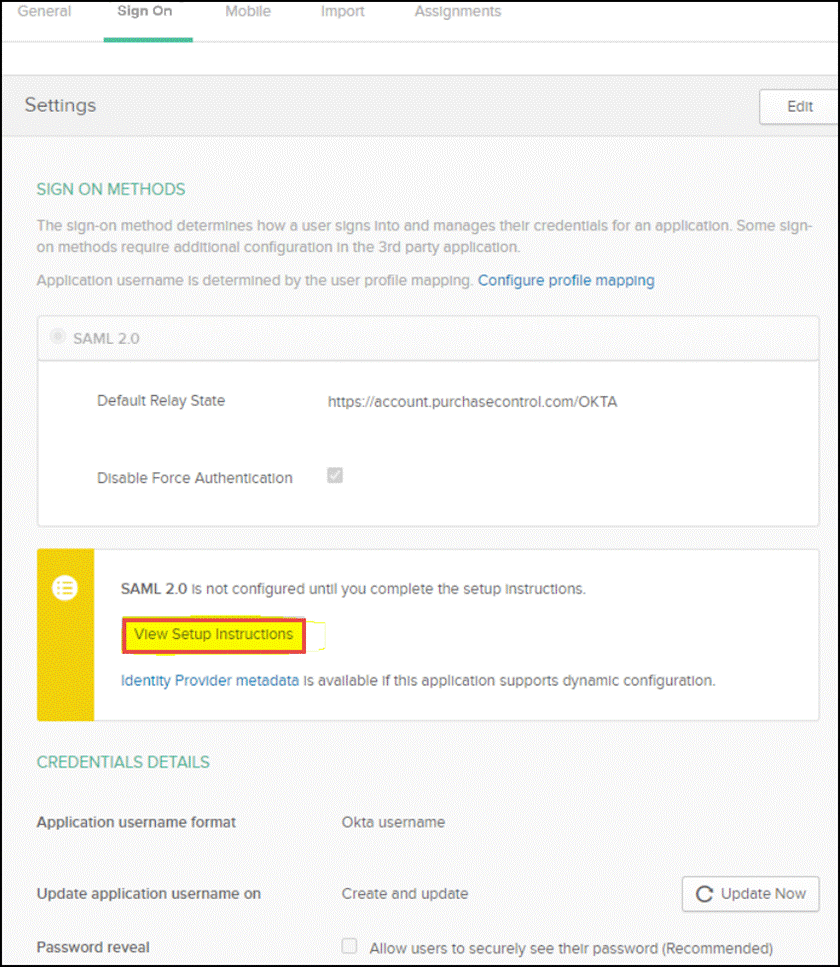
- Follow the instructions on the page and send the following details in separate files to the PLANERGY Support team:
-
- Generated Metadata
- Generated certificate
- Entity Id
- Login URL-Sign on
The PLANERGY Support team will process your request.
After receiving a confirmation email, you can assign people to the application.
How to Enable SSO Integration – Okta in PLANERGY
To enable the Okta in PLANERGY, an account owner user has to follow the steps below.
- Press the Control Panel on the Home page.
 The Control Panel page is displayed.
 - Press Integrations under Advanced Controls.
 The Control Panel > Integrations page is displayed.
 - Press Setup corresponding to Okta.
 The Control Panel > SSO Settings page is displayed.
How to Set Up SSO Integration – Okta in PLANERGY
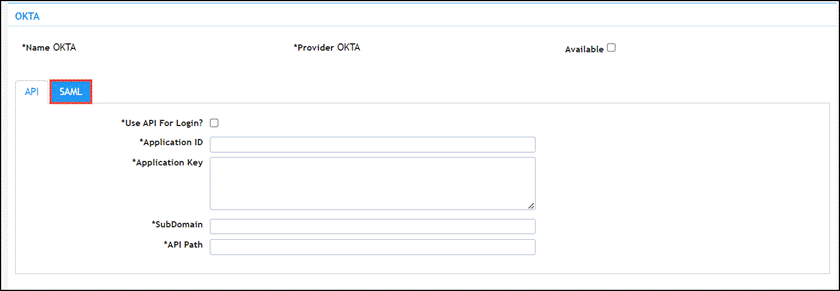
Before connecting PLANERGY with Okta, it is important to ensure SAML fields are added.
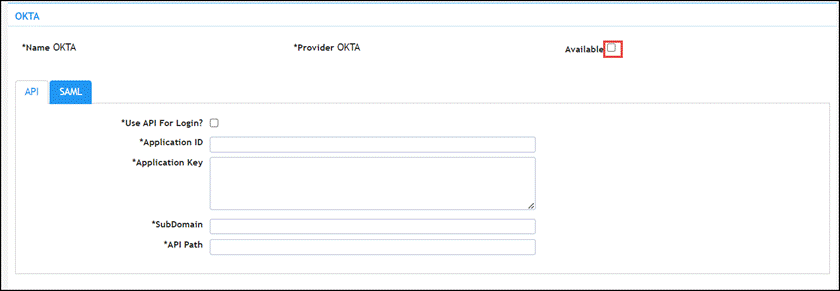
- Navigate to the SSO Settings page > Okta section.
- Check the box Available.
- Press SAML.
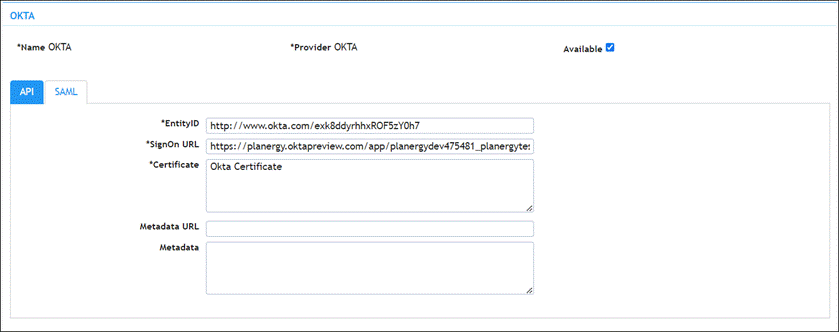
- Fill in the fields with all the required details you received upon completing the PLANERGY configuration with Okta.
- Scroll down the SSO Settings page and press Save.
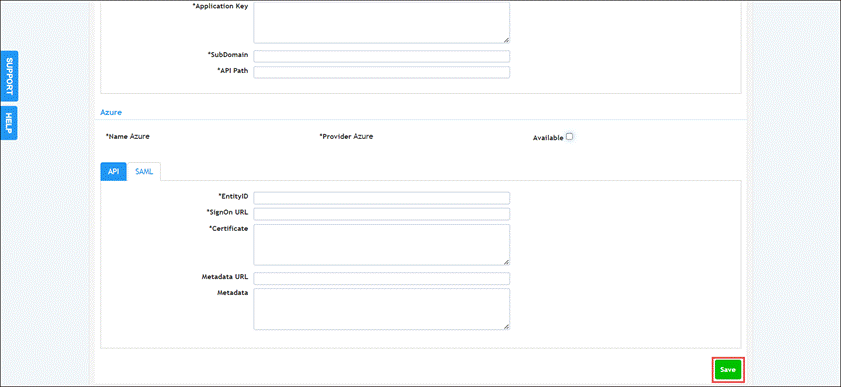 A success notification about the setup is displayed.
How to Enable Okta on Users
After setting up Okta with PLANERGY, ensure to enable it for all users you wish to allow access to in PLANERGY.
- Navigate to the Control Panel page > Organization and press Users.
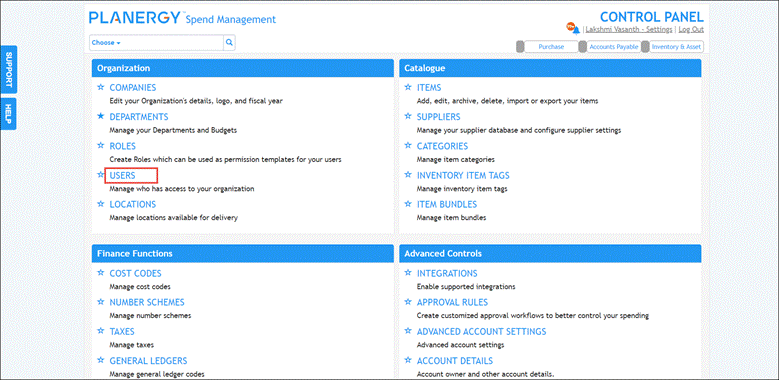 The Control Panel > Users page is displayed.
 - Press anywhere in the user row you wish to activate Okta.
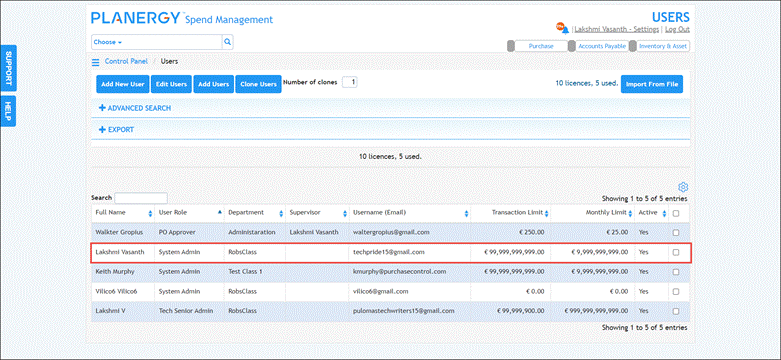 The Edit User page is displayed.
 - Enable the Use SSO toggle button.
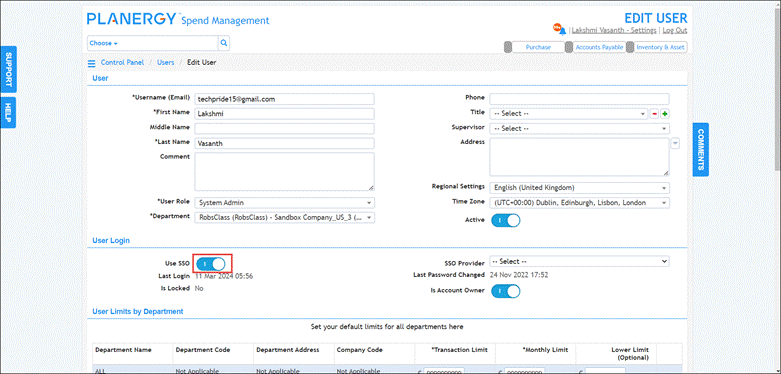
- Select Okta from the SSO Provider dropdown list.

- Press Save.
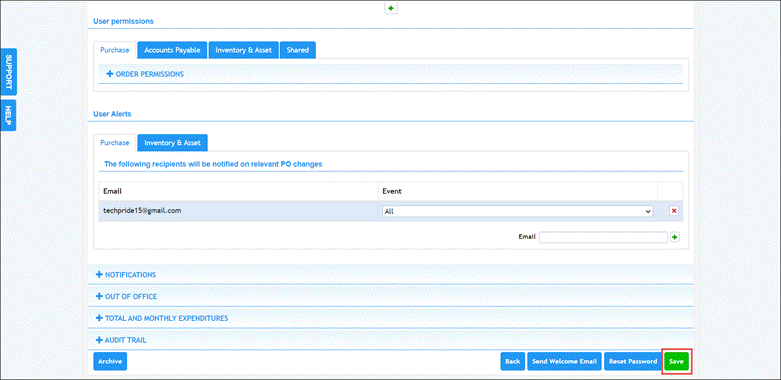 A success notification is displayed.
