Integrating with Microsoft Azure Active Directory allows you to manage secure access to your PLANERGY account across various computer networks and cloud computing environments. This is achieved through the comprehensive Identity & Access Management and Privileged Identity Management features provided by Azure Active Directory.
This integration ensures identities associated with users, computers, applications, and resources are safeguarded within a defined security boundary, providing strong protection in diverse networks and cloud environments.
How To Configure PLANERGY with Azure Active Directory
You can configure PLANERGY with Azure Active Directory to establish strong protection of identities by following the steps below.
Note
- You must have Premium 1 or Premium 2 subscriptions for Azure AD to set up PLANERGY access through Azure Active Directory.
- The integration covers only SSO, where SSO has to be set up on the client’s AD as Enterprise Application SAML SSO. Users who use PLANERGY have to be subsequently added to the list of users who can use the app.
For more information, refer to Adding PLANERGY as an Enterprise Application.
Adding PLANERGY as an Enterprise Application
You can add PLANERGY as an Enterprise Application within the Microsoft Azure Active Directory SSO platform by following the steps below.
- Log in to your Azure/Office365 admin account using the link https://portal.azure.com. The Microsoft Azure Home page is displayed.
- Press View under the Manage Azure Active Directory option.

The Azure Services page is displayed. - Press Enterprise Application on the left navigation menu.
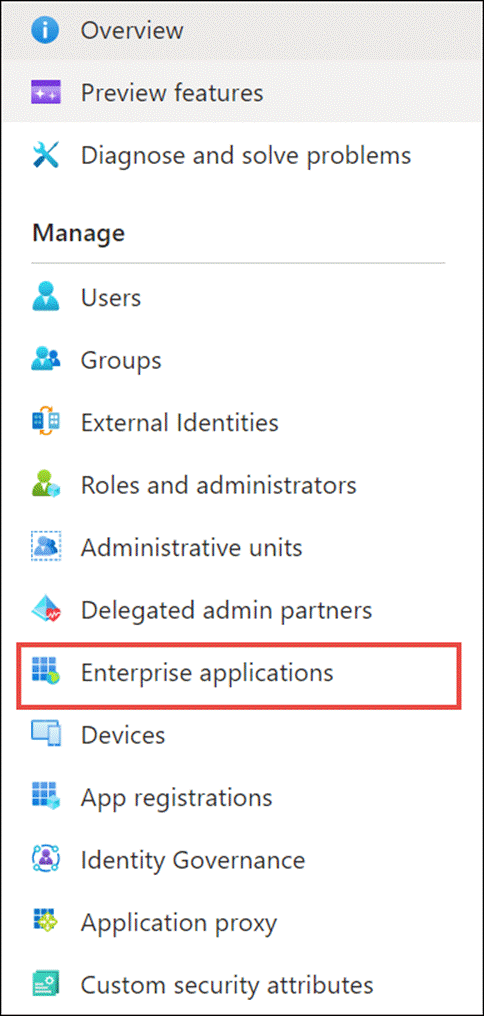 The Enterprise applications/All applications page is displayed.
 - Press New application.
 The Browse Azure AD Gallery page is displayed.
 - Press Click Here to add an application.
 The Add an Application page is displayed.
 - Press Non-gallery Application.
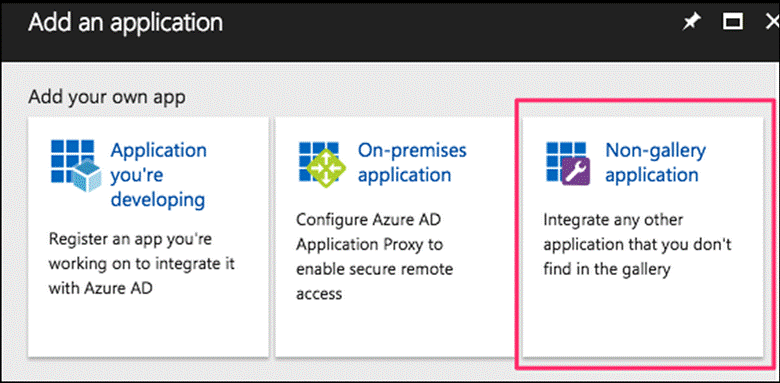 The Add an Application page is displayed.
 - Enter the application name as PLANERGY in the Name field.
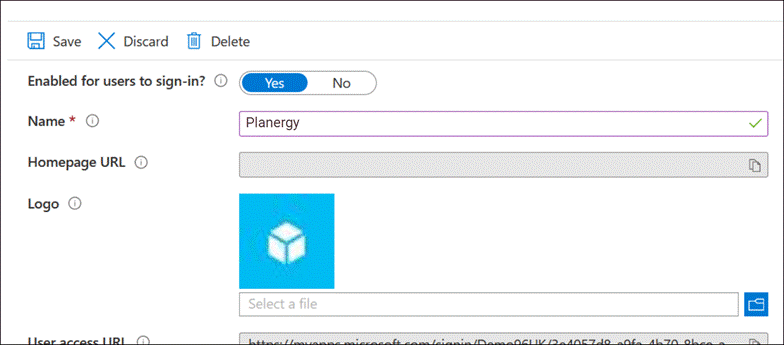
- Press Save. The application is added to the Enterprise Applications list and the SSO properties are auto-populated.
- Press Single sign-on on the left navigation menu.
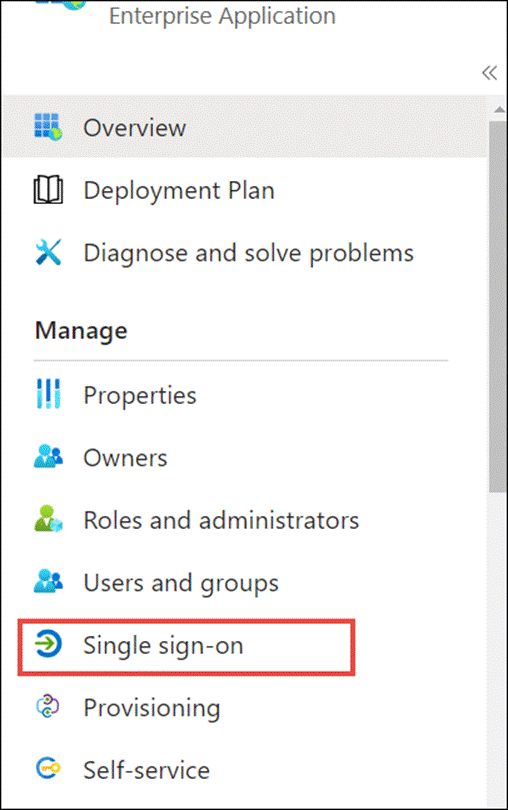 The Single sign-on page is displayed.
 - Press SAML.
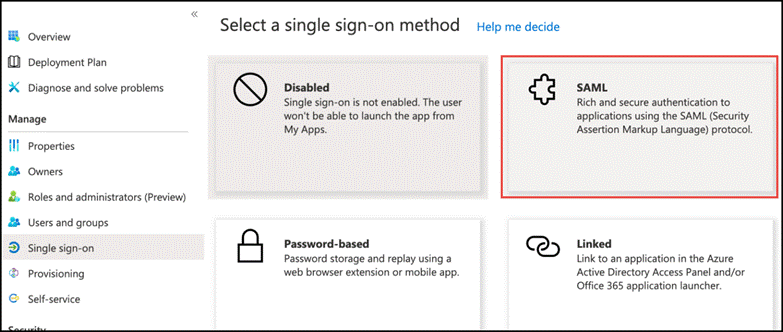 The SAML Configuration page is displayed.
 - Enter the following links in the respective fields under the Basic SAML Configuration settings.
-
- Identifier (Entity ID) – https://account.purchasecontrol.com/SSOWebAccess/AuthServices
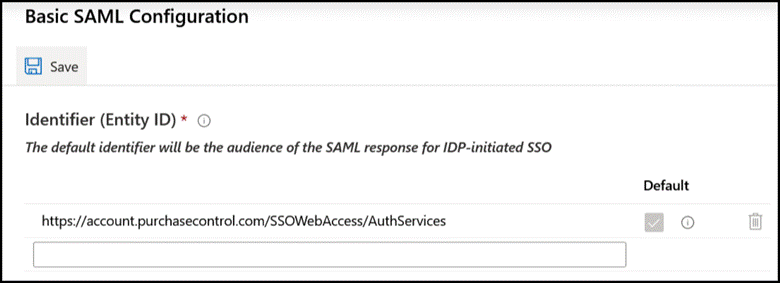
- Reply URL (Assertion Consumer Service URL) – https://account.purchasecontrol.com/{YourAccount}/Login/LoginSAML In the example provided, replace {YourAccount} with your company’s specific URL for accessing your PLANERGY account.

- Identifier (Entity ID) – https://account.purchasecontrol.com/SSOWebAccess/AuthServices
- Remove the values in the default attributes and claims fields and add the following in the respective fields in the Attributes & Claims section:
-
- Claim Name – Login
- Value – user.mail
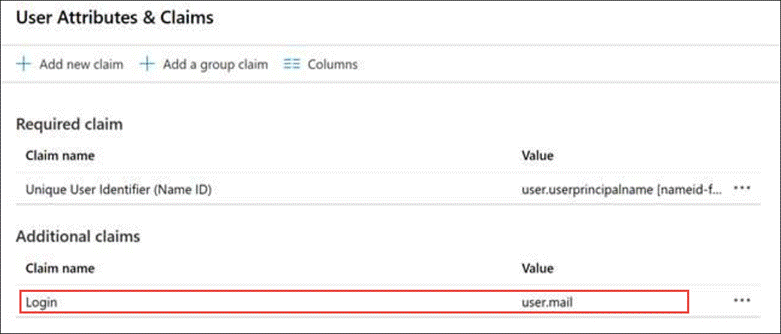
The following details are required for setting up the SSO for your account:Note
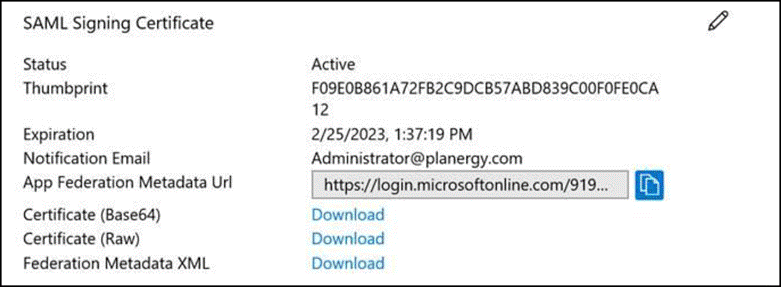
The SAML Signing Certificate details are auto-populated. This information should be sent to our support team so that we can set up the SSO for your PLANERGY account. - Certificate from SAML Signing Certificate section
- Federation Metadata XML from SAML Signing Certificate section
- Azure AD Identifier from Set up DNA section

- Press Save.
- Navigate to Users and Groups on the left navigation menu.
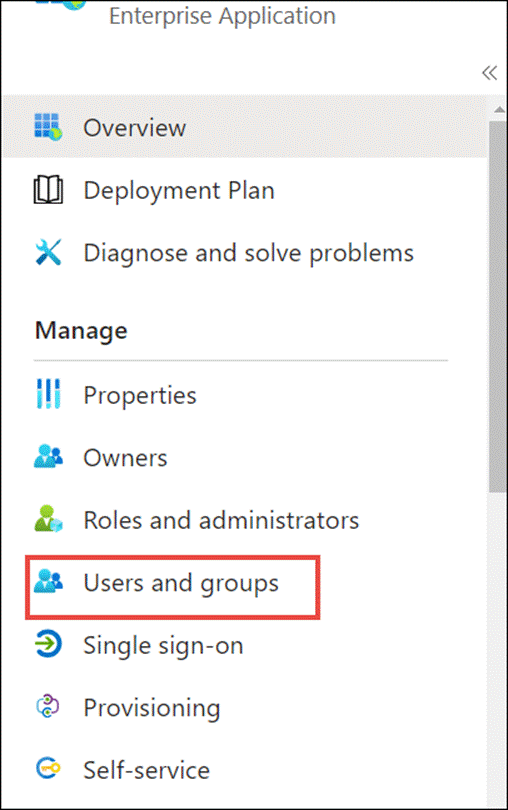 The Users and Groups page is displayed.
 - Press Add user/groups and add the users/ groups to whom you wish to grant this permission.

- Generate a support ticket with the PLANERGY support team, incorporating the relevant data from the SAML Signing Certificate and Set up DNA sections mentioned earlier for setting up Azure Active Directory on your account
Note
Once the integration is confirmed, users can log in directly from Office365 apps to PLANERGY by clicking the PLANERGY application within their Office365 instance or using the popular Office365 browser plugins to jump directly to PLANERGY.
How to Enable SSO Integration – Microsoft Azure in PLANERGY
To enable the Azure AD integration in PLANERGY, an account owner user has to follow the steps below.
- Press the Control Panel on the Home page.
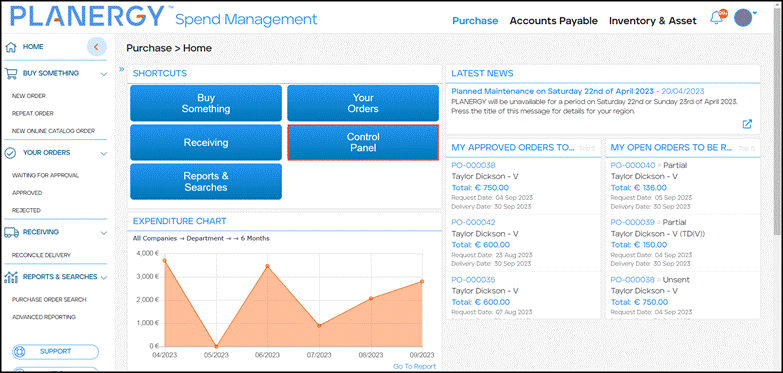 The Control Panel page is displayed.
 - Press Integrations under Advanced Controls.

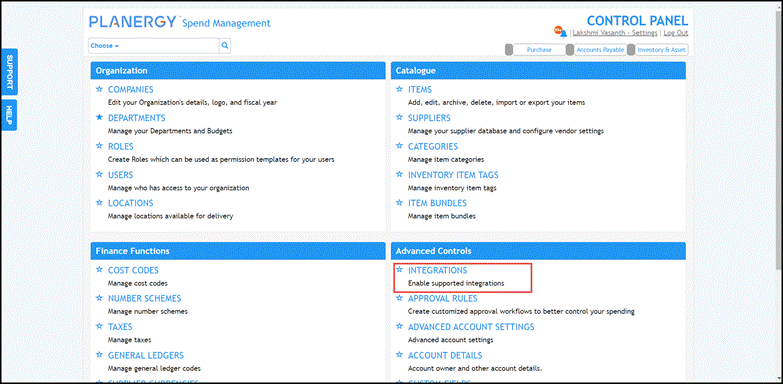 TheControl Panel > Integrations page is displayed.
 - Press Setup corresponding to Microsoft Azure.
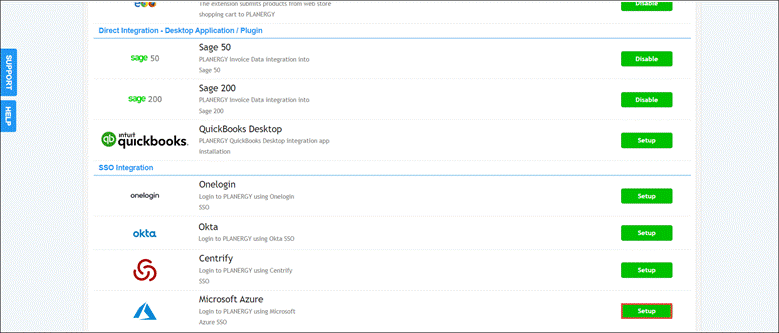 The Control Panel > SSO Settings page is displayed.
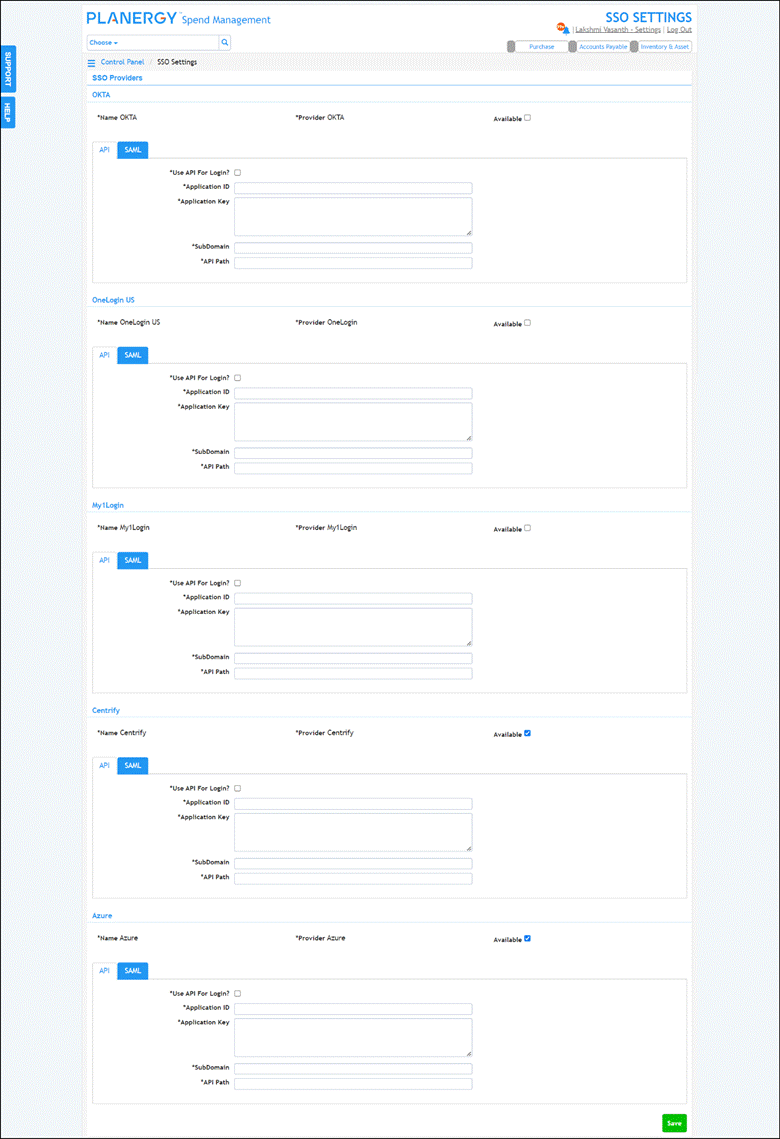
How to Set Up SSO Integration – Microsoft Azure in PLANERGY
Ensuring that SAML fields are added before connecting PLANERGY with Azure AD is important.
- Scroll down the Control Panel > SSO Settings page to the Azure section.
- Check the box Available.

- Press SAML.
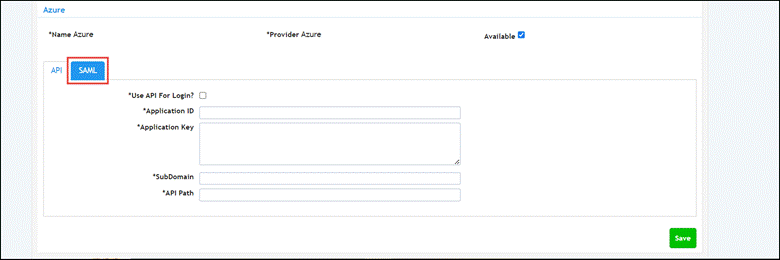
- Fill in the fields with all the required details you received upon completing the PLANERGY configuration with Azure Active Directory.
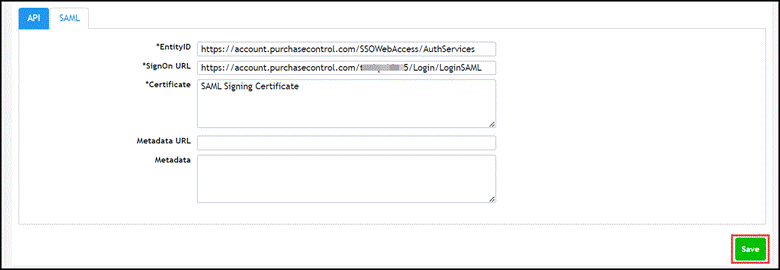
- Press Save. A success notification about the setup is displayed.

How to Enable Microsoft Azure on Users
After setting up Microsoft Azure with your PLANERGY account, ensure enabling it on all users on your account.
- Navigate to the Control Panel page > Organization and press Users.
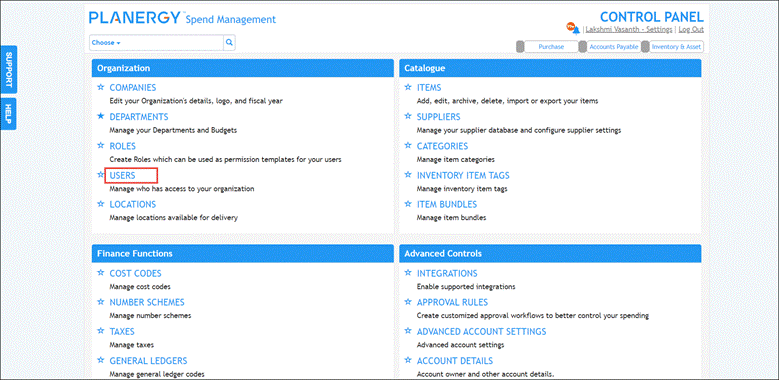 The Control Panel > Users page is displayed.
 - Press anywhere in the row of the user you wish to activate Azure.
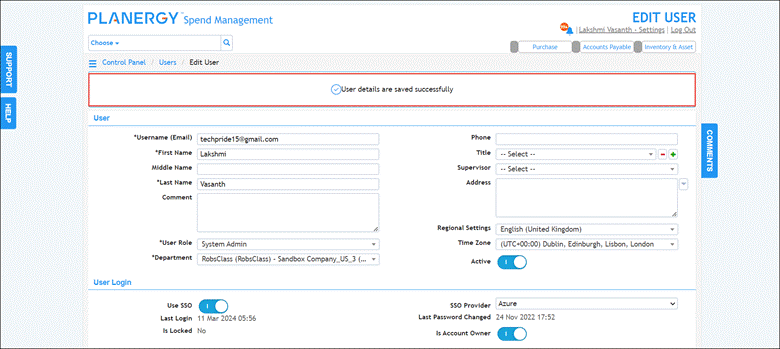
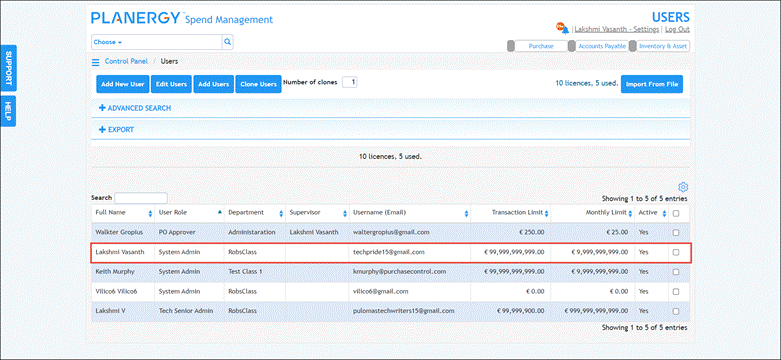 The Edit User page is displayed.
 - Enable the Use SSO toggle button.

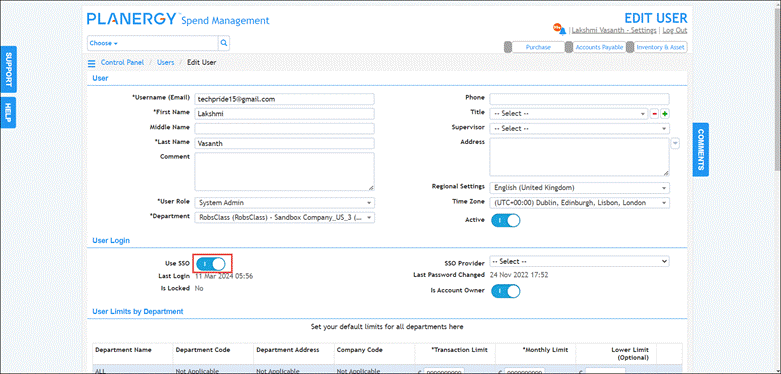
- Select Azure from the SSO Provider dropdown list.

- Press Save.
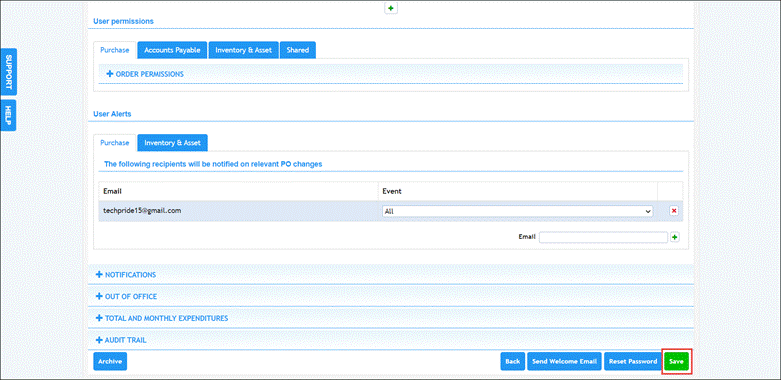 A success notification is displayed.