PLANERGY allows you to integrate with your Xero account. Syncing data between the two systems ensures PLANERGY maps to the structure set up in your Xero account to maintain consistency of your chart of accounts, etc.
The integration allows you to use PLANERGY to manage your business spend and streamline accounts payable. Invoices authorized in PLANERGY will be sent to Xero as bills with relevant attachments ready to be processed for payment.
The integration between PLANERGY and Xero is free of cost.
How PLANERGY and Xero Work Together
How Data Is Mapped Between PLANERGY And Xero
Data mapping between PLANERGY and Xero is outlined in the diagram below. 
There are 2 fields with optional mapping:
- Departments
- Cost Codes
How To Integrate PLANERGY with Xero
You can set up the Xero integration in your PLANERGY account in four steps.
Note
Enable Xero Integration
To enable the Xero integration for PLANERGY, follow the steps below.
- On the Home page, press the Profile icon in the top right corner.
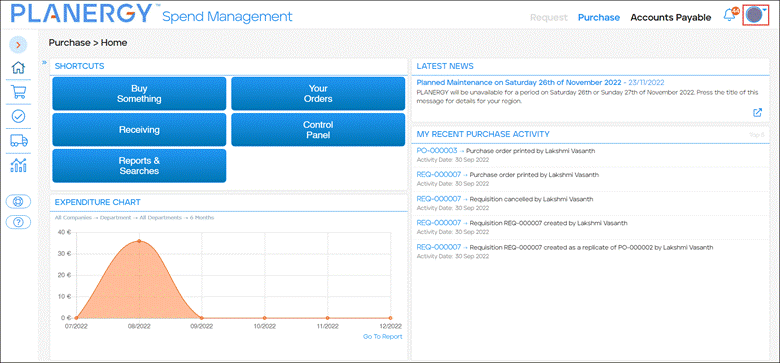 The Profile menu is displayed.
 - Press Control Panel in the Profile menu.
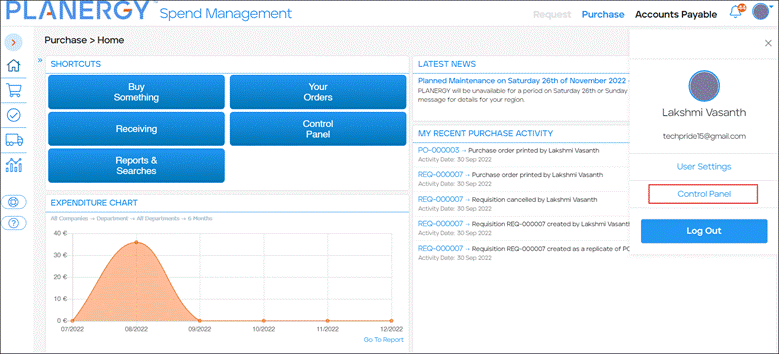 The Control Panel is displayed.
 - Press Integrations in the Advanced Controls section.
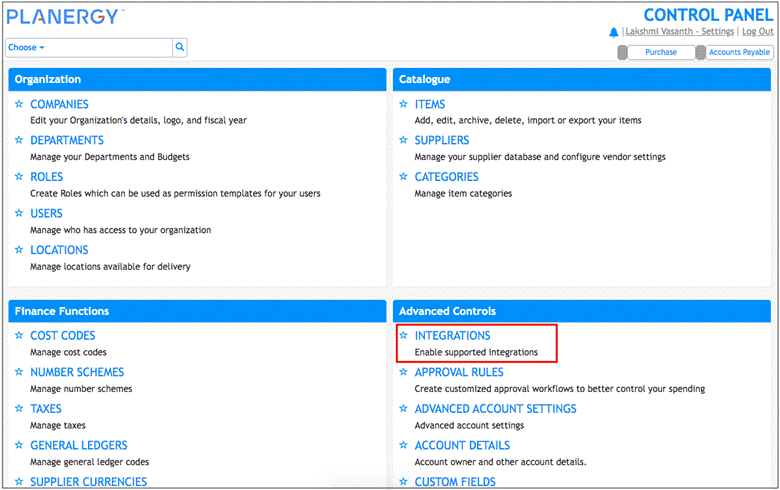
Note
Only Account Owner users can view this option.
The Integration Settings page is displayed.
- Press the Setup button in the row of the Xero integration.
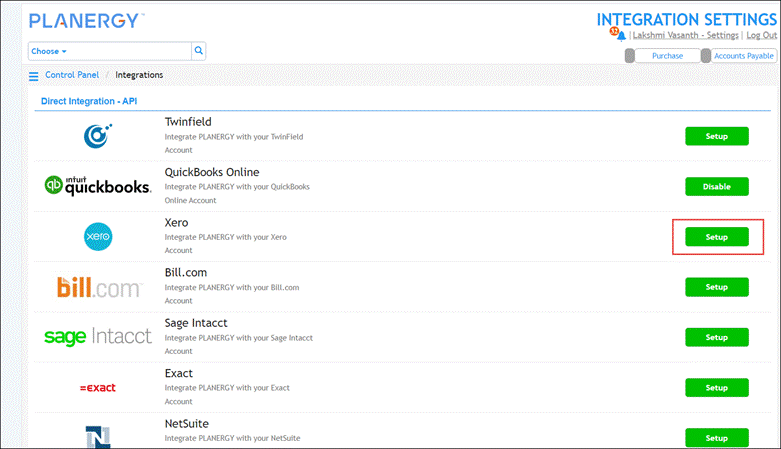 The integration is now enabled and the Xero Settings page is displayed.
Connect Xero With PLANERGY
To connect Xero with PLANERGY, follow the steps below.
- Press Connect to Xero.
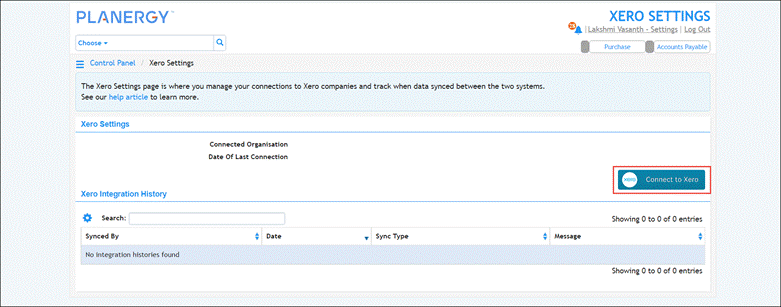
Note
It is important to ensure you have the same company name in PLANERGY and Xero to connect the two systems.
The Xero Log In page is displayed. - Enter your email address in the Email or User ID field, your password in the Password field, and then press Log In.
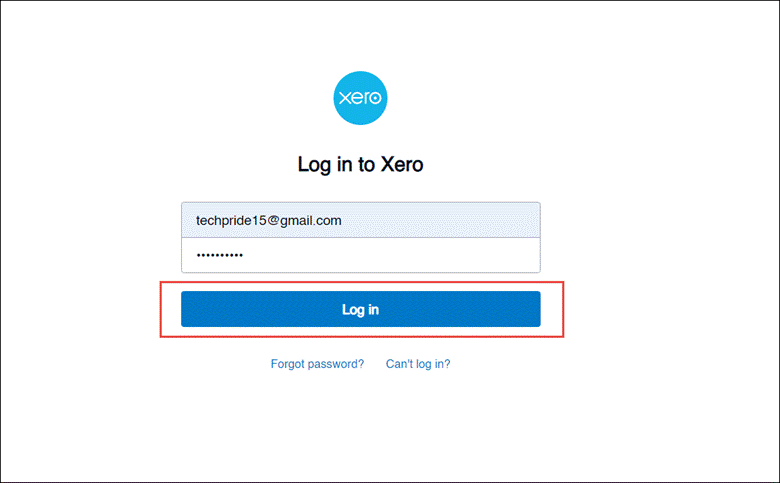
Note
To integrate PLANERGY and Xero, you need to provide access to organization data and some user information on the User Consent page.
- Press the Allow Access button. Here, in case you have multiple companies listed in Xero, you may have to choose one company from a dropdown menu.
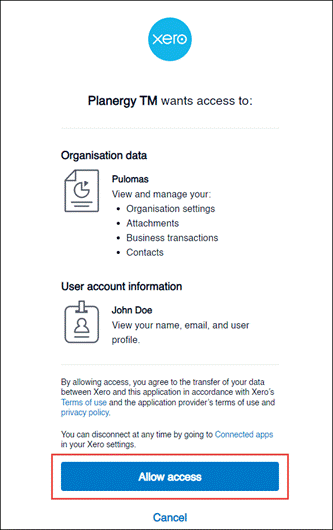 The connection to Xero is created and a confirmation message is displayed.
  The Xero Integration History section will update to include a record of the connection.
Set Up Xero Integration
The field mapping for optional fields can be set in the integration for importing data from Xero. 
Note
- Tracking Categories mapping is done only after connecting to
- It should be noted that 2 tracking categories can be mapped. If only one tracking category is used in Xero, only one will be listed on the Xero Settings page in PLANERGY.
- Region is the Tracking Category name in the image. It will be a different name for every client.
- Select the Tracking Categories you would like to import from Xero.In the following example, Region is the dropdown menu from which you can choose to import tracking categories as either Departments or Cost Codes.
-
- Department is at the header level of the PO and is where you will have the most control in PLANERGY. You can restrict who can order for specific departments, set budgets per department, and set approval workflows.
- Cost Code is an expenditure tracking field at the line level of the Purchase Order. It can be used for reporting but does not have similar controls, like Department.

- Press the Save button.A notification confirming the successful saving of the settings is displayed.
 Press the 0K button to dismiss the message.
Import Data From Xero
When first integrating PLANERGY with Xero you must import all data after setting up the integration.
For more information on the other options for importing data from Xero you can read How To Import Data From Xero?
After saving your data mapping settings for Xero, you will be on the Xero Settings page.
- Press Import All Data.
 The import process has started. You will see a confirmation message on screen.
- When the import is completed, you will receive an email confirmation for each piece of data imported.

Note
If you want to integrate with multiple companies, follow the steps to Connect Xero with PLANERGY and Import Data from Xero for each company you want to integrate with.
How To Import Data From Xero
You can import data from Xero to map data, set up budgets, and control user spending limits along with managing item catalogs, approval routing, and vendor management.
Note
There are three options to import data from Xero to PLANERGY.
- Import All Xero Data Manually
- Import Individual Xero Data Sets Manually
- Schedule Automated Imports of All Xero Data
Import All Xero Data Manually
To import all data from Xero:
- On the Home page, press the Profile icon in the top right corner.
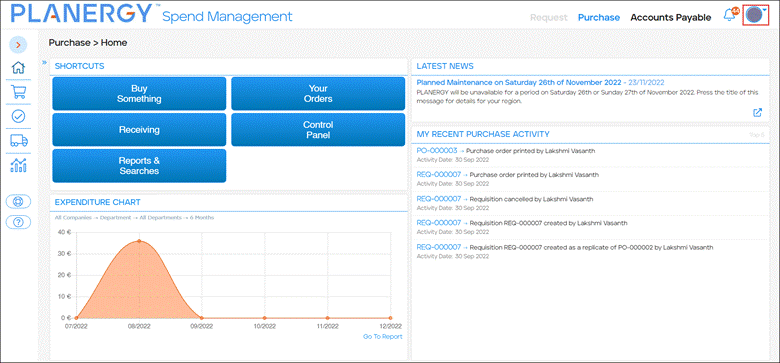 The Profile menu is displayed.
 - Press Control Panel in the Profile menu.
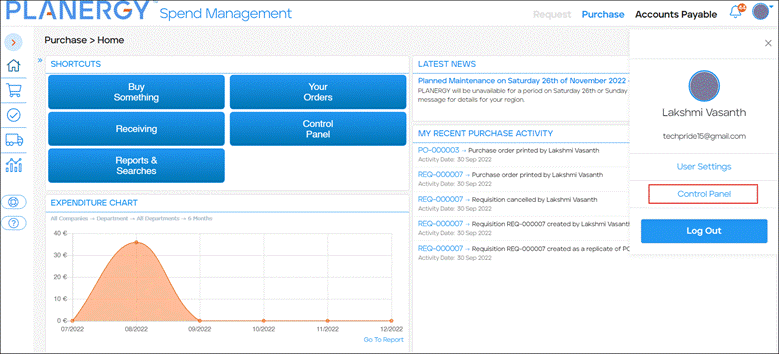 The Control Panel is displayed.
 - Press Xero Settings in the Advanced Controls section.
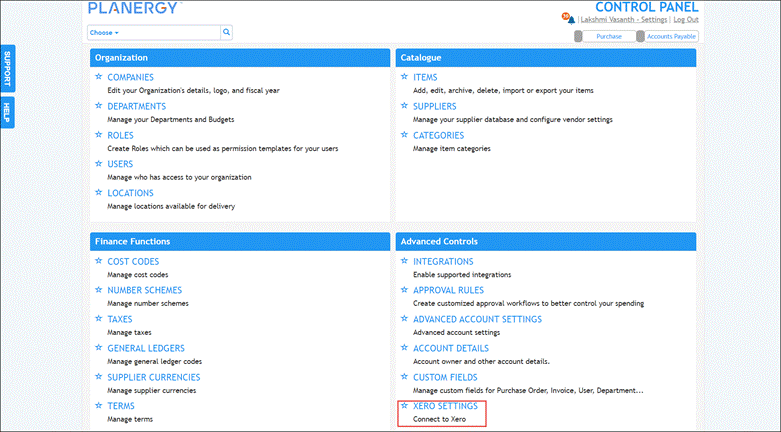 The Xero Settings page is displayed.
 - Press Import All Data.
 The import process has started. You will see a confirmation message on screen.
Note
If you want to integrate with multiple companies, follow the steps Connect Xero with PLANERGY and Import Data from Xero for each company you want to integrate with.
- When the import process completes you will receive confirmation notifications. This includes updates on what data was imported and any relevant errors.
 If there are any errors during the import process, they can be reviewed by clicking on the To see the details of this import click here link in the email.
This will open the Integration History-Details page.Note
You can also view the Integration History-Details page by clicking on the particular log under the Xero Integration History.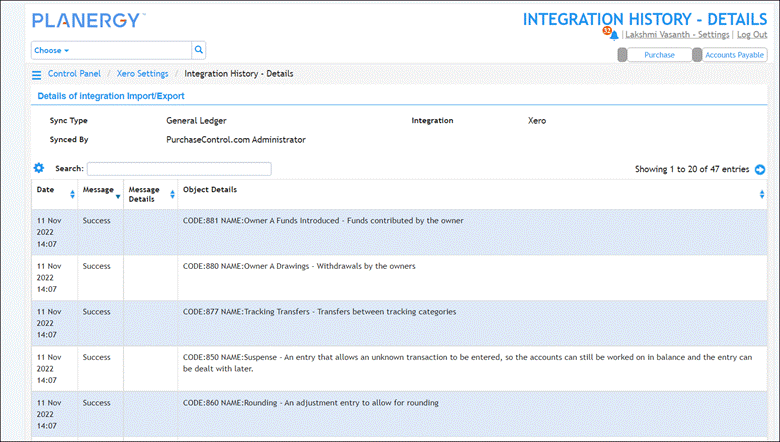 To learn more about the Integration History section you can read this article. Common errors for the Xero integration are explained here.
Note
Import Individual Xero Data Sets Manually
You can import and update a single data set from Xero. This option is useful when you have added a specific piece of data in Xero that you now require in your PLANERGY account. For example, a new project.
In the following example we will import updates to General Ledger codes. You can also import Suppliers, Terms, Taxes.
To import General Ledger codes from Xero, follow the steps below.
- On the Home page, press the Profile icon in the top right corner.
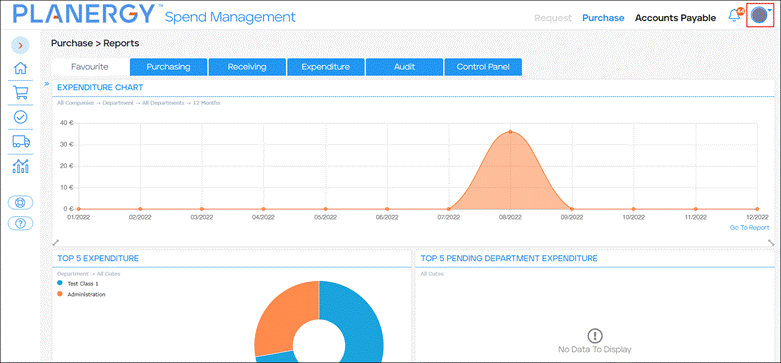 The Profile menu is displayed.
 - Press Control Panel in the Profile menu.
 The Control Panel is displayed.
 - Press General Ledgers in the Finance Functions section.
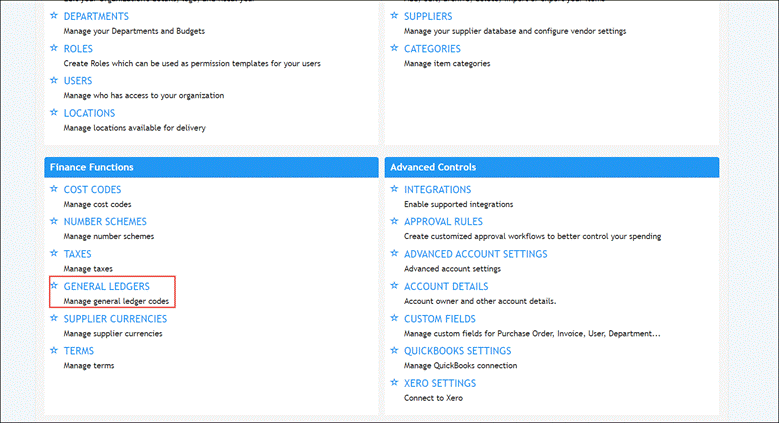 The Search General Ledgers page is displayed.
 - Press Import From Xero
 The import process has started. You will see a confirmation message on screen.
Schedule Automated Imports of All Xero Data
When you regularly want to update Xero data to ensure data is regularly synced to PLANERGY, you can schedule automated imports of all Xero data.
To set up scheduled imports you should contact the support team and they will help get these in place for you. Here is How to create a support ticket.
Common Xero Import Errors and How To Fix Them
The most common import errors when importing data from Xero relate to missing currency, credit terms, or some invalid characters included in the name of the imported data.  Removing the invalid character will resolve the issue.
  This error will not stop the import of the supplier. The supplier will be imported, but the Supplier Currency will not be set automatically for the supplier.
Adding the currency will resolve the issue.  This error will not stop the import of the supplier. The supplier will be imported, but the Terms will not be set automatically for the supplier.
Adding the currency will resolve the issue.
How to Disconnect from Xero
You can disconnect from Xero when you want to stop the integration with your PLANERGY account. This temporarily disconnects from Xero and you can restore the connection any time.
To disconnect from Xero, follow the steps below.
- On the Home page, press the Profile icon in the top right corner.
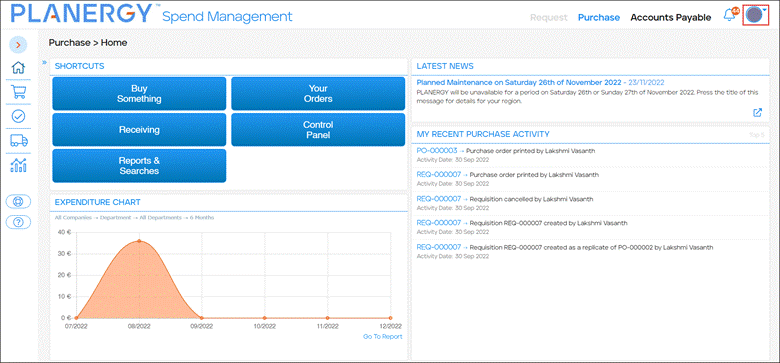 The Profile menu is displayed.
 - Press Control Panel in the Profile menu.
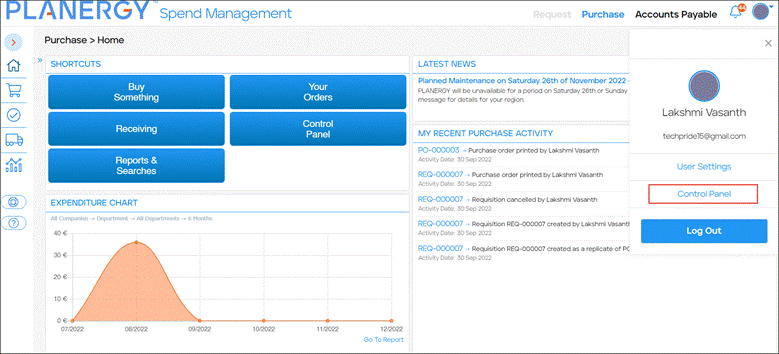 The Control Panel is displayed.
 - Press Xero Settings in the Advanced Controls section. If this option isn’t available for you under the above section, contact support.This option is visible for users with the apt permissions.
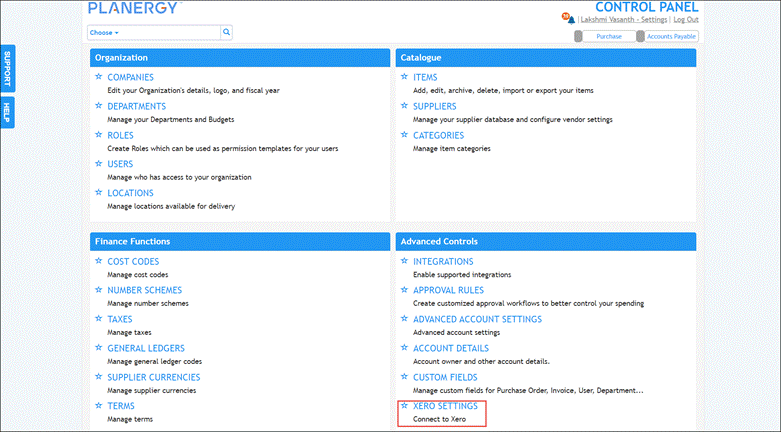 The Xero Settings page is displayed.
 - Press Disconnect from Xero.
 A notification message about the successful disconnection is displayed. Click OK to dismiss the message.
How to Disable Xero Integration
You can disable a Xero connection which means that you are permanently removing the existing connection. If you want to connect again, you need to go through the complete process of integration from scratch.
- On the Home page, press the Profile icon in the top right corner.
 The Profile menu is displayed.
 - Press Control Panel in the Profile menu.
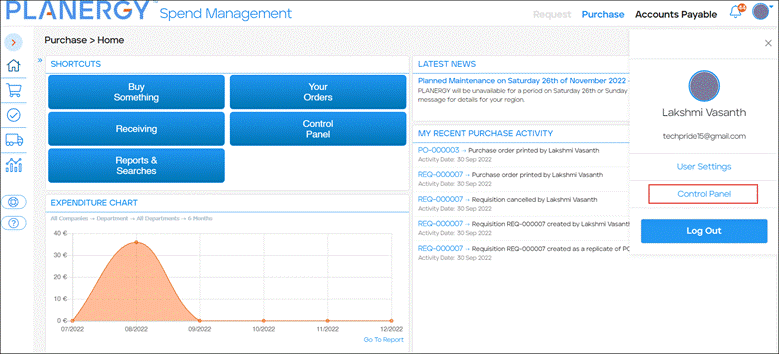 The Control Panel is displayed.
 - Press Integrations in the Advanced Controls section.
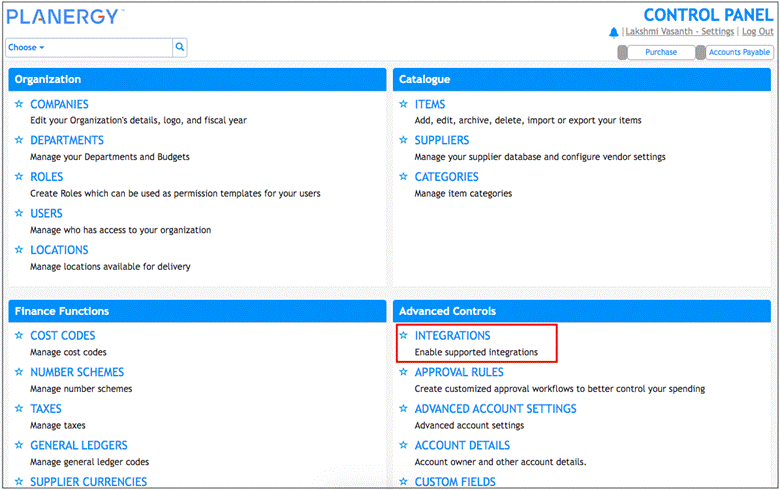 The Integration Settings page is displayed.
Note
Only Account Owner users can view this option.
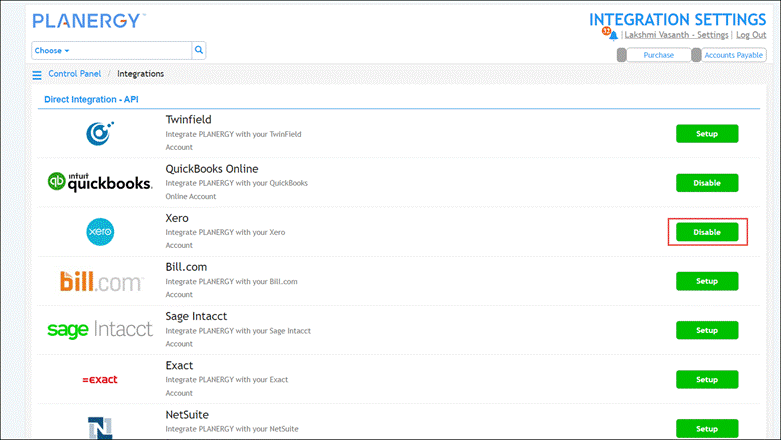
- Press the Disable button in the row of the Xero integration.
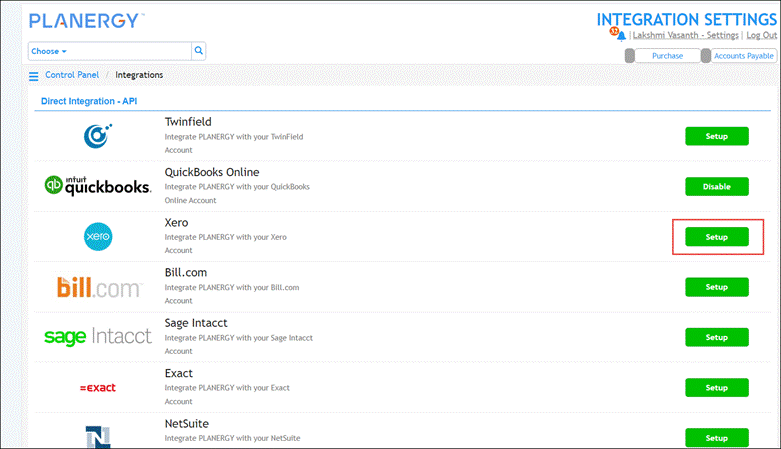
The integration is completely disabled and the button changes to Setup. You can click Setup, to re-integrate Xero to PLANERGY.
How to Export Invoices To Xero
Authorized invoices can be exported to Xero from PLANERGY. The invoice data and any attached documents will be exported.
There are 3 ways to export invoices to Xero:
- Export All Invoices with Status ‘Authorized’ To Xero
- Export a Single Invoice To Xero
- Automate Export of Authorized Invoices
Note
Export All Invoices with Status ‘Authorized’ to Xero
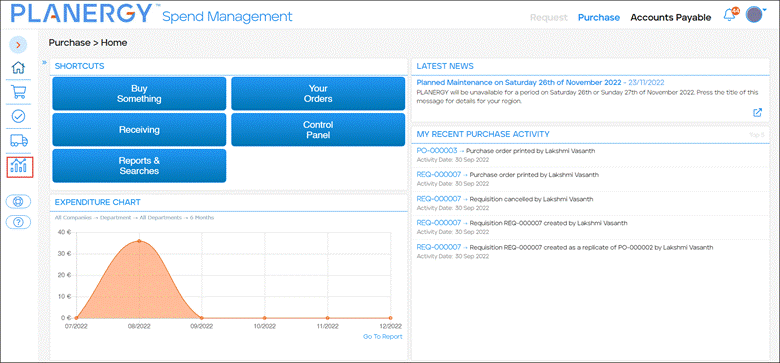
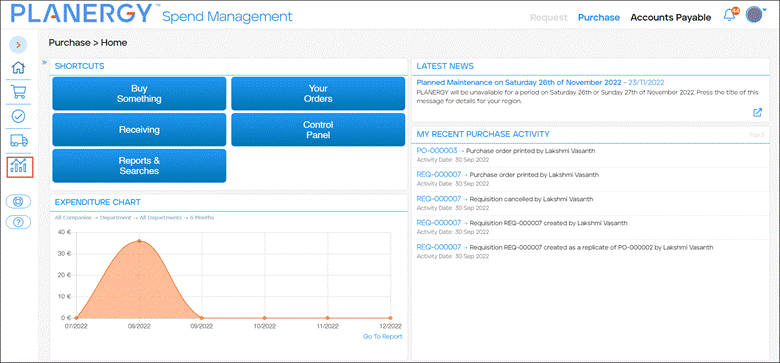
- On the Accounts Payable Home page, press Reports & Searches in the left sidebar menu.
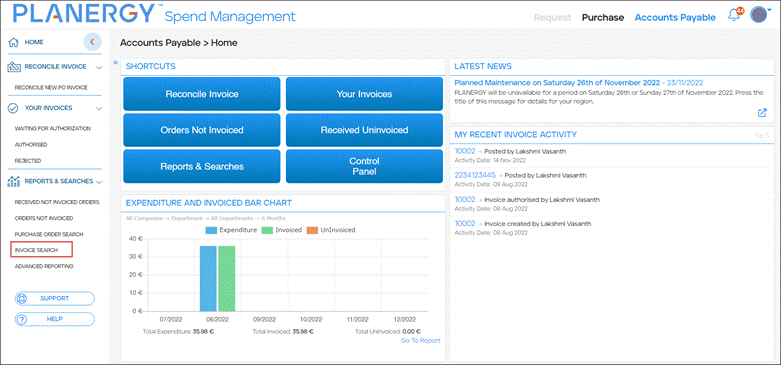
- Press Invoice Search.
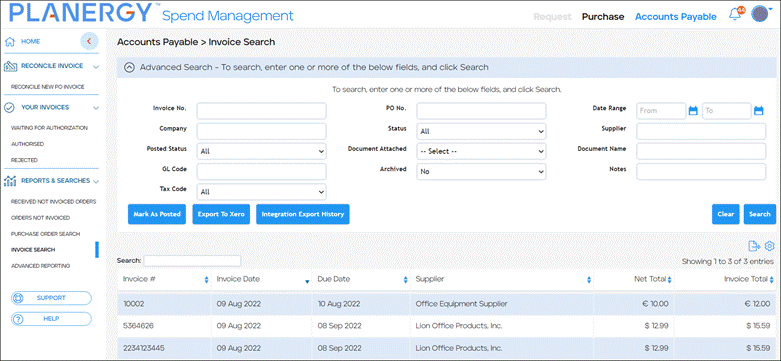
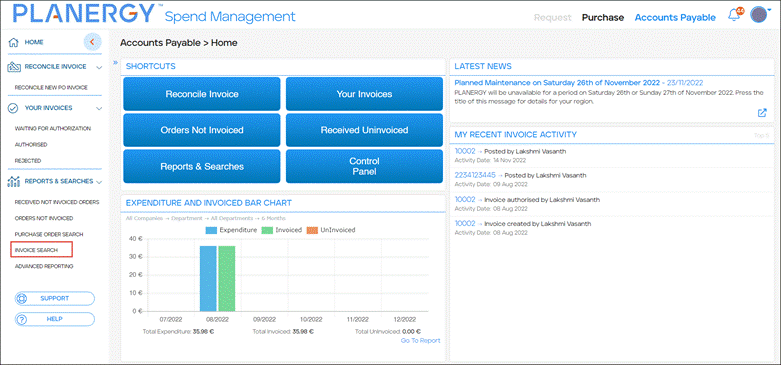 The Invoice Search page is displayed.
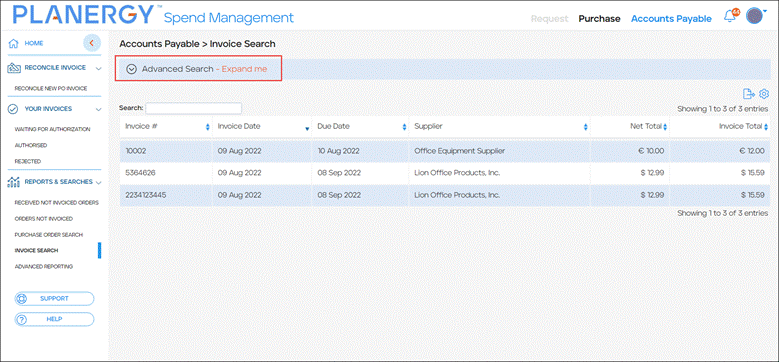
- Press Advanced Search.
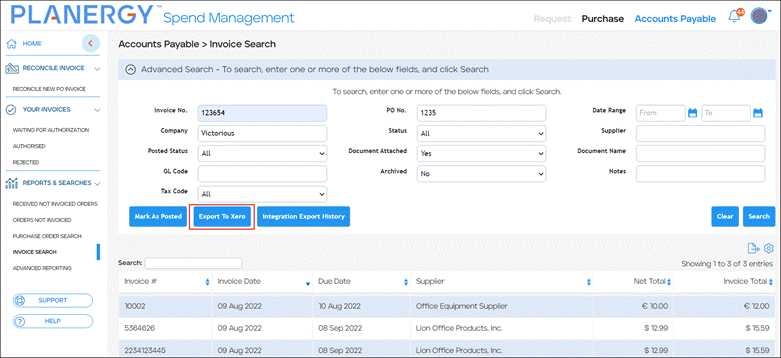
- Press Export to Xero.
Note
- The export process is started and all invoices will be attempted to be exported. You will see a confirmation message on the screen.

Note
To be exported, the invoices must be authorized. You can export invoices only after general ledger codes, taxes, and vendors have been imported from Xero successfully.
If an invoice has a document attached, the document also exports to Xero. Any errors will be reported to the user via email report.
Export a Single Invoice To Xero
On the View Invoice page for any invoice with the status Authorized you will have the option to export that invoice directly from the page.
- On the Accounts Payable Home page, press Reports & Searches in the left sidebar menu.
- Press Invoice Search.
 The Invoice Search page is displayed.
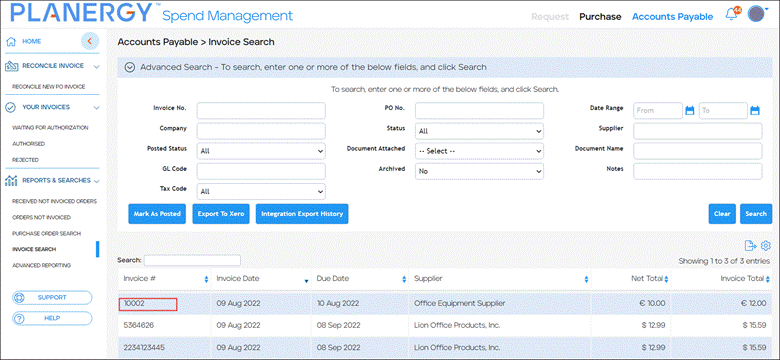
- Select the invoice you want to export from the invoice search. The View Invoice page for the selected invoice will be displayed.
- Press Export to Xero in the Export Invoice section of the page.
 The invoice will be exported and you will see a confirmation message on screen.
Automate Export of Authorized Invoices To Xero
When you want to get invoices to Xero as fast as possible while reducing manual steps, you can set invoices to export automatically as soon as they have been authorized.
To set up scheduled imports you should contact the support team and they will help get these in place for you. Here is How to create a support ticket.
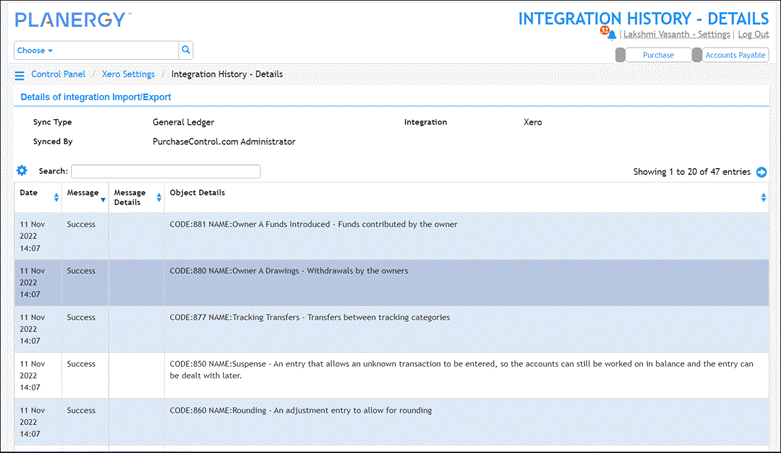
Xero Integration History keeps track of all imports and exports run in the system, automated or manual. 
Clicking a specific entry will show more detail about the action. 
The Integration History – Details page is displayed.
How to Export Suppliers To Xero
To export suppliers to Xero:
- On the Home page, press the Profile icon in the top right corner.
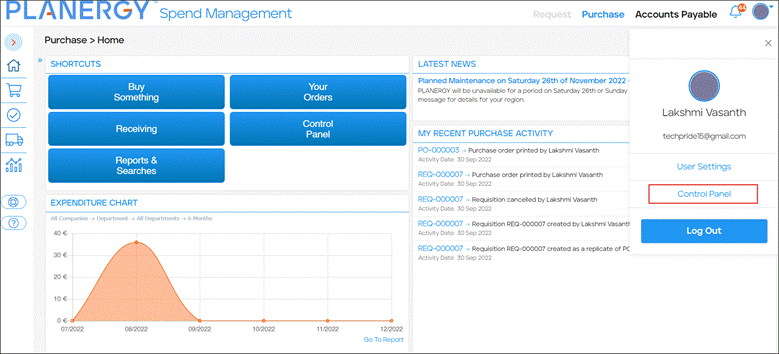 The Profile menu is displayed.
 - Press Control Panel in the Profile menu.
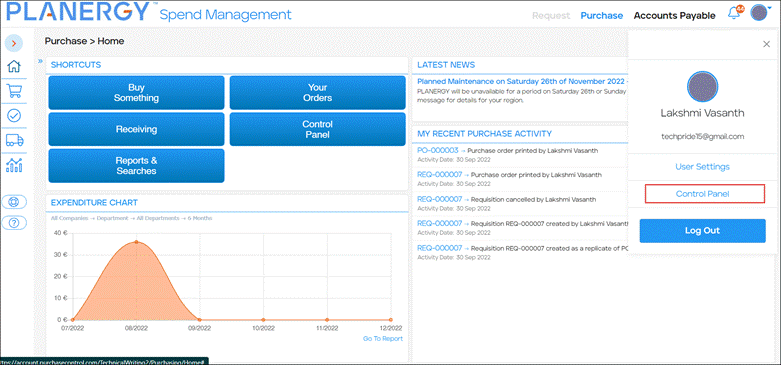 The Control Panel is displayed.
 - Press Xero Settings in the Advanced Controls section.
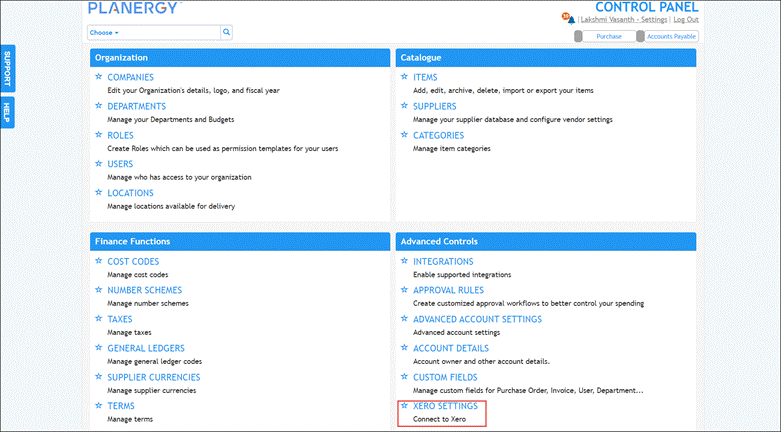 The Xero Settings page is displayed.
 - Choose Suppliers from the Choose dropdown menu.
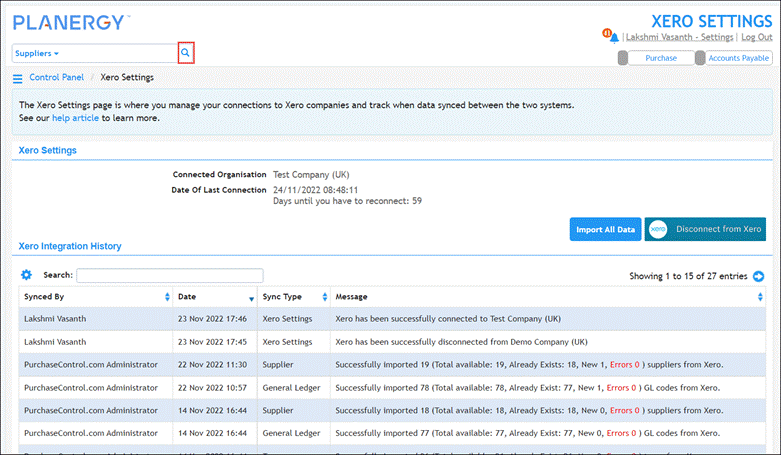 Then, press the Search
  icon.The Suppliers page will be displayed.
- Select the supplier you want to export from the supplier search.The Edit Supplier page will be displayed.
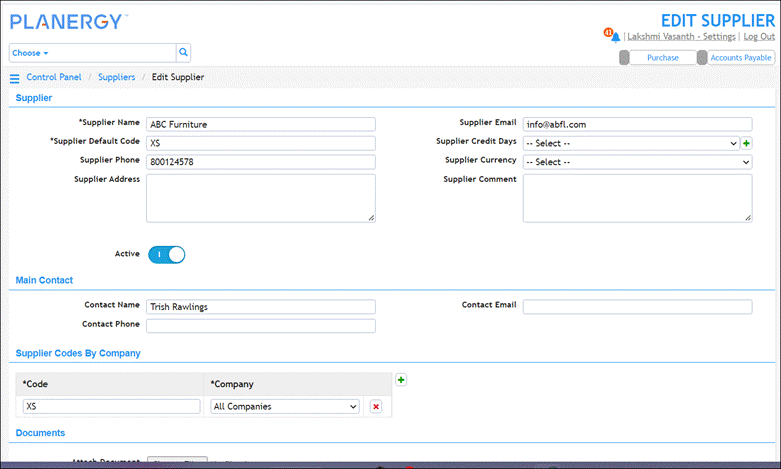 A confirmation will be displayed, then you can proceed to export the supplier.
Note
Before exporting the supplier, you must fill out all the necessary fields and press Save.
- Press Export to Xero on the bottom on the Edit Suppliers page.
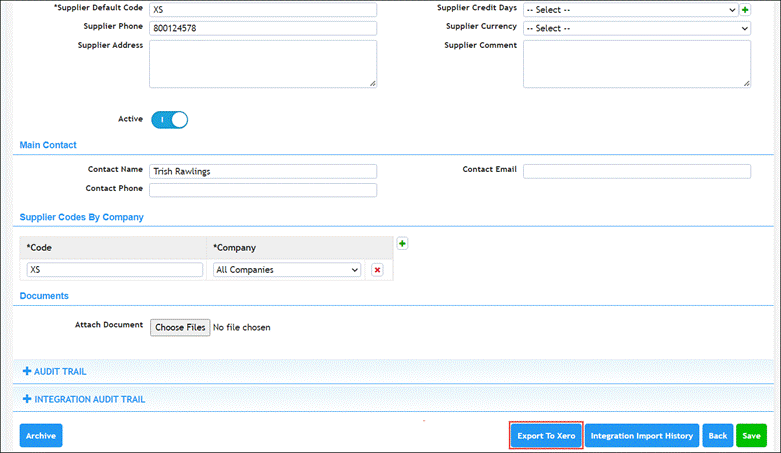
- Once the export process has finished, you will see a confirmation message on screen.

