The Ticket module allows you to create a new ticket that enables you for purchases. You can also manage all tickets in the system based on your user permissions settings.
Note
When you have access to the Ticket module, you can directly create a new requisition using the ticket or ticket items. For more details, refer to How to Create New Order From Ticket.
The tickets can be approved by you if you have the user’s permission to do so or it can be sent to an approver for approval.
All approved tickets are available to you, thus giving you the ability to create purchase orders from them.
You can search for the various tickets in the system and also search for an item on any tickets in the system.
- Navigate to Ticket.
 The Ticket > Home page is displayed.
For more information, refer to the following sections:
- Sections in Ticket
- Ticket Authorization
- Ticket Approval Rule
- Ticket Home Page
- Submit Ticket
- Your Tickets
- Reports & Searches
Common Operations Across Tickets
The common operations are standard operations performed across the section of Ticket such as sorting a table, customizing a table, and searching for a specific ticket.
The common operations in the Ticket section are similar to those in the Purchase module.
For more information, refer to Common Operations Across Purchase.
You can also replicate a ticket across all the sections of Ticket module. For more information, refer to How to Replicate a Ticket.
How to Create a New Ticket
To create a new ticket in the system, follow the steps below.
- On the left navigation panel, press SUBMIT TICKET > NEW TICKET.

The Ticket > New Ticket page is displayed.
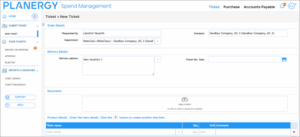
Note: The Requested By, Department, and Company fields under Order Details are autopopulated, but you may select a different department from the Department dropdown list if needed.

- Select the destination address from the Delivery Address dropdown list.

- Select the delivery due date from the Ticket Del. Date dropdown calendar.

- Add any document associated with the ticket by dragging and dropping it into Documents. You can also press the Document section to upload the document from your system.

- Select items from the dropdown list in the Item name column.
Note:
- The items will be listed in the dropdown list only if added in the Items section under Control Panel.
- It will be possible to move items from the Approved Ticket Items list to the Selected Ticket Items list only if A supplier is selected.

- Once items are selected, click Pick All Checked Ticket Items.

- Enter the number of the items in the Qty column for each item.

Note that the Unit is set for each item and is autopopulated. You can select a different unit from the Unit dropdown list if needed.

8. Enter more details about the item in the associated row in the Comment column if needed.

9. Press Save.

The success notification is displayed and the ticket status will be In Creation.
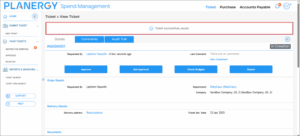
Note: You can approve/reject the ticket if you have the user’s permission to do so or send the ticket for approval to an approver.
How to Create New Order From Ticket
You can create new orders from ticket items present in the system if the Ticket module is enabled for you by your system admin.
- On the Purchase > Home page, press BUY SOMETHING > NEW ORDER FROM TICKET.
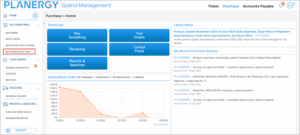
The Purchase > New Order From Ticket page is displayed.
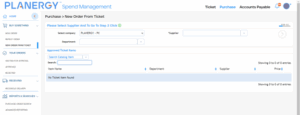
Note: All the fields with an asterisk (*) are mandatory.
- Select the company’s name from the Select company dropdown list.

The ticket items are filtered based on the company selection.
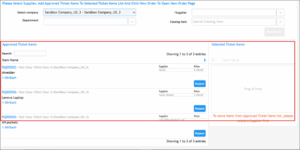
- Select the supplier from the Supplier dropdown list to further narrow down the filtered result of the ticket items.

The ticket items filtered based on the selected supplier are displayed.
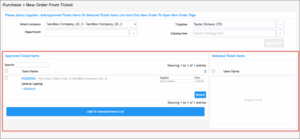
- Optionally select the department from the Department dropdown list to further refine the ticket items based on the department. This field is optional.

The ticket items are filtered and displayed based on the selected supplier.
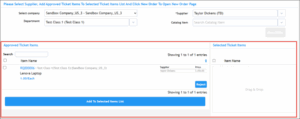
Note: You can reject the ticket items filtered from here by pressing Reject in the corresponding item row.

The Reason for rejection dialog is displayed. Enter the reason for rejecting the item in the space provided and press Reject.
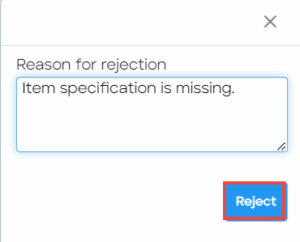
The item will be rejected and removed from the listed ticket items.
- Check the box(es) against the items you wish to add to the Selected Ticket Items list. You can also drag and drop items to Selected Ticket Items.
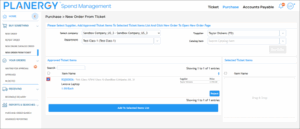
- Press Add to Selected Items List.
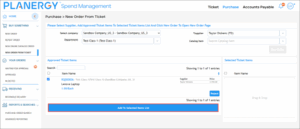
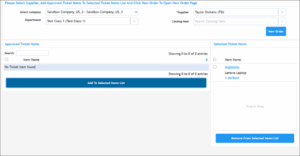
The selected items are moved to the Selected Ticket Items list.
The Purchase > New Order page is displayed.
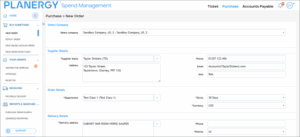
The steps to continue creating the order from here are similar to those while creating a new order. For more information, refer to How to Create a New Order.
When saved, the new order is created in the system and would need to go through the approval process.
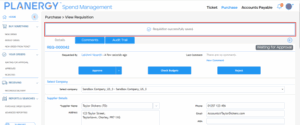
How to Replicate a Ticket
You can duplicate a ticket across the Ticket module if the data on it is similar to the one you wish to create in the system.
In the following section, we are replicating a ticket in the Ticket Search section. You can follow similar steps to replicate the data in other sections as well.
- Navigate to the Tickets > Home page and press Reports & Searches in the left navigation panel. The Reports & Searches subsections are displayed.
- Press Ticket Search.
 The Ticket > Ticket Search page is displayed.
 - Press anywhere in the row of the ticket you wish to replicate the data.
 The Ticket > View Ticket page is displayed.
- Scroll down the ticket page and press Replicate.
 The Ticket > New Ticket page is displayed.
Note
All the fields are auto populated with the data. You can edit the fields as needed. For more information, refer to How to Create New Ticket. - Press Save. The ticket is replicated with a new ticket number.

Sections in Ticket
The sections in the Ticket module are Home, Submit Ticket, Your Ticket, and Reports & Searches.
- Home – The Home is the landing page that allows easy navigation across the various sections of the Ticket. You can quickly access the latest news, shortcuts to the core sections of the module, and the Control Panel of the system.

- Submit Ticket – This section allows you to create a new ticket for purchase.

- Your Ticket – In this section, you can access all your tickets in the system that are sent for approval by you and the tickets that are waiting for your approval as well as tickets that are approved by you and your tickets that are approved by others.
Note
You can also access the tickets that are rejected by you and tickets that are rejected by others.
You can view the status of your tickets such as waiting for approval/approved/rejected.

- Reports & Searches – This section allows you easy access to all tickets and ticket items in the system using the search functionality by combining as many search fields as needed to narrow down the results.

Ticket Permissions
To access the Ticket module if enabled on your account by the admin, you must update your user permission settings in the Control Panel by following the steps below.
- On the Home page, press the Profile icon in the top right corner.
 The profile menu is displayed.
 - Press Control Panel in the profile menu.
 The Control Panel page is displayed.
 - Press Users under Organization.
 The Control Panel > Users page is displayed with all the users listed.
 - Press anywhere in the row of the user you wish to edit the user permission.
 The Edit User page is displayed.
 - Scroll down to the User Permissions section and press the Ticket tab.
 The Ticket Permissions section is displayed.
 - Press Ticket Permissions.
 The Ticket Access section is displayed by default.
- Select the appropriate option to determine the ticket orders that the user can view in the system.
-
- Own Tickets– The user can view only the tickets created by him in the system.
- All Tickets – The user can view all the tickets available in the system.
- Tickets for department(s) – The user can view all the tickets available for the selected department(s).
- To add a department to the selected department(s) list, press the Add icon.
 The Department dialog is displayed.
- Check the box in the row of the department you wish to add.
- Press Add All Selected Departments.
 The selected departments are added to the Department list.
Note
- Press the Ticket On Behalf tab.
 The Ticket On Behalf section is displayed.
- Select the appropriate option that determines for whom the user can place ticket orders.
-
- Own user – The user can place ticket orders for only himself in the system.
- All departments – The user can place ticket orders for all the departments in the company.
- Other selected department(s) – The user can place ticket orders for only the selected department(s).
-
- To add a department to the selected department(s) list, press the Add
 The Department dialog is displayed.
- Check the box in the row of the department you wish to add.
- Press Add All Selected Departments.
 The selected departments are added to the Department list.
Note
You can remove a department from the list by pressing the Close icon in the row of the department.
- To add a department to the selected department(s) list, press the Add
- Press the Ticket cancellation tab.
 The Ticket cancellation section is displayed.
- Select the appropriate option to determine the ticket orders the user can cancel.
-
- Own Tickets – The user can cancel ticket orders that are created by him in the system.
- All Tickets – The user can cancel all ticket orders in the system.
- Tickets for department(s) – The user can cancel ticket orders for only the selected department(s).
- To add a department to the selected department(s) list, press the Add
 The Department dialog is displayed.
-
- Check the box in the row of the department you wish to add.
- Press Add All Selected Departments.
 The selected departments are added to the Department list.
Note
You can remove a department from the list by pressing the Close icon in the row of the department.
- Press the Ticket Authorization tab.
 The Ticket Authorization section is displayed.
- Select the appropriate option to determine the ticket orders that the user can authorize.
-
- Own Tickets – The user can authorize only the ticket orders that are created by him in the system.
- All Tickets From Other Users – The user can authorize all ticket orders from other users in the system.
- Other User’s Tickets for department(s) – The user can authorize ticket orders by other users for only the selected department(s).
-
- To add a department to the selected department(s) list, press the Add
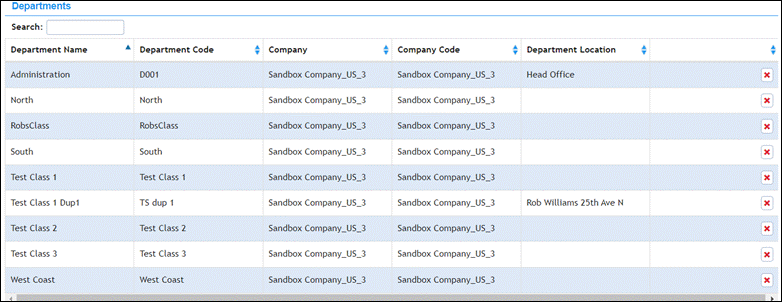
 The Department dialog is displayed.
- To add a department to the selected department(s) list, press the Add
-
- Check the box in the row of the department you wish to add.
- Press Add All Selected Departments.
 The selected departments are added to the Department list.
Note
You can remove a department from the list by pressing the Close icon in the row of the department.
Ticket Approval Rule
When the Ticket module is enabled on your account, you can set the approval rules in the Control Panel for the Ticket module.
- On the Home page, press the Profile icon in the top right corner.
 The Profile menu is displayed.
 - Press Control Panel in the Profile menu.
 The Control Panel page is displayed.
 - Navigate to the Advanced Controls section and press Approval Rules.
 The Control Panel > Approval Rules page is displayed.
 - Press Ticket.
Note
The Ticket tab is available to you only if you have the required permissions to access the Ticket module. The Ticket section is displayed.
 - Press Add New Approval Rule.
 The Add new approval rule dialog is displayed.
  Enter the name of the approval rule in the Rule Name field.
 Select the department you wish to set the rule for from the Department dropdown list.
 Select the Manual or Automatic option to manually/automatically trigger the approval rule from the Type dropdown list.
 Select the number of approvers required to approve the ticket from the dropdown list in the Approvers Required column.
 Select the user you wish to set as the approver from the dropdown list in the Approver column.
Note
You can press the Add icon in the Approver column to set more users as approvers. You can press Add Step to add additional steps or Remove Step to delete any additional step added if needed.
 Press Make Active to enable the approval rule.
- Press Save.

 The success notification is displayed and the ticket approval rule is added.
Note
You can edit and view the audit trail of the approval rule by pressing the row of the approval rule you wish to update.
Ticket Home Page
The Home page is the landing page of the Ticket module. It allows you easy navigation through the various sections provided in the Ticket module.
You can quickly access information such as the latest news and shortcuts that allow access to all the core sections of the Ticket module and also to the PLANERGY Control Panel.
Navigate to PLANERGY > Ticket. The Ticket > Home page is displayed. 
For more information, refer to Ticket Dashboard Widgets.
Ticket Dashboard Widgets
The widgets on the Ticket dashboard help with quick easy access to the various sections. The available widgets are:
Shortcuts
The Shortcuts widget allows easy access to New Ticket, Your Tickets, Ticket Search, Ticket Item Search, and Control Panel. 
Press any of the buttons on the Shortcut widget to be redirected to the specific page.
In the following example, we have pressed the Ticket Search button to get redirected to the Ticket > Ticket Search page.
Latest News
The Latest News widget highlights the most recent information about PLANERGY. This includes updates related to the latest feature releases and notifications about planned downtime for the software. 
Pressing the Maximize icon will display the RSS News Feed dialog with links that redirect to the News page. 
Submit Ticket
The Submit Ticket section allows you to create a new ticket for an item purchase order.
- On the Ticket > Home page, press Submit Ticket in the left navigation panel.
 The Submit Ticket subsection is displayed.
For more information, refer to How to Create New Ticket.
How to Create New Ticket
To create a new ticket in the system, follow the steps below.
- On the left navigation panel, press Submit Ticket > New Ticket.
 The Ticket > New Ticket page is displayed.
Note
The Requested By and Company fields under Order Details are auto populated. - Select the department from the Department dropdown list.

- Select the address of delivery from the Delivery Address dropdown list.

- Select the due date of delivery from the Ticket Del. Date dropdown calendar.

- Add any document associated with the ticket by dragging and dropping it into Documents. You can also press the Document section to upload the document from your system.

- Select items from the dropdown list in the Item name column.
Note
The items will be listed in the dropdown list only if they are added in the Items section under Control Panel. You can edit the quantity of the items and add a comment about the item in the row of the associated item if needed.
 - Press Save.
 The success notification is displayed and the ticket status will be In Creation.
Note
You can approve/reject the ticket if you have the user’s permission to do so or send the ticket for approval to an approver.
Your Tickets
The Your Tickets section allows you to access all your tickets in the system to approve or reject them. Note that each ticket has to be individually approved/rejected.
The tickets in the system are classified into the following subsections:
- Waiting For Approval – This section displays all your tickets in the system that are still waiting for approval.
- Approved – This section displays all your tickets in the system that are already approved.
- Rejected – This section displays all your tickets in the system that are rejected.On the Ticket > Home page, press the Your Tickets widget or Your Tickets in the left navigation panel.
 Your Tickets subsections are displayed.
 Note
On pressing the Your Tickets widget, you will be redirected to the Ticket > Waiting For Approval page by default.
For more information, refer to the following sections:
How to View Your Tickets
You can view your tickets based on their approval status.
For more information refer to the following sections:
View Your Tickets Waiting for Approval
To view all your tickets that are waiting for approval, follow the steps below.
- On the left navigation panel, press Your Tickets > Waiting For Approval.
The Ticket > Waiting For Approval page is displayed. The tickets waiting for approval are further classified into the following:
- Your Tickets Waiting For Approval From Other Users – This section displays all the tickets created by you that are waiting for approval from other approvers.
- Other Users’ Tickets Waiting For Approval From You – This section displays all the tickets created by other users that are waiting for your approval.In the following example, we are showing you how to view the ticket classified under Your Tickets Waiting For Approval From Other Users. You can follow similar steps to view the tickets under Other Users’ Tickets Waiting For Approval From You .
- Press anywhere in the row of the ticket you wish to view.
 The Ticket > View Ticket page is displayed.
- Depending on your user permission settings, you can approve/reject the ticket by pressing Approve or Reject. If needed, the ticket can be sent to an approver for getting approval by pressing Get Approval.
- You can check the budget for the department by pressing the Check Budget.
- You can add or view comments under the Comments tab from here.
- You can also view the audit trail of the ticket under the Audit Trail tab from here.
- You can scroll down to cancel, replicate, print, or download the ticket as needed.
View Your Approved Tickets
To view tickets that are approved, follow the steps below.
- On the left navigation panel, press Your Tickets > Approved. The Ticket > Approved page is displayed.

The tickets that are approved are further classified into the following:
- Your Tickets Approved By Other Users – This section displays all your tickets approved by others in the system.
- Other Users’ Tickets Approved By You – This section displays all the other users’ tickets approved by you in the system.
In the following example, we are showing you how to view the ticket classified under Your Tickets Approved By Other Users. You can follow similar steps to view the tickets under Other Users’ Tickets Approved By You.
- Press anywhere in the row of the ticket you wish to view.
 The Ticket > View Ticket page is displayed.
- You can add or view comments under the Comments tab from here.
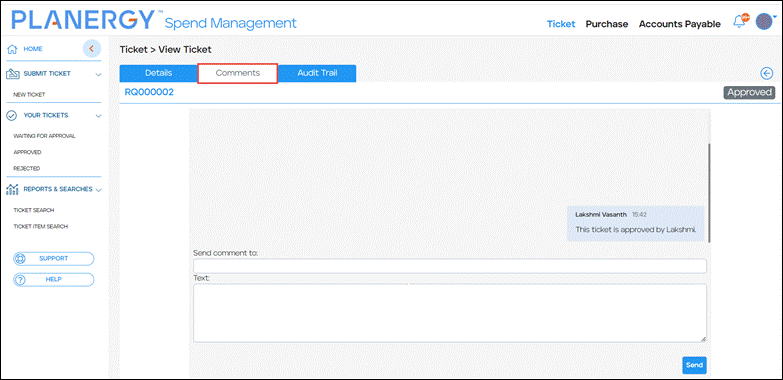
- You can also view the audit trail of the approved ticket under the Audit Trail tab from here.

- You can scroll down to replicate, print, or download the ticket as needed.

View Your Rejected Tickets
To view your tickets that are rejected in the system, follow the steps below.
- On the left navigation panel, press Your Tickets > Rejected. The Ticket > Rejected page is displayed.
 The tickets that are rejected are further classified into the following:
- Your Tickets Rejected by Other Users – This section displays all your tickets rejected by other users in the system.
- Other Users’ Tickets Rejected by You – This section displays all the other users’ tickets rejected by you in the system.
In the following example, we are showing you how to view the ticket classified under Your Tickets Rejected by Other Users. You can follow similar steps to view the tickets under Other Users’ Tickets Rejected by You.
- Press anywhere in the row of the ticket you wish to view.
 The Ticket > View Ticket page is displayed.
- You can add or view comments under the Comments tab from here.

- You can also view the audit trail of the ticket under the Audit Trail tab from here.

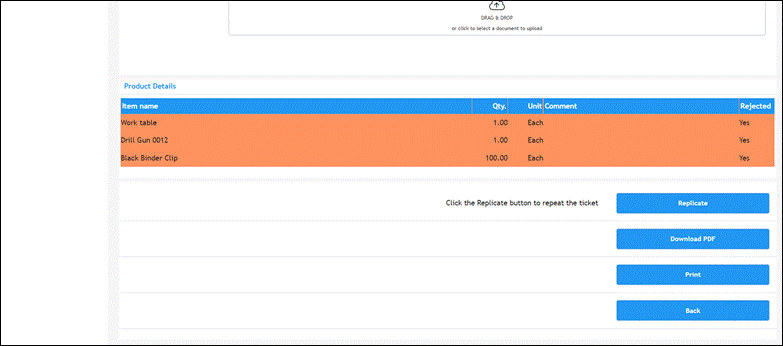
- You can scroll down to cancel, replicate, print, or download the ticket as needed.
Reports & Searches
The Reports & Searches section allows you to easily filter the required ticket in the system by using the search function. You can also export the tickets when needed for any offline documentation.
- On the Tickets > Home page, press Reports & Searches in the left navigation panel.
- The Reports & Searches subsections are displayed.

For more information, refer to the following section:
- Common Operations Across Tickets
- How to Search Ticket
- How to Search Ticket Items
- How to Export Your Tickets
How to Export Your Tickets
To export tickets in the system, follow the steps below.
- On the left navigation panel, press Reports & Search > Ticket Search.
 The Ticket > Ticket Search page is displayed.
 - Press the Export icon.
 The Export dropdown list is displayed.
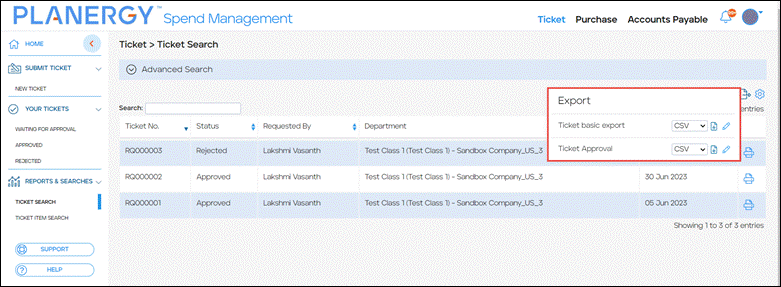
- Press the Run icon in the row of the export you wish to download.
 The Ticket document is downloaded to your system.
 - Press the document.
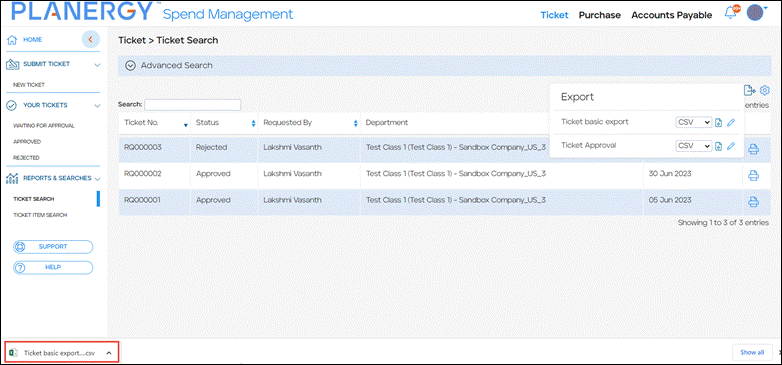 The Excel file is displayed.
Customize Ticket Export
To customize the exporting of the data in the ticket table, follow the steps below.
In the following example, we are showing you how to customize exporting in the Ticket Search section for the Ticket basic export option. You can follow similar steps to customize exporting for other options in the Ticket Search section and Ticket Item Search section.
- On the Export dialog, press the Edit icon in the row of the export you wish to customize.
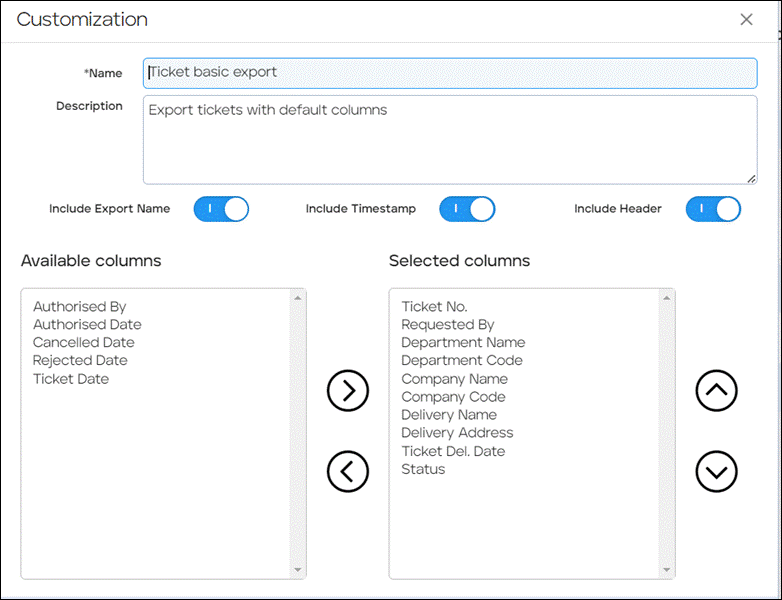
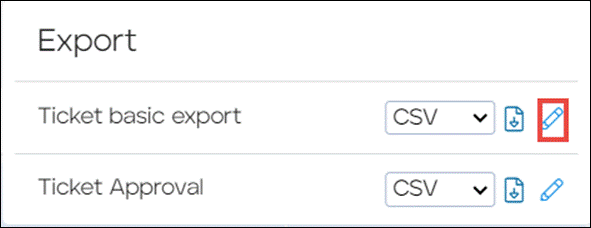 The Customization dialog is displayed.
Note
The fields with an asterisk (*) are mandatory. - Enter a unique name for the custom export in the Name field.
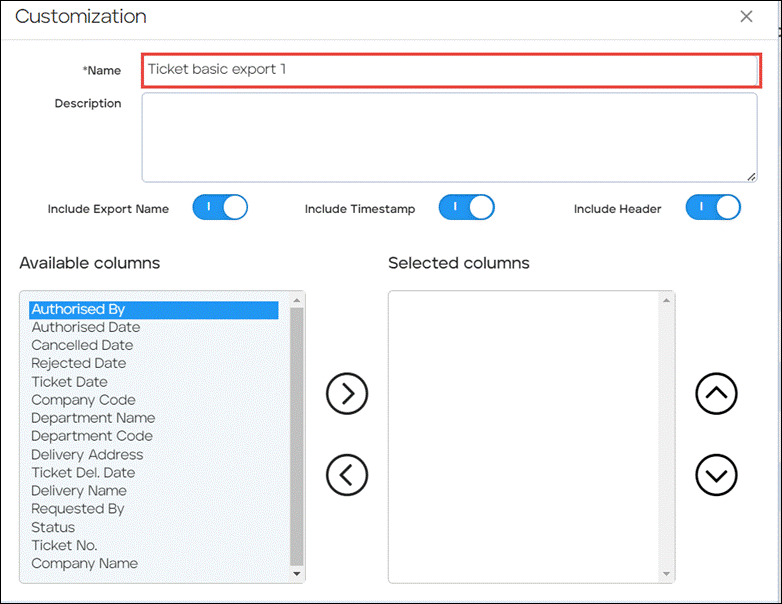
- Enter a description or information if any in the Description field.

- Enable the Include Export Name button if you wish to include the name of the export.

- Enable the Include Timestamp button if you wish to include the time.

- Enable the Include Header button if you wish to include the headers.

- Select the column you wish to add from the Available columns list.

- Press the Move Right icon to move the columns into the Selected columns list. You can press the Move Left icon to move the columns from the Selected columns list back to the Available columns list.

- Select the column names that you wish to reorder in the Selected columns list.

- Press the Move Up icon to move them down the list.
 You can press the Move Down icon to move the selected columns up the list.
 - Scroll down and press Save As New.
 The export is added to the Export dialog and can be run to download the customized document.
Note
You can archive the customized export by pressing Archive in the Customization dialog.
How to Search Ticket
To search for a specific ticket in the system, follow the steps below.
- On the left navigation panel, press Reports & Search > Ticket Search. The Ticket > Ticket Search page is displayed.

- Enter the characters present in Ticket No. in the quick search. The tickets that match the search criteria are displayed.
 You can further narrow down the search results using the Advanced Search option by following the steps below.
 - On the Ticket > Ticket Search page, press Advanced Search.
 The fields for entering the criteria for the Advanced Search are displayed.
- Enter the criteria in the respective field based on which you wish to search the tickets. The available fields are Ticket No., Ticket Date range, Item Name, Requested By, Ticket Delivery Date range, Item Comment, Company, Status, and Department.

- Press Search.
 The tickets with the data matching the criteria in the Advanced Search fields are displayed.
How to Search Ticket Items
To search for items requested in the tickets in the system, follow the steps below.
- On the left navigation panel, press Reports & Search > Ticket Item Search.
The Ticket > Ticket Item Search page is displayed.
- Enter the characters present in Item Name or Ticket No. in the quick search. The tickets that match the search criteria are displayed.
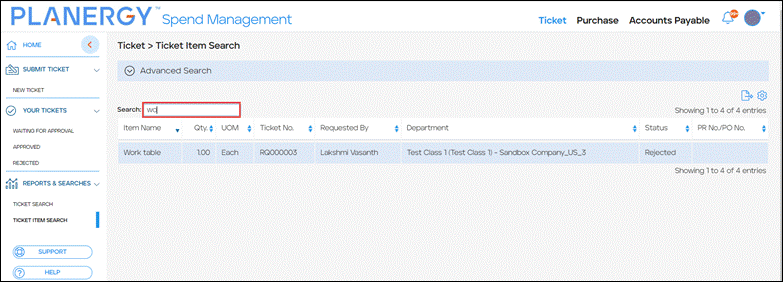
Note
You can further narrow down the search results using the Advanced Search option by following the steps below. - On the Ticket > Ticket Item Search page, press Advanced Search.
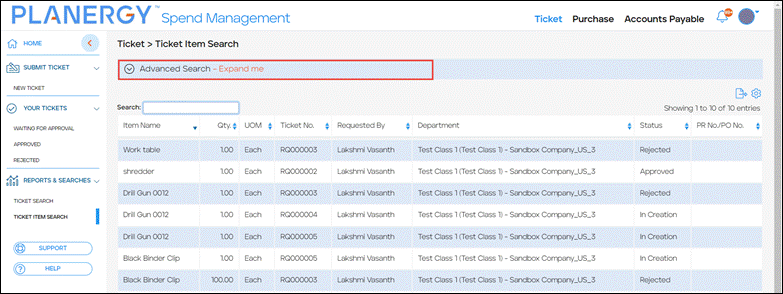 The fields for entering the criteria for the Advanced Search are displayed.
- Enter the criteria in the respective field based on which you wish to search the tickets. The available fields are Item Name, Item Comment, Ticket Item Status, Requested By, Ticket Date range, Company, Department, Ticket No., and Ticket Delivery Date range.

- Press Search.
 The ticket items with the data matching the criteria in the Advanced Search fields are displayed.
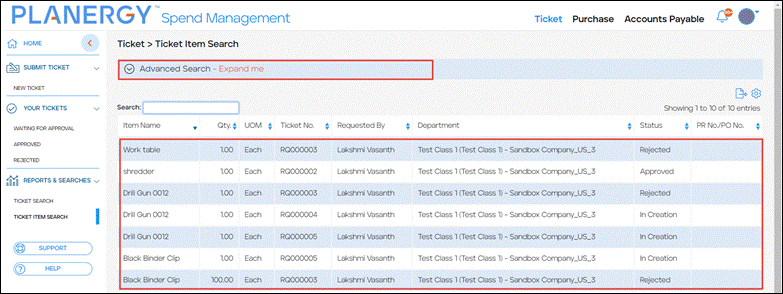
Note
- You can view the ticket containing the item by pressing anywhere in the row of the ticket item.
- You can customize exporting of ticket data. For more information, refer to Customize Ticket Export.
- You can also create new purchase orders using the tickets. For more information, refer to How to Create New Order From Ticket
