PLANERGY mobile application allows you to streamline your procurement and finance processes remotely, improving productivity.
You can request, approve, and manage purchase orders from anywhere on any device using the PLANERGY cloud app.
Additionally, you can utilize all the features of PLANERGY to automatically generate bills in your accounting software or ERP for all authorized invoices.
Installing PLANERGY Application on Mobile
To install the PLANERGY application on your mobile phone, follow the steps below.
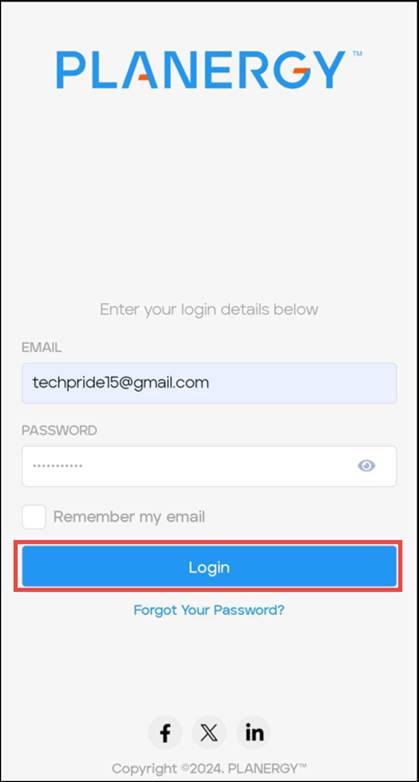
- Open the PLANERGY web portal in any browser (Google Chrome, Mozilla Firefox, etc) on your mobile device.
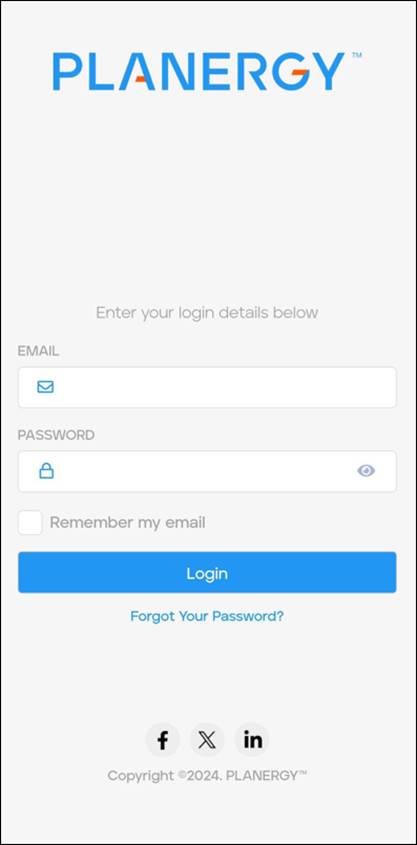
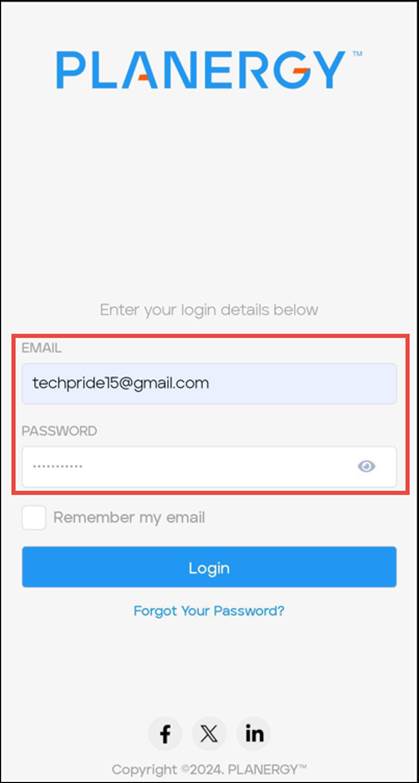
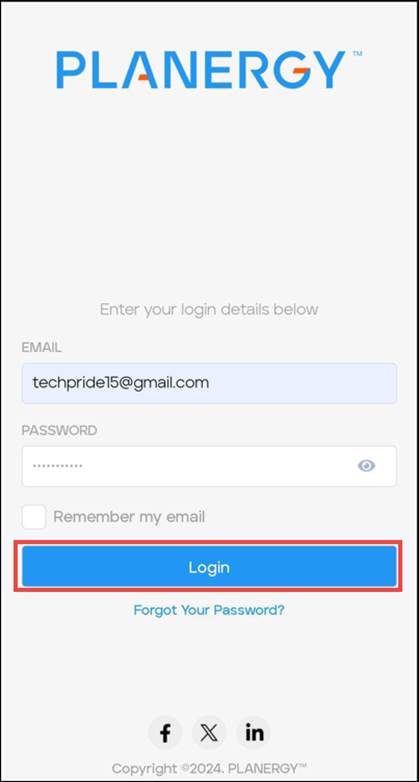
- Enter your PLANERGY account credentials in the Email and Password fields.
- Tap Login.
 The Purchase > Home screen is displayed.
 - Tap Install.
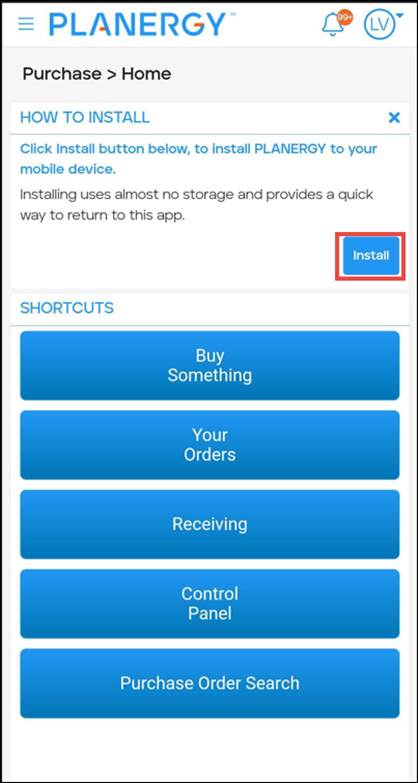 The Install app popup message is displayed.
 - Tap Install.
 The PLANERGY app is successfully installed.
How to Log In/Out of PLANERGY App?
To log in to the PLANERGY app, follow the steps below:
- Tap the PLANERGY app on your mobile device.
 The Login screen is displayed.
 - Enter your PLANERGY account credentials in the respective fields and tap Login.
 The Purchase > Home screen is displayed.
 To log off from PLANERGY, follow the steps below:
-
- Tap your Profile icon on the top-left corner of the screen.

- Press Log Out from the dropdown menu.
 You will be logged out of the PLANERGY mobile application.
- Tap your Profile icon on the top-left corner of the screen.
Navigating between Modules
You can easily navigate between the modules in the PLANERGY mobile app.
- Open the PLANERGY mobile application and log in to your PLANERGY account.The Purchase > Home screen is displayed.
- Tap the Navigation icon on the top-right corner of the application.
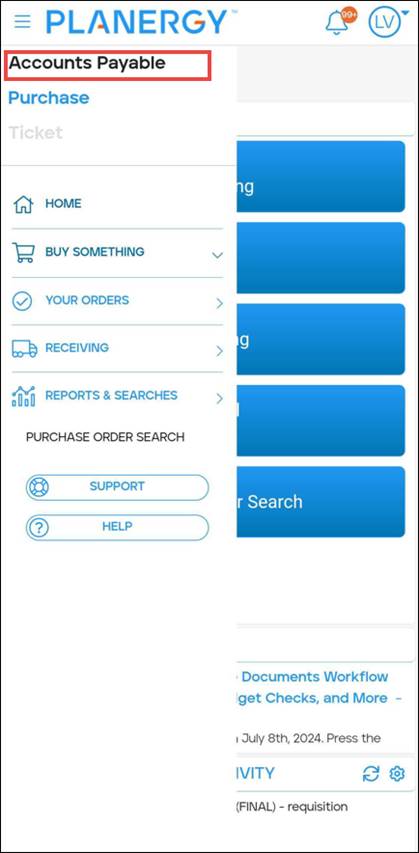
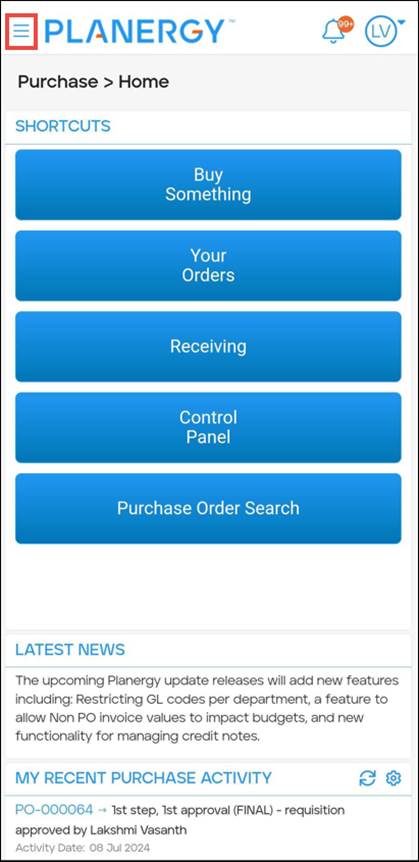 The Navigation menu is displayed.The following example demonstrates how to navigate to the Accounts Payable module.
Note
You can similarly access other modules for which you have user permission. - Tap Accounts Payable.
 The AP > Home screen is displayed.
Purchase Overview
The PLANERGY Purchase Order System is a cloud-based application that provides real-time data to support your purchasing decision, thus ensuring efficient procurement of items.
Using the mobile PLANERGY app – Purchase module, you can remotely manage requisitions, automate approval flows for POs, and track spending.
Purchase > Home Screen
The Purchase > Home screen gives you quick access to shortcuts, including all the core sections of the Purchase module and information such as the latest news, recent purchase activity, etc.
- Open the PLANERGY mobile application and log in to your PLANERGY account. The Purchase > Home screen is displayed by default.
Note
For more details, refer to the following:
- Shortcuts
- Latest News
- My Recent Purchase Activity
- Expenditure Chart
- My Orders In Creation
- Favorite Reports
- My Orders In Approval Process
- My Orders To Be Sent
- My Open Orders To Be Received
Note
Buy Something
In the Buy Something section, you can create purchase requisitions and orders in PLANERGY remotely. This section also allows you to repeat any purchase requisition or order when needed.
- Open the PLANERGY mobile application and log in to your PLANERGY account.The Purchase > Home screen is displayed by default.
- Tap Buy Something.
 The Purchase > Buy Something screen is displayed.
You can create a new order, repeat an order, and create a new online catalog order. These operations on the mobile application follow similar steps as those in the web portal.
For more information, refer to the following sections.
Your Orders
The Your Orders section provides access to all orders associated with you in the system, categorized into three subsections based on their status – Orders Waiting for Approval, Approved, or Rejected. Each subsection lists orders you have created and those awaiting your approval.
- On the Purchase > Home screen, tap the Your Order on the Shortcuts menu.
 Alternatively, tap Your Orders in the left navigation menu.
 The Your Orders dropdown menu is displayed.
Note
By default, the Purchase > Waiting For Approval screen is displayed when you tap Your Orders on the Shortcuts card.
You can access the subsections of Your Orders and perform the various actions, similar to the process on the web portal.
For more information, please refer to the following sections.
Orders Waiting for Approval
You can view the details of a purchase requisition awaiting approval in the system. Additionally, if you have the user permission, you can approve/reject requisitions.
- On the Purchase > Home screen, tap Your Orders > Waiting For Approval in the left navigation menu.
 The Purchase > Waiting for Approval screen is displayed.
- Tap anywhere in the order row to view the details. The Purchases > View Requisition screen is displayed.
The displays a purchase requisition under Your Orders Waiting For Approval From Other Users.
You can scroll down to Other Users’ Orders Waiting For Approval From You and follow similar steps to view/edit purchase requisitions under it.

Note
- You can make the necessary changes to the fields and save the changes.
- You may approve or reject the purchase requisition if your user permissions settings allow. If not, you can forward it to other approvers.
- The Back arrow icon at the bottom of the screen allows you to navigate to the previous order, while the Forward arrow icon lets you move to the next one.
How to Approve Orders Waiting for Your Approval
You can approve a purchase requisition waiting for your approval if the user permission setting allows you to do so.
- On the Purchase > Waiting For Approval screen, tap anywhere in the row of the purchase requisition you wish to approve.
 The Purchases > View Requisition screen is displayed.
 - Press Approve to approve the purchase requisition.

Note
The success notification is displayed and the purchase order is listed in the Approved orders section.
Note
The Back arrow icon at the bottom of the screen allows you to navigate to the previous invoice, while the Forward arrow icon lets you move to the next invoice.
You can perform various actions such as approving orders via email, rejecting orders, checking budget, etc, similar to the process on the web portal.
For more information, please refer to the following sections.
- How to Approve Orders Via Email
- How to Reject Orders Waiting for Your Approval
- How to Check Budget for Order Waiting for Your Approval
- How to Archive Order Waiting for Approval
- View Audit Trail of Orders Waiting for Approval
- How to Send Orders for Approval
- How to Cancel Order
- How to Request Amendment
Approved Orders
The Approved section allows you to review all the orders approved within the system that are pending to be received.
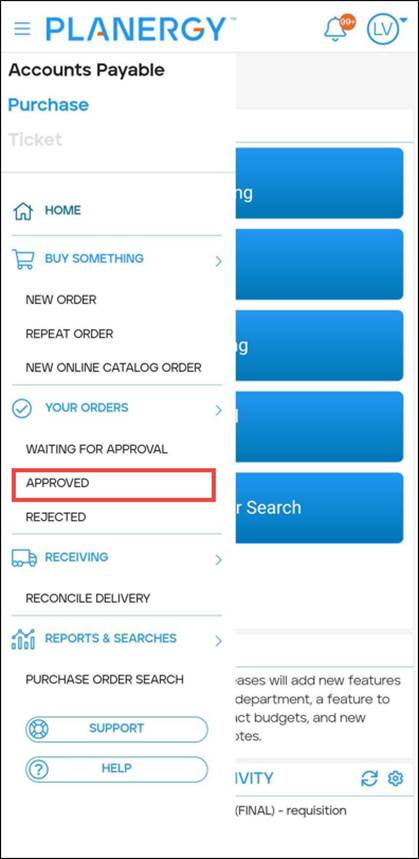
- On the Purchase > Home screen, tap Your Orders in the left navigation menu.
 The Your Orders dropdown menu is displayed.
 - Tap Approved.
 The Purchase > Approved screen is displayed.
For more information regarding the various operations that are similar to web portal, refer to the following sections:
- View Details of Approved Orders
- View Invoices for Approved Orders
- View Audit Trail for Approved Orders
Rejected Orders
The Rejected Orders section allows you to access all the orders associated with you that have been rejected by you or by other approvers.
- On the Purchase > Home screen, tap Your Order > Rejected in the left navigation panel.
 The Purchase > Rejected screen is displayed.
For more information regarding the various operations that are similar to web portal, refer to the following sections:
Receiving
The Receiving section allows you to access all purchase orders you have permission to receive goods for. Note that each order has to be individually reconciled.
- On the Purchase > Home screen, tap the Receiving on the Shortcuts card.
 Alternatively, tap Receiving in the left navigation menu.
 The Purchase > Receiving screen is displayed.
For more information regarding the various operations that are similar to web portal, refer to the following sections:
Reports & Search
The Reports & Search section provides easy access to review all your purchase orders and purchase requisitions in the system.
- On the Purchase > Home screen, tap Purchase Order Search on the Shortcuts card.
 Alternatively, tap Reports & Search > Purchase Order Search in the left navigation menu.
 The Purchase > Order Search screen is displayed.
For more information regarding the operation similar to the web portal, refer to Purchase Order Search.
Accounts Payable Overview
PLANERGY’s AP Automation automates invoice processing, verification, and authorization using optical character recognition (OCR), AI, and machine learning.
The Accounts Payable section on the mobile application allows you to remotely create a centralized and streamlined accounts payable process ensuring faster reconciliation than manual systems for reporting, analyzing, and reconciling across all entities to have real-time consolidated spend visibility.
Account Payable > Home Screen
The Home screen allows easy navigation to the core sections of the Accounts Payable module. You can quickly access information displayed on cards such as the latest news, recent invoice activity, shortcuts, etc.
- Log in to your PLANERGY account on the PLANERGY mobile application and navigate to the Accounts Payable module.For more information, please refer to Navigating between Modules.
 The Accounts Payable > Home screen is displayed.
- The displayed information on the cards is similar to the respective widgets within the web portal.
For more details, refer to the following sections:
- Shortcuts
- Latest News
- My Recent Invoice Activity
- Expenditure And Invoiced Bar Charts
- My Invoices Waiting For Authorization
- My Authotized Invoices To Be Posted
- Invoices Waiting For My Authorization
Reconcile Invoices
Using the PLANERGY mobile application, you can manually reconcile invoices with purchase orders or without purchase orders remotely. Additionally, you can perform many more actions on the invoice documents such as view invoices sent through email, upload invoices manually, search invoices, etc.
- On the AP > Home screen, tap the Reconcile Invoices on the Shortcuts card.

Reconcile Invoices section is further classified into the following subsections:
- Reconcile New PO Invoice – This allows you to reconcile the invoices with purchase orders that are associated with them. The steps for reconciling new PO invoices are similar to those on the web portal.
For more information, please refer to How to Reconcile New PO Invoice Manually. - Reconcile New Non PO Invoice – This allows you to reconcile the invoices having no purchase orders associated with them. The steps for reconciling new Non-PO invoices are similar to those on the web portal.
For more information, please refer How to Reconcile a New Non PO Invoice Manually. - Invoice Documents – This section allows you to scan or upload the invoice documents to be stored in your account preparing them to be matched, authorized, and processed for payment. The operations within invoice documents are similar to those on the web portal.
For more information, please refer to Invoice Documents.

Your Invoices
The Your Invoices section on the PLANERGY mobile application allows you to access all your invoices in the system to authorize or reject invoices for payment remotely.
Note
- On the AP > Home screen, tap the Your Invoices on the Shortcuts card.
 The Invoices Waiting for Authorization screen is displayed.
The invoices in the system are classified into the following subsections:
- Waiting For Authorization – This section displays all the invoices still waiting for authorization. Only after the invoice authorization, the invoice can be sent for payment.
- Authorized – This section displays all the already authorized invoices that are ready for payment.
- Rejected – This section displays all the invoices that are rejected for payment.
Note
For more information, please refer to Your Invoices.
Reports & Searches
The Reports & Searches section allows easy access to review all invoices, outstanding POs, and various accounts payable reports. You can create reports, export invoices and reports for charting figures or generating pivot tables and offline documentation.
- On the Accounts Payable > Home screen, press the Reports & Searches in the left navigation menu.
The Reports & Searches subsections are displayed.
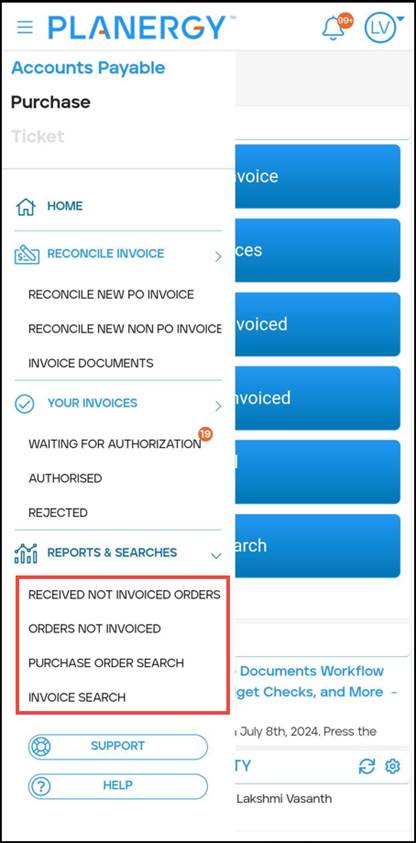
The subsections of Reports & Searches are as follows:
- Received Not Invoiced Orders – This section displays the outstanding purchase orders, not fully invoiced but marked as delivered.
- Orders Not Invoices – This section displays the purchase orders that are not invoiced. The order may or may not be delivered.
- Purchase Order Search – This section displays and allows you to search the purchase orders in the system, including requisitions and canceled orders.
- Invoice Search – This section allows you to view and search all the invoices in the system for which you have permission.
- Advance Reporting – This section enables viewing the various graphs, creating custom reports, scheduling reports, etc.
Note
For more information, refer to the following sections:
- How to Customize the Table
- How to Sort the Table
- How to Export Data in Table
- Received Not Invoiced Orders
- Orders Not Invoiced
- Purchase Order Search
- Invoice Search
- Advanced Reporting