The PLANERGY CheckOut Extension is a browser extension that extends the functionality of PLANERGY to import items directly from the carts of e-commerce websites.
This feature will automatically import item information into the line item section of your purchase requisition in PLANERGY, saving time and increasing accuracy when requesting a purchase.
The PLANERGY CheckOut Extension will work in Chrome or Microsoft Edge.
For more information, refer to How to Setup PLANERGY CheckOut Extension.
How to Set Up PLANERGY CheckOut Extension
To set up PLANERGY CheckOut Extension in Chrome or Microsoft Edge, refer to the following sections.
- Install PLANERGY CheckOut Extension
- Enable PLANERGY CheckOut Extension in Your PLANERGY Account
- Create PLANERGY CheckOut Supplier in Your PLANERGY Account
Install PLANERGY CheckOut Extension
To install the PLANERGY CheckOut extension on your browser, follow the steps below.
Note
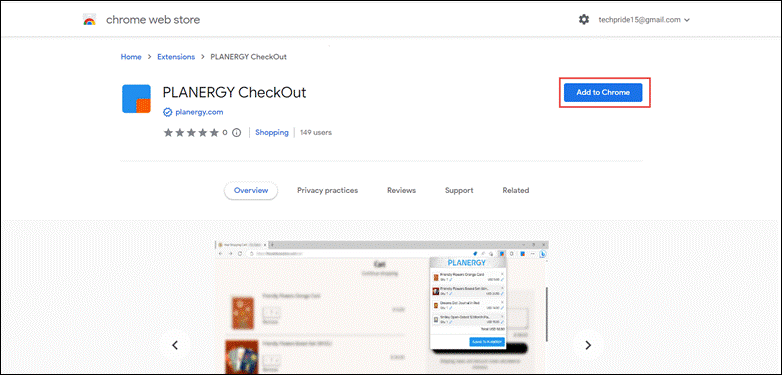
- Navigate to Chrome Web Store Home > Extensions > PLANERGY CheckOut Extension using the link Chrome Web Store.The Chrome web store > PLANERGY CheckOut page is displayed.
- Press Add to Chrome.
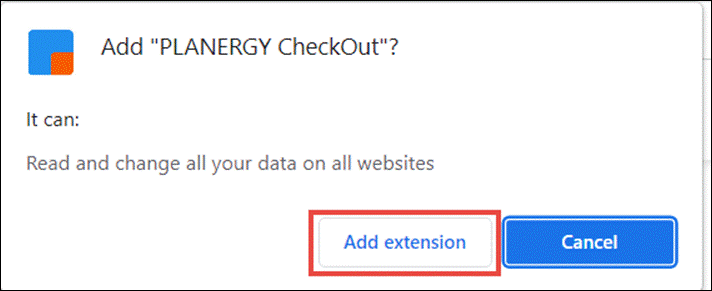
 The Add “PLANERGY CheckOut”? dialog is displayed.
 - Press Add extension.
 The success dialog is displayed.

The next step is to enable the PLANERGY CheckOut Extension.
Enable PLANERGY CheckOut Extension in Your PLANERGY Account
The PLANERGY CheckOut extension can be enabled in your PLANERGY account only by the account owner.
To integrate PLANERGY CheckOut Extension into your account, follow the steps below.
- Navigate to Control Panel > Advanced Controls and press Integrations.
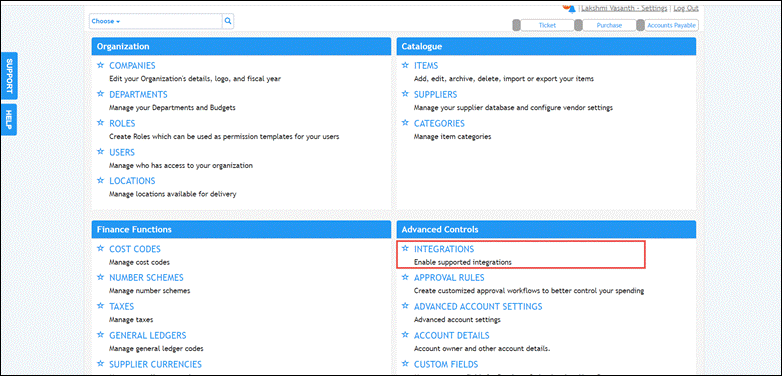 The Control Panel > Integrations page is displayed.
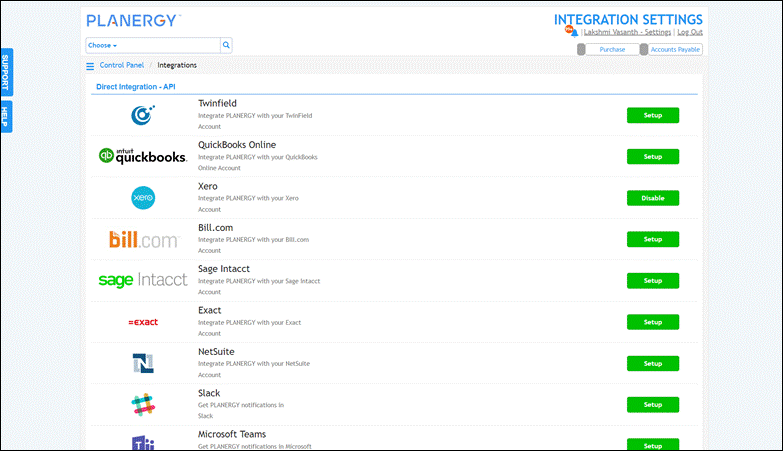
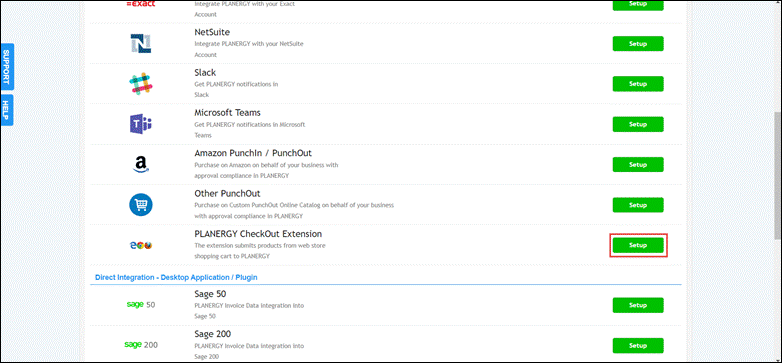
- Scroll down and press Setup in the row for PLANERGY CheckOut Extension.
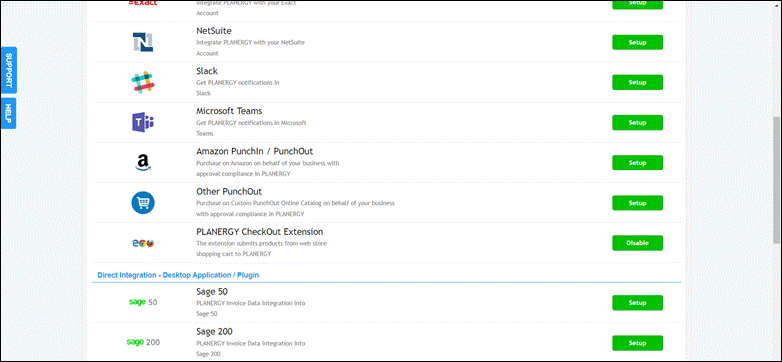
 The PLANERGY Checkout Extension is enabled and the button will update to be Disable.
Now, you can create a PLANERGY CheckOut Supplier.
Create PLANERGY a CheckOut Supplier
To create a PLANERGY CheckOut Supplier after enabling the PLANERGY CheckOut Extension in your PLANERGY account, follow the steps below.
Note
- Navigate to Control Panel > Catalog and press Suppliers.
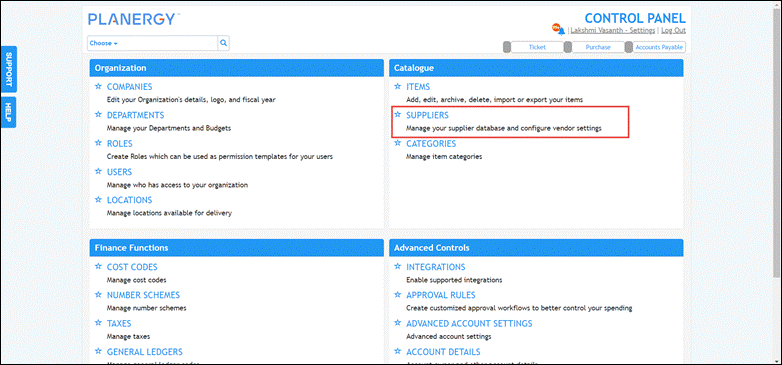 The Control Panel > Suppliers page is displayed.
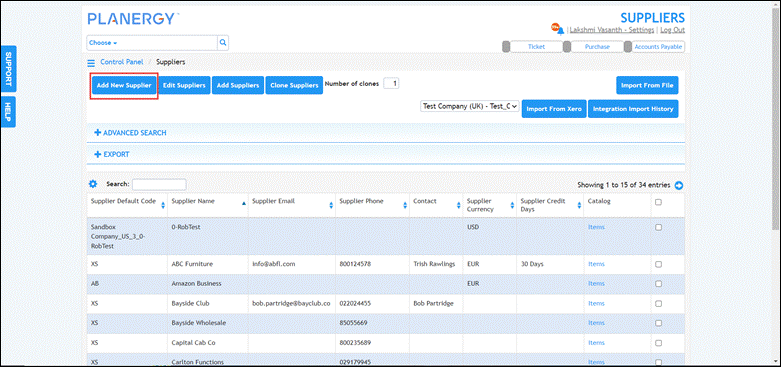
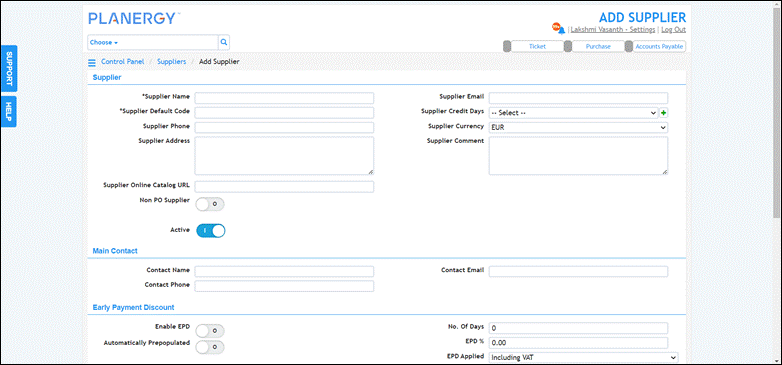
- Press Add New Supplier to add a new supplier to your account.The Add Supplier page is displayed.
Note
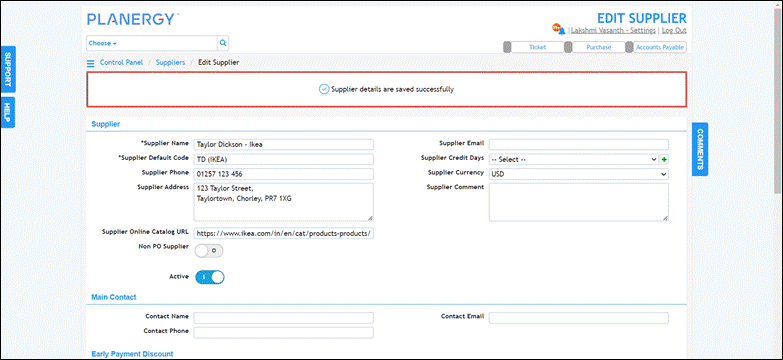
Only after the PLANERGY CheckOut Extension is enabled in your PLANERGY account will the Supplier Online Catalog URL field be visible. - Enter the online shop’s web address in the Supplier Online Catalog URL field.

- After entering/updating the required details, press Save.
 The success notification is displayed.
How to Create a PLANERGY CheckOut Order
After the setup is completed, you can create a new purchase order using the PLANERGY Checkout Extension. For more information, refer to PLANERGY Checkout Order.
How to Integrate a New Supplier’s Cart with PLANERGY CheckOut
You can also directly map the fields of the suppliers’ websites into PLANERGY. For more information, refer to How to Integrate Supplier Shopping Cart Fields Using PLANERGY CheckOut Extension.
