Using the PLANERGY Amazon Integration allows you to experience the seamless integration of PLANERGY and Amazon Business that combines Amazon’s extensive product selection, competitive pricing, and shopping convenience with the comprehensive control, visibility, and spend analysis offered by PLANERGY Spend Management Software.
It enables you to simplify and streamline the entire purchasing process from Amazon Business.
How PLANERGY Amazon Punch-in/PunchOut Integration Works

For more information on setting up the PLANERGY Amazon Punch-in/PunchOut, refer to the following sections:
- Configure PunchOut Settings in Your Amazon Business Account
- PunchOut Setup on Amazon Business Account
- Enable Amazon Punch-in/PunchOut Feature in PLANERGY
- How to Add Amazon PunchOut Supplier in PLANERGY
Configure PunchOut Settings in Your Amazon Business Account
PLANERGY is part of the Amazon Partner Network and integrates directly with Amazon Business using either PunchOut or Punch-in.
To use the Amazon Business Punch-in/PunchOut feature, you must have an Amazon Business account and follow the steps within that account to start using PunchOut integrations.
For more information, refer to PLANERGY PunchOut Self-Service Guide for Amazon Business.
PunchOut Setup on Amazon Business Account
If you don’t already have an Amazon Business account, please register for one here: www.Amazon.com/Business.
- On your Amazon Business Home page, press Business Settings in Your Account dropdown menu.
 The Business Settings screen is displayed.
 - Press Groups under Members.
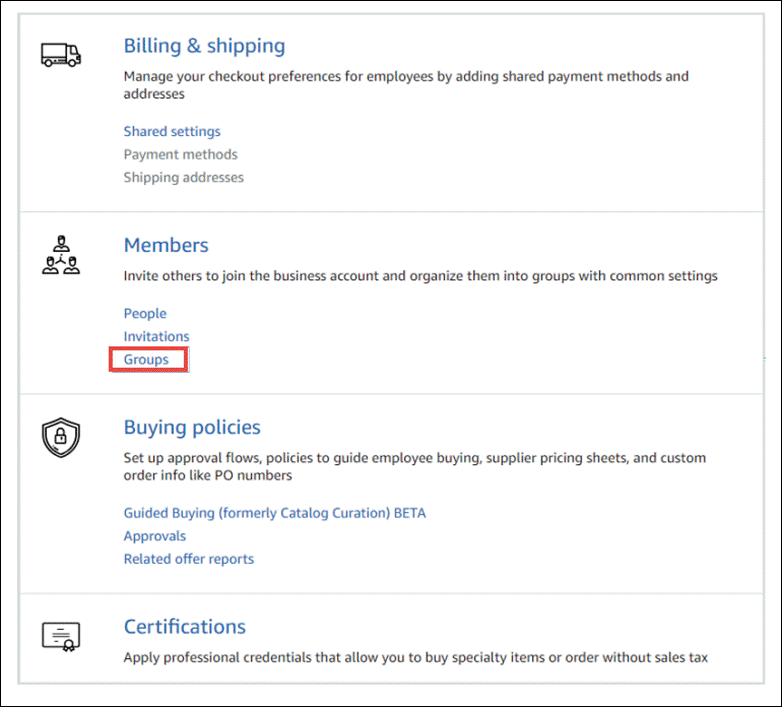 The Groups screen is displayed.
- Press Add Group.
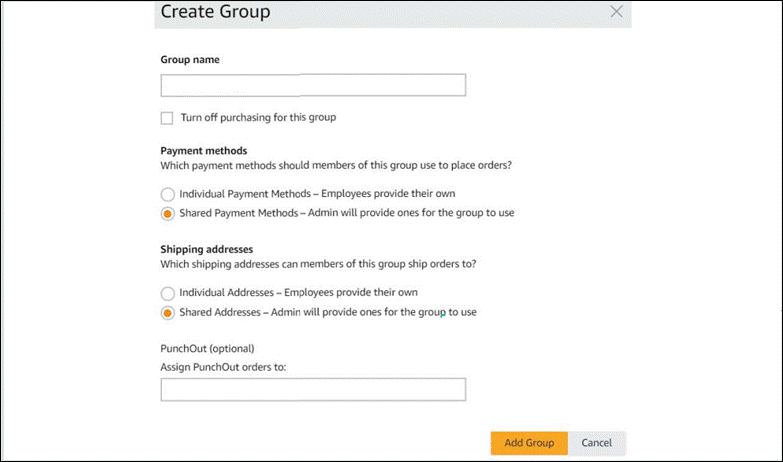 The Create Group screen is displayed.
 - Enter a name for the group in the Group Name field.
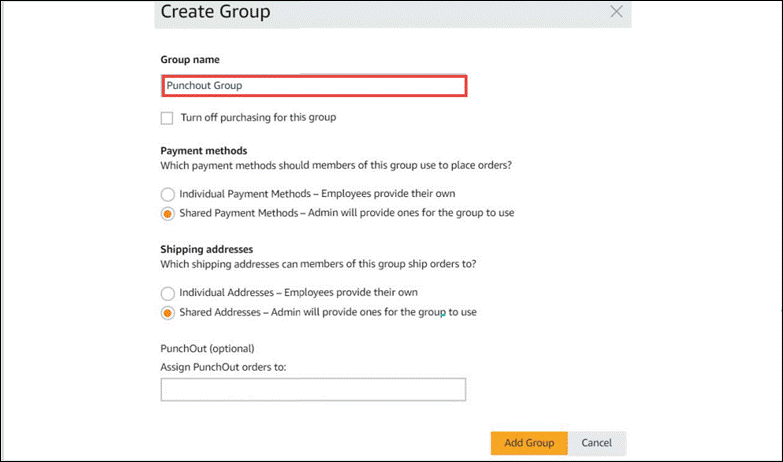
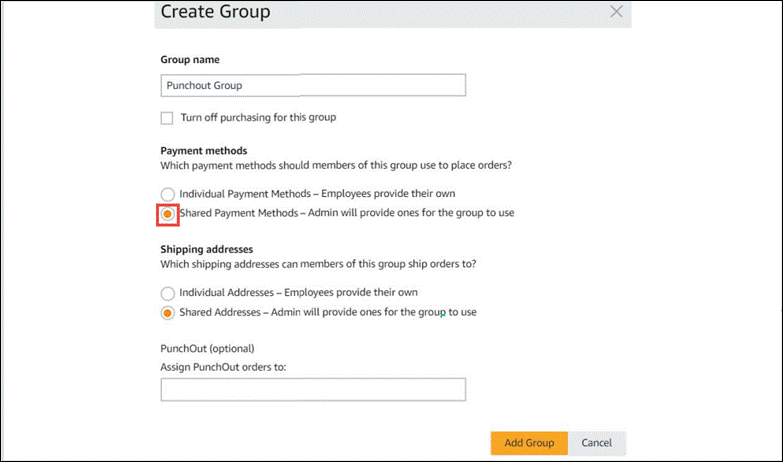
- Select the payment method option you wish to give your users in the Payment methods section. The options available are
-
- Individual Payment Method – This payment method allows you to give each user the option to add their own payment method.
- Shared Payment Method – This payment method allows you to use a single payment method for the entire group.
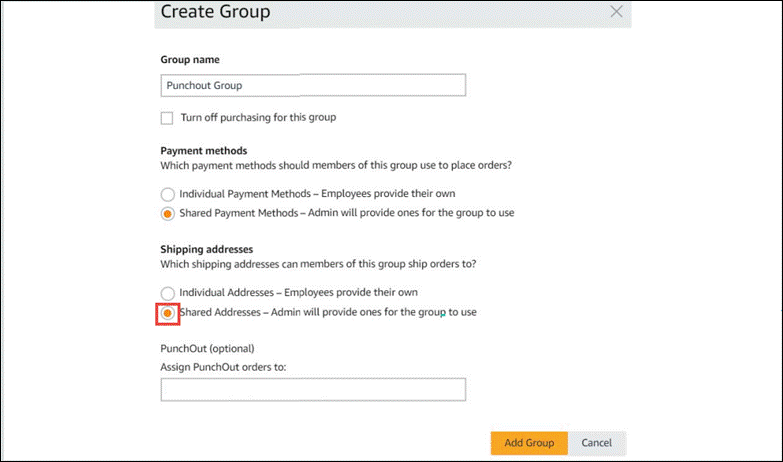
- Select the preferred address option to be used by your users for shipping orders in the Shipping addresses section. The options available are
-
- Individual addresses – This option allows each user to provide their own address.
- Shared Payment Method – This option allows you to provide an address for the entire group to use.
Note
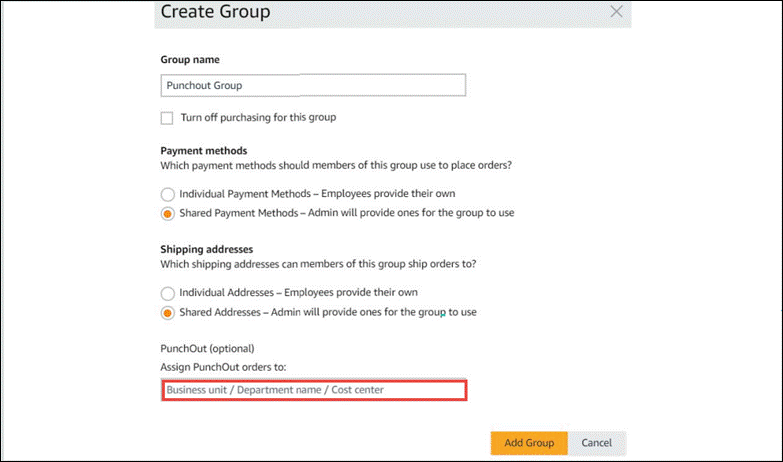
- Enter the location to which the PunchOut order has to be assigned in the PunchOut field.
- Press Add Group.
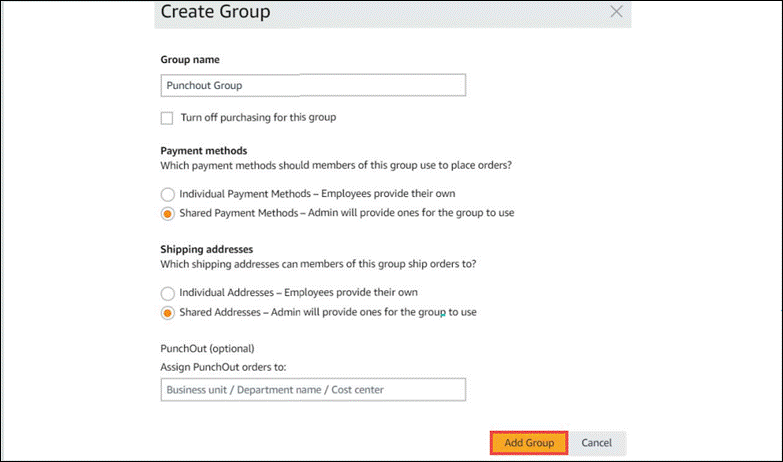 The group is created.
 - Press the newly created group. If the new group created is not immediately displayed, simply refresh the web page.
 The Business Settings screen for the new group is displayed.
 - Press Configure Purchasing System under System Integrations.
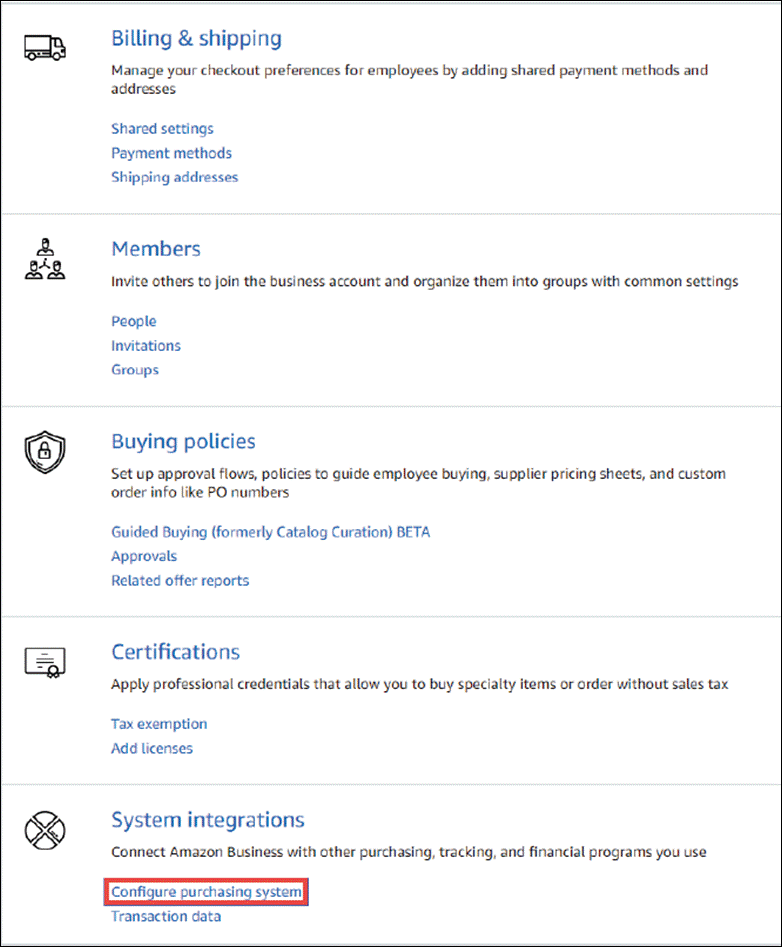 The Setup your purchasing system dialog is displayed.
 - Select PLANERGY from the dropdown list and press Save.
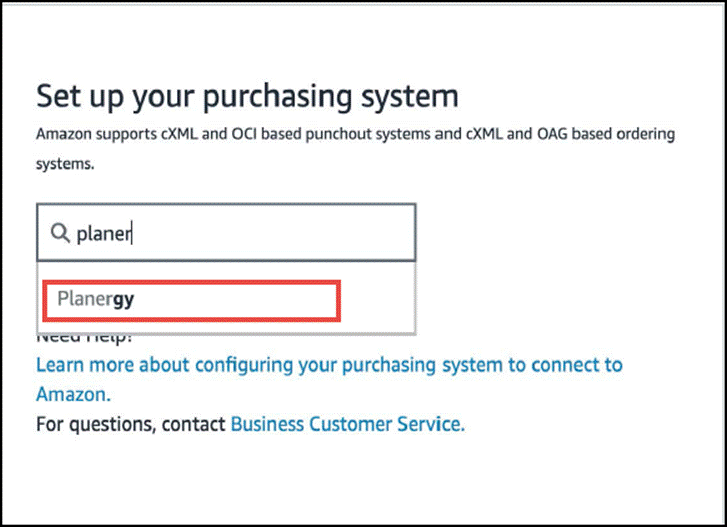 You will receive your system login (From Identity), password (Shared Secret), PunchOut URL, and Purchase Order URL.
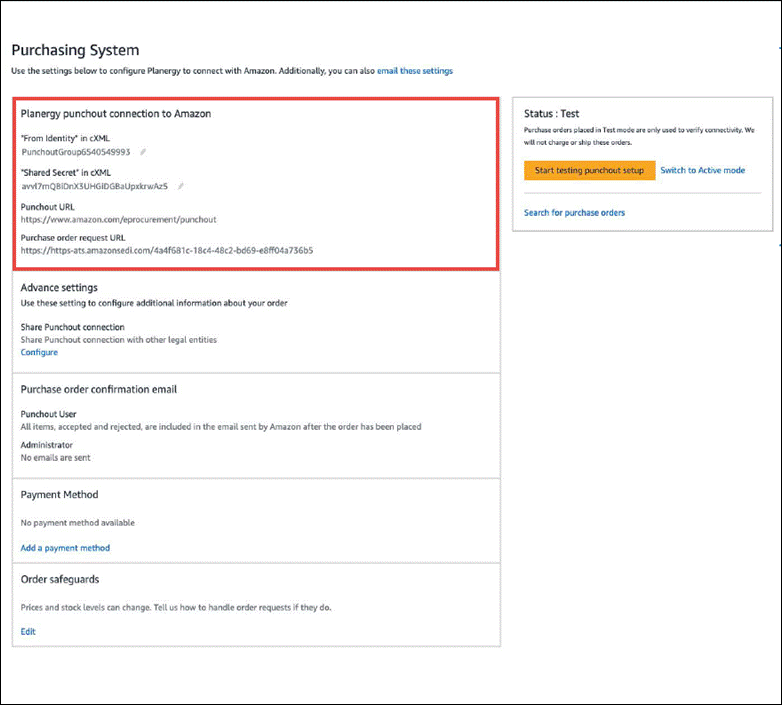
- Copy this information to be used when setting up your Amazon vendor in PLANERGY.
Now you can enable the Amazon PunchOut/Punch-in feature on your PLANERGY account. For more information, refer to Enable Amazon PunchOut/Punch-in Feature in PLANERGY.
Enable Amazon PunchOut/Punch-in Feature in PLANERGY
To start using the Amazon Business catalog for procuring the items and creating a requisition directly in PLANERGY, you must first enable Amazon PunchOut/Punch-in feature enable it in your PLANERGY account by following the steps below.
- Navigate to Control Panel > Advanced Controls and press Integrations.
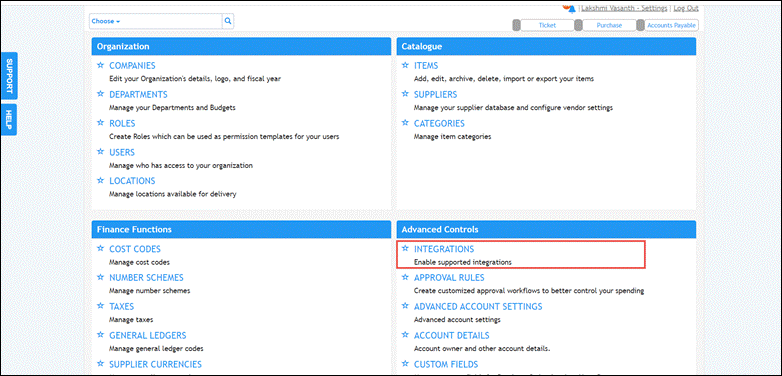 The Control Panel > Integrations page is displayed.
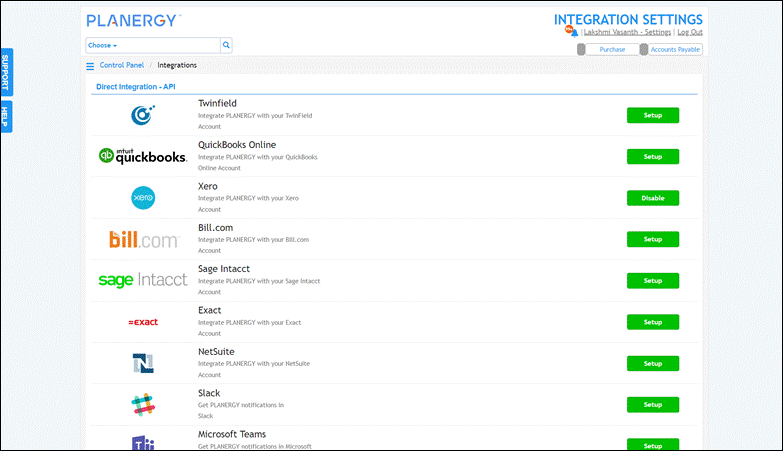
- Scroll down and press Setup in the row of Amazon PunchOut/Punch-in.
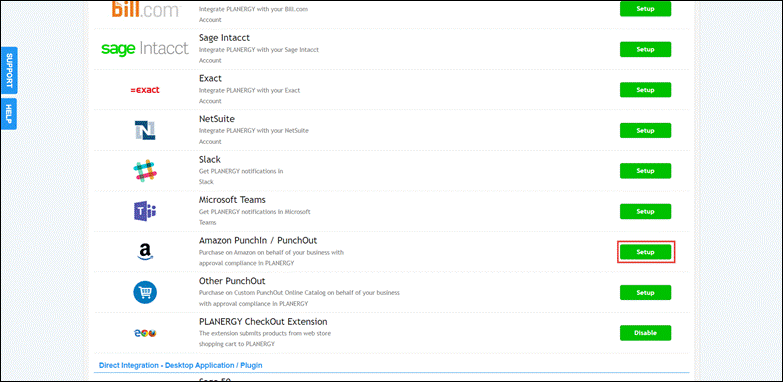 The Punch-in/PunchOut feature is enabled on your account and an Amazon supplier will be automatically created and ready to be updated.
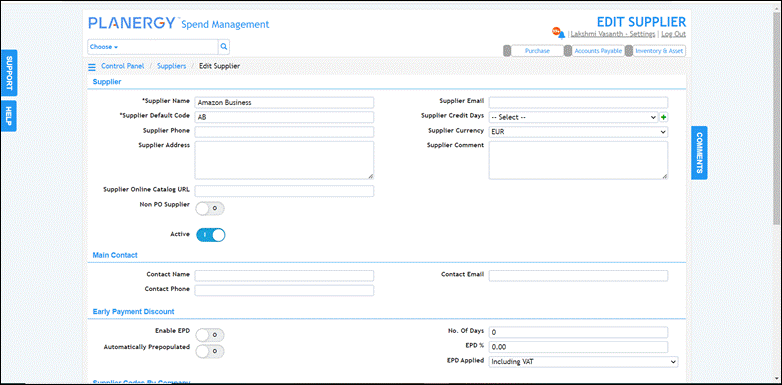 For more information, refer to How to Add Amazon PunchOut Supplier in PLANERGY.
How to Add Amazon PunchOut Supplier in PLANERGY
To add an Amazon PunchOut Supplier after enabling the Amazon Punch-in/PunchOut feature in your PLANERGY account, follow the steps below.
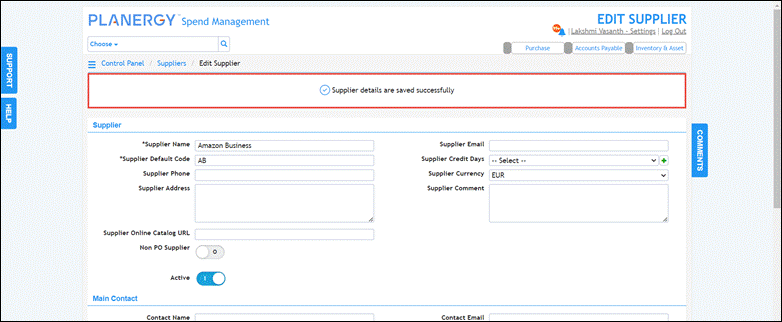
- On the Edit Supplier page created for Amazon Business, enter the details required in the fields.
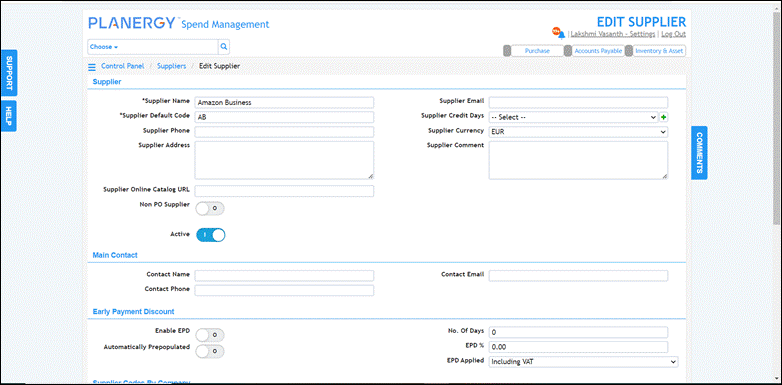 For more information on adding the supplier details, refer to How to Add/Edit a Supplier.
 - Scroll down to the PunchOut section.

- Check the box Is Enabled.

- Enter the user identity set up on the supplier web store in the From/Sender Identity field. Note that the From Identity field in the Amazon Business settings is the same as Identity in PLANERGY.

- Enter the user password that is set up on the supplier web store in the Shared Secret field.
 Note that the Shared Secret field in the Amazon Business settings is the same as the Secret field in PLANERGY.
 - Enter the Punchout URL to log in to the supplier web store in the PunchOut URL field. Note that the PunchOut URL field in the Amazon Business settings is the same as the PunchOut URL field in PLANERGY.

- Enter the request URL in the Purchase Request URL field.
 Note that the Purchase order request URL field in the Amazon Business settings is the same as the Purchase request URL field in PLANERGY.
 - Press Save.
 The success notification is displayed.