Control Panel V9.6
PLANERGY V9.6 brings a new look to the Control Panel of PLANERGY. This updated User Interface is more intuitive and streamlined than the previous versions. We have taken each section of the Control Panel and organized them into 4 core areas. This version provides a more transparent and descriptive Control Panel, with ease of use and navigation in mind. We have also added more functionality and control over Integrations and switchable features.
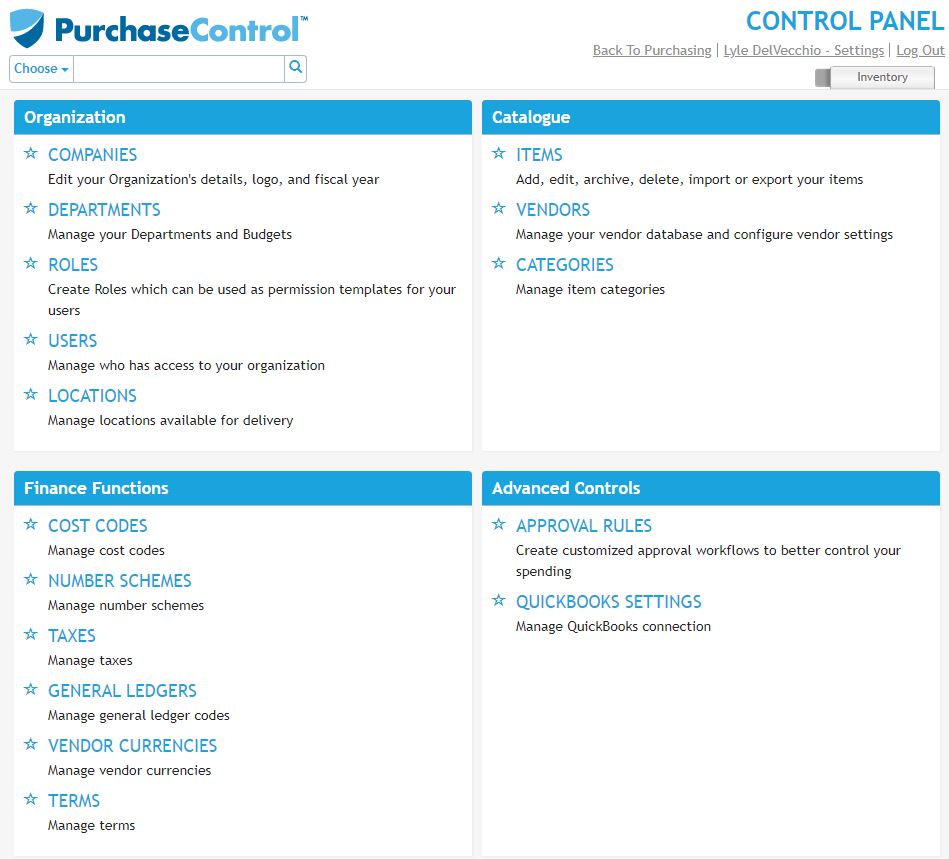
Users, Roles, Departments, Companies, and Locations have been moved to the Organization section.
Vendors, Items, and Categories, have been moved to the Catalogue section.
GL Codes, Terms, Tax Codes, Currencies, and Numbering Schemes have been moved to the Finance Functions section.
Approval Rules and integration options have been moved to the Advanced Controls section.
Organization
In the Organization section of the Control Panel, you’ll set up the bulk of PLANERGY. Here is where you’ll create your company (or companies, if you’re using PLANERGY as part of a multi-company setup).
In the Companies section, you’ll be able to edit the details of your organization, upload your logo, and provide details about your fiscal year.
In the Departments section, you’ll set up each department within your organization as well as their budgets.
In the Roles section, you’ll create roles to be used as permissions templates for users. By default, there are a number of options to choose from in the system to make this process easier for you.
In the Users section, you’ll create accounts for each of the people you want to have access to your organization. Each user will be assigned a role that determines what they can and cannot do in the system, as well as what they can and cannot see. For instance, requesters won’t be able to approve requisitions or see budget information.
In the Locations section, you’ll set up all the delivery locations for your organization. This includes various office locations and warehouse locations. You’ll also be able to choose which users have access to which locations.
Catalogue
The Catalogue section of the PLANERGY Control Panel is where you’ll go to add items, vendors, and categories for your items.
In the Items section, you’ll be able to create a list of items you want users to be able to request and order. If you have multiple vendors for a single item, you can include those details, to allow users to choose the best price for the item, or to use as a backup should one vendor not be able to fulfill the order as requested.
In the Vendors section, you’ll be able to add any vendors you’re working with and attach their items. You’ll also be able to upload documents directly to the vendors so you can keep track of contracts for easier compliance management.
In the Categories section, you’ll be able to create categories to assign items to, for easier budgeting and reporting purposes.
Finance Functions
The Finance Functions section is where you will handle all the financial setup. Here, you’ll be able to enter cost costs, number schemes for your requisitions and purchase order numbers, tax rates, general ledger codes, vendor currencies, and payment terms.
These sections are designed to make it easier to manage budget and spend by assigning cost codes and general ledger codes to items automatically. All of this information is available in reporting, so you can look at how much you’re spending with certain vendors, on certain items, in various categories, etc. based on your needs.
Advanced Controls
In the Advanced Controls section of the PLANERGY Control Panel, you’ll be able to designate a series of approval rules. These approval rules are intended to create automated approval workflows for greater spending control.
Using approval workflows, you can set up multi-step approvals at certain thresholds, allow people to automatically approve requisitions under a certain threshold, and so on, as needed by your current approval workflow.