The Organization section within the Control Panel is the core section that allows you to set up different companies, diverse departments, and user permissions and roles.
Additionally, you can configure and manage the delivery locations for use across various orders and reports within the system.
For more information, refer to the following sections:
Companies
Companies Overview
You can add and manage companies from the Companies section within the Control Panel, provided you have the necessary user permissions.
Note that the Companies in PLANERGY are the highest level of the structural setup within the system.
The orders for each company within the system will have the related company-specific details on their purchase orders. All orders created must be assigned to a department that is related to a company.
- Navigate to the Organizations section on the Control Panel page.
- Press Companies.
For more information, refer to the following sections
How to Add/Edit a Company
To add a new company to the system, follow the steps below.
- Navigate to the Control Panel > Companies page.
- Press Add New Company. The New Company page is displayed.
- Enter the required fields. For more information on entering the fields required for company creation, refer to the following sections:
- After entering the fields, press Save.
 The Company Saved Successfully notification is displayed.
Note
You can edit the company details by pressing anywhere (other than the Catalogue column) in the row of the company you wish to update in the company list.
Add/Edit Company Details
To add or update company details, follow the steps below.
- Navigate to the Company section on the New Company page/Edit Company page.

Note
All the fields with an asterisk (*) are mandatory. - Enter the name of the company in the Company Name field.
- Enter the code of the company in the Company Code field.

- Enter the address of the company in the Address field.

- Enter the phone number of the company in the Phone field.

- Enter the website link of the company in the Company Web Site field.

- Enter the email address of the company in the Email field.

- Enter the company tax label in the Tax Label field.

- Select the time zone the company is in from the Time Zone dropdown list.

- Enter the prefix for the AP automation in the AP Automation Prefix field.

- Enter the valid company tax number in the Tax Number field.

- Enable the Active button to set the company to active status. By default, it is set to Active.

All the required details are added in the Company section.
Add/Edit Company Logo
To add or edit the company logo, follow the steps below.
- Navigate to Add your logo section on the New Company page/Edit Company page.

- Press Click To Upload Your Logo.
 The Open dialog is displayed.
- Select the logo you wish to upload to the company and press Open. The logo is uploaded to the company.

Configure Financial Year
To configure the beginning of the company’s financial year, follow the steps below.
- Select the day and the month of the company’s financial year begin on the New Company page/Edit Company page.

The beginning of the financial year is set.

Add/Edit Purchase Order Footer
To configure the footer for all the purchase orders related to the company, follow the steps below.
- Press Purchase Order Footer on the New Company page/Edit Company page.

The textbox to enter the footer note for the purchase order is displayed.

- Enter the required text in the textbox. You can format the text as required using the tools available in the textbox.
 The footer note is added.
Departments
Departments Overview
The Departments section, also known as Cost Centers, enables you to assign budgets to departments, track orders, control budgets, report on expenditures, and control user permissions.
Note
- All orders you create in the system must be assigned to a Department linked to a specific company.
- The Own Department permissions will relate to the department assigned to a user but the user can be given further permissions related to other departments when needed.
- Navigate to the Organizations section on the Control Panel page.
- Press Departments.
 The Control Panel > Departments page is displayed.
For more information, refer to the following sections:
- Common Operations Across All Core Sections of Control Panel
- How to Add/Edit Department
- How to Clone Department
- How to View Department Budget Audit Trail
- How to View Department Audit Trail
- How to Import Department from File
How to Add/Edit Department
To add a new department or edit a department in the system, follow the steps below.
- Press Add New Department on the Control Panel > Departments page. The Add Department page is displayed.
 Enter the necessary details for creating a department. For more information, refer to the following sections:
- Press Save.
 The Department Saved Successfully notification is displayed.
Note
You can edit the details of the department when needed by navigating to Control Panel > Department page and pressing anywhere in the row of the department in the department list.

The Edit Department page is displayed.
 You can make the necessary changes to the fields on the Edit Department page.
Add Department Details
To add department details to create a new department, follow the steps below.
- Navigate to the Department section on the Add Department page/Edit Department page.

Note
All the fields with an asterisk (*) are mandatory. - Enter the unique name for the company department in the Department Name field.

- Enter the unique identification code of the department in the Department Code field.

- Enter the location of the department used for identification purposes in the Department Location field.

- Select the company that the department relates to from the Company dropdown list.

- Enable the Active button to set the department to active status.
 The department details are entered.
Add Department Budget Details
To add or update the department budget details for setting control on the total expenditure amount of the company, follow the steps below.
- Navigate to the Budget Type section on the Add Department page/Edit Department page.

- Select from the options to define the Budget Type for the department.
The available Budget Type options are:Note
The associated fields for the department budget shown will vary depending on the Budget Type field selected.- Project – This type of budget is a non-renewing one that can be spent over any period defined by the Start Date and End Date

- Annual – This type of budget will renew at the start of your financial year configured in the related company financial settings in the companies section.

- Muti Year – This type of budget is a renewing one where the total budget for each of the multiple years is set.

- Project – This type of budget is a non-renewing one that can be spent over any period defined by the Start Date and End Date
- Enter the total budget amount to establish the spending limit of the department in the Budget field.

- Enter the per-month budget to limit the total monthly amount spent by the department under Monthly Expenditure Limits in the respective month fields.
 The budget details are entered.
Add Department Budget By GL Code
To add or update the department budget by GL Code to allow each department to manage and track its budget allocation for shared GL Codes, follow the steps below.
- Navigate to the Budget By GL Code section on the Add Department page/Edit Department page and click the Add icon.

The configuration fields for setting the budget by GL Code are displayed.
- Select the GL code from the GL Code dropdown list.

- Enter the budget amount in the Total field.
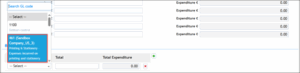
- Press Save.

The department budget by GL Code is successfully saved.

Note: The Total Expenditure field is automatically calculated from the value of approved orders/invoices.
How to View Department Budget Audit Trail
You can view the department budget audit trail to track and analyze the budget for the department by following the steps below.
- Press the name of the department in the row that you wish to view the budget audit trail on the Control Panel > Departments page.

The Edit Department page is displayed.

- Scroll down and press Department Budget Audit Trail.
 The Department Budget Audit Trail is displayed.

Note
You can set the Budget Type, Financial Period Start Date, and Budget Range filters and press Search to view a specific budget audit trail of the department.

Roles
Roles Overview
The Roles section provides you with functional-based preset permissions that you can assign to your users. These preset roles help you define the actions that a user can or cannot do within the system.
The Roles section also enables you to customize the preset roles and create roles based on the various functions in the system.
- Navigate to the Roles section on the Control Panel page.
- Press Roles.
 The Control Panel > Roles page is displayed.
For more information, refer to the following sections:
- Default Roles in PLANERGY
- Common Operations Across All Core Sections of Control Panel
- How to Add/Edit a Role
Default Roles in PLANERGY
The preset roles within PLANERGY are as follows:
- PO Approver – The user assigned to this role can approve the purchase orders for all the departments.
- Invoice Approver – The user assigned to this role can create and approve invoices.
- Accounts Payable – The user assigned to this role can only create invoices.
- Requisitioner – The user assigned to this role can only create orders with no additional permissions.
- Reporter – The user assigned to this role can only view users, departments, and charge-to.
- Purchaser – The user assigned to this role is a simple purchaser for all the departments.
- System Admin – The user assigned to this role has all the permissions.
- Tech Senior Admin – The user assigned to this role can add control panel entities.
- Junior Tech Admin – The user assigned to this role can only edit and view control panel limits.
Note
How to Add/Edit a Role
To create a new role, follow the steps below.
- Press Add New Role on the Control Panel > Roles page.
 The Add Role page is displayed.

- Enter the details necessary for creating the role. For more information, refer to the following sections:
Note
The role permissions are classified into Purchase, Accounts Payable, and Shared. - After entering the details and configuring permissions, press Save.
 The user role is added to the system. Any user assigned this role will automatically have the permissions that you set for the role.
Note
To edit a role, press the role in the role list that you wish to update.The Edit Role page is displayed. You can make the necessary changes and save the role.
Add Role Details
To add the primary details of a role, follow the steps below.
- Navigate to the Role section on the Add Role page.

Note
All fields with an asterisk (*) are mandatory. - Enter the name of the role in the Role Name field.

- Enter any information or description about the role in the Role Description field.

- Enter the number to define the session expiration of the role in the Session Expiration field.

- Enable the Active button to set the role as active.
 The Role details are entered.
Set Default Limits
To set the default limits or individual department limits for a role on the department’s permission, follow the steps below.
- Navigate to the Limits section on the Add Role page.
- To configure the default limits, follow the steps below.
- Enter the expenditure limit in the Transaction Limit column to be set for the role in all departments.

- Enter the monthly expenditure limit in the Monthly Limit column to set for the role in all departments.
- Enter the minimum expenditure limit you wish to set for the role for all departments in the Lower Limit column. This field is optional.

- Enter the expenditure limit in the Transaction Limit column to be set for the role in all departments.
- To configure individual limits for departments, follow the steps below.
- Press the Add icon.
 The Departments dialog is displayed.
- Check the box in the row of the departments you wish to set the individual limits and press Add All Selected Departments.
 The departments are added to set the limits for each of them.
- Enter the values to set the limits for each department in the Transaction Limit, Monthly Limit, and Lower Limit columns.

Note
- The default limits configured will be applied to all the departments other than the individual departments associated with this role set with the default limits.
- Press the Close icon in the row of the department to remove the individual limit for the department.
- Press the Add icon.
Configuring Role Permissions for Purchase
The role permissions that apply to orders are classified under Purchase.
To configure the role permissions for the Purchase section, follow the steps below.
- Navigate to the Role Permissions section on the Add Role page.
 By default, the Purchase tab under Role Permissions is enabled.
 - Press Order Permissions.
 The Order Permissions > Order Access section is displayed.This section allows you to configure the permission for the user to view the purchase orders in the system.
- Select the required options to authorize the user to view the purchase orders. The available options are:
- Own POs – Allows the user to view only his own purchase orders
- All POs – Allows the user to view all purchase orders in the system
- POs for selected department(s) – Allows the user to view the purchase orders for a selected department(s)

- Press the Order on behalf tab.
 The Order on behalf section is displayed. This section allows you to configure the permission for the user to place orders on behalf of the departments in the system.
- Select the required options to authorize the user to place orders. The available options are:
- Own department – Allows the user to place orders only on behalf of his own department
- All departments – Allows the user to place orders on behalf of all the departments in the system
- Other selected department(s) – Allows the user to place orders on behalf of the department(s) that are selected

- Press the Order edit tab.
 The Order edit section is displayed. This section allows you to configure the permission for the user to edit the purchase orders in the system.

- Select the required options to authorize the user to edit the orders. The available options are:
- Own POs – Allows the user to edit only his own purchase orders
- All POs – Allows the user to edit all purchase orders in the system
- POs for selected department(s) – Allows the user to edit the purchase orders for selected department(s)

- Press the Order cancellation tab.
 The Order cancellation section is displayed. This section allows you to configure the permission for the user to cancel the purchase orders in the system.
- Select the required options to authorize the user to cancel the orders. The available options are as follows:
- Own POs – Allows the user to cancel only his own purchase orders
- All POs – Allows the user to cancel all purchase orders in the system
- POs for selected department(s) – Allows the user to cancel the purchase orders for the selected department(s)

- Press the Order authorisation tab.
 The Order Authorisation section is displayed. This section allows you to configure the permission for the user to approve his own purchase orders in the system.
 - Select Yes to allow the user to approve or No to restrict the user to from approving his own POs.

- Press the Goods received tab.
 The Goods received section is displayed.

This section allows you to configure the permission for the user to enter the goods received for the purchase orders in the system. - Select the required options to authorize the user to receive the goods on the orders. The available options are:
- Own POs – Allows the user to enter the goods received on only his own purchase orders
- All POs – Allows the user to enter the goods received on all purchase orders in the system
- POs for selected department(s) – Allows the user to enter the goods received on the purchase orders for selected department(s)

- Press the Close Invoicing tab.
 The Close Invoicing section is displayed. This section allows you to configure the permission for the user to close the invoicing for the purchase orders in the system.
 - Select the required options to authorize the user to receive the goods on the orders. The available options are:
- Own POs – Allows the user to close the invoicing for only his own purchase orders
- All POs – Allows the user to close the invoicing for all purchase orders in the system
- POs for selected department(s) – Allows the user to close the invoicing for the purchase orders for selected department(s)
Note
- When the POs for selected department or Other selected departments, the option is selected, configure the departments for which the user can view the PO by following the steps below.
- Press the Add icon.
 The Departments dialog is displayed.
- Check the box in the row of the department to select the required departments and press Add All Selected Departments.
 The selected departments are added to the Departments list.
- You can delete the departments that are selected by pressing the Close icon in the row of the department.
- You can select all the departments by pressing Add All Departments.
- You can import the department from an Excel file by pressing Import From Excel.
- You can also copy the required selection of departments that are selected in other sections from the Copy From dropdown list.
Configure Role Permissions for Accounts Payable
The permissions for the role that applies to invoices are classified under Account Payable. To set the role permissions for Accounts Payable, follow the steps below.
- Press the Accounts Payable tab under the Role Permissions section on the Add Role page.
 The Accounts Payable section is displayed.
- Press Invoice Permissions. The Invoice Permissions > Invoice Visibility section is displayed.
 This section allows you to set the permission for the user to view the invoices in the system.
 - Select the required options to authorize the user to view the invoices in the system. The available options are:
- All invoices – Allows the user to view all the invoices in the system
- Invoices for selected company(ies) – Allows the user to view the invoices for only the selected company(ies)

- Press the PO Invoice Visibility tab.
 The PO Invoice Visibility section is displayed. This section allows you to set the permission for the user to view the PO invoices in the system.
- Select the required options to authorize the user to view the PO invoices in the system. The available options are:
- Own PO invoices – Allows the user to view his own PO invoices in the system
- All PO invoices – Allows the user to view all the PO invoices in the system
- PO invoices for selected department(s) – Allows the user to view the invoices for only the selected department(s)
- Press the PO Invoice Administration tab.
 The PO Invoice Administration section is displayed. This section allows you to enable the user to administrate the invoices for purchase orders in the system.
- Select the required options to enable the user to administrate invoices for the POs in the system. The available options are:
- POs they have approved – Allows the user to administrate invoices for only the POs approved by himself
- All POs – Allows the user to administrate invoices for all POs in the system
- PO invoices for selected department(s) – Allows the user to administrate invoices for POs of only the selected department(s)

- Press the PO Invoice Authorization tab.
 The PO Invoice Authorization section is displayed. This section allows you to enable the user to authorize invoices in the system.
- Select the required options to enable the user to authorize invoices in the system. The available options are:
- POs they have approved – Allows the user to authorize invoices for only the POs approved by himself
- All POs – Allows the user to authorize invoices for all POs in the system
- PO invoices for selected department(s) – Allows the user to authorize invoices for the POs for only the selected department(s)

- Press the Non PO Invoice Administration tab.
 The PO Invoice Authorization section is displayed. This section allows you to authorize the user to administrate Non PO invoices in the system.
- Select the required options to authorize the user to administrate Non PO invoices in the system. The available options are as follows:
- All Non PO invoices – Allows the user to administrate all the Non PO invoices in the system.
- Non PO invoices for selected companies – Allows the user to administrate Non PO invoices for only selected companies

- Press the Non PO Invoice Authorization tab.
 The PO Invoice Authorization section is displayed. This section allows you to enable the user to approve Non PO invoices in the system.
- Select the required options to enable the user to approve Non PO invoices in the system. The available options are:
- All Non PO invoices – Allows the user to approve Non PO invoices in the system
- Non PO invoices for selected company(ies) – Allows the user to approve Non PO invoices for only selected companies

Note
- When the option to select departments/companies is selected under the tabs in the Accounts Payable section, press the Add icon to configure the departments/companies for user permission. The steps to select departments/companies are similar to the selection of departments in Configure Role Permissions for Purchase.
- You can delete the departments/companies that are selected by pressing the Close icon in the row of the departments/companies.
- You can select all the departments by pressing the Add All Departments
- You can import the department from an Excel file by pressing the Import From Excel
- You can also duplicate the selection of departments/companies from other sections. Select the section you wish to duplicate from the Copy From dropdown list.
Configure Role Permissions for Shared
The permissions for the role that applies to sections such as administration, data entry, item categories, and special permission for location are classified under Shared.
To set the role permissions under Shared, follow the steps below.
- Press the Shared tab under the Role Permissions section on the Add Role page.
 The Shared > Administration section is displayed.
- Check the required box under the All, Add, Edit, and View columns in the various rows of Rights to enable the required permission for the role.

- Scroll down the page and check the box against the applications you wish the user to administer under User can administer the following applications.

- Press the Data Entry tab.
 The Data Entry section is displayed.
- Select the options to enable the user to use Free Text features for suppliers, delivery locations, or items as needed for the role.

- Press the Item Categories tab.
 The Item Categories section is displayed.
 - Press the Add icon.
 The Categories dialog is displayed.
- Check the box in the row of the category to enable this role to use the item category(ies).
- Press Add All Selected Categories.
 The item categories are added.
- Press the Special Permission Location tab.
 The Special Permission Location section is displayed.
 - Press the Add icon.
 The Special Location dialog is displayed.
 - Select the locations with special permission that are listed and press Add All Selected Locations.
 The selected locations are added.
Users
Users Overview
You can allow users to access your PLANERGY account and decide the number of members you wish to add with user licenses.
The default base account includes 10 licenses and additional licenses can be purchased when needed.
In this section, you can create new users and edit existing users. You can also enable the use of single sign-on, configure the user transaction limits by departments as well as the total and monthly budgets, configure the user alerts, and set the user permissions to deviate a bit from the assigned role.
- Navigate to the Users section on the Control Panel page.

- Press Users. The Control Panel > Users page is displayed.

For more information, refer to the following sections:
- Common Operations Across All Core Sections of Control Panel
- How to Add a New User
- How to View Total and Monthly Expenditures of the User
- How to Import Users from File
How to Add a New User
You can add up to 10 users on your base user license. To add a new user, follow the steps below.
- Press Add New User on the Control Panel > Users page.
 The Add User page is displayed.
- Enter the fields needed to create a new user. For more information, refer to the following sections.
- Press Save. The success notification is displayed.

Note
To edit a user, press anywhere in the row of the user in the user list that you wish to update.

The Edit User page is displayed.
 You can now make the necessary changes to the user and save the changes.
User Details
To add the primary details of a user, follow the steps below.
- On the Add User page, navigate to the User section.

Note
All fields with an asterisk (*) are mandatory. - Enter the email ID of the user that will be used for logging in to your account in the Username (Email) field.

- Enter the First Name, Middle Name, and Last Name of the user in the respective fields.

- Enter any information or comment about the user in the Comment textbox.

- Assign a role to the user from the User Role dropdown list.

- Select the department of the user from the Department dropdown list.

- Enter the phone number of the user in the Phone field.

- Select a title for the user from the Title dropdown list.
 Enter the title you wish to add in the Name field and press Add.
Note
You can add a new title to the dropdown list by pressing the Add icon. The Add User Title dialog is displayed.
- Select the supervisor for the user from the Supervisor dropdown list.

- Enter the address of the user in the Address textbox.

- Select the user language from the Regional Settings dropdown list.

- Select the time zone of the user from the Time Zone dropdown list.

- Check the box Send Welcome Email? If you wish to send the user an email to welcome him into the system.

- Under User Login, enable the Use SSO button to activate the use of single sign-on.

- Select the provider of SSO from the SSO Provider dropdown list.
 The User Details are added.
Configuring User Limits by Department
When a user has access to place orders for multiple departments, limits need to be set on a departmental basis.
To set the user limits by department, follow the steps below.
- On the Add User page, configure the user’s expenditure limit for departments under the User Limits by Department section.

Note
The steps to add the default limits for the user for individual departments are similar to adding the default limits for a role. You can follow similar steps to configure the user limits. For more information, refer to Set Default Limits.
Configure User Permissions
The user permissions are classified into Purchase, Accounts Payable, and Shared similar to the Role Permissions.
- On the Add User page, configure the user permission for various sections across the platform such as Purchase, Accounts Payable, and Shared.
 To configure the user permissions for the Purchase, Accounts Payable, and Shared sections, follow the steps similar to the steps in configuring the Role permissions. For more information, refer to the following sections:
- Configure Role Permissions for Purchase
- Configure Role Permissions for Accounts Payable
- Configure Role Permissions for Shared
The user permissions for Purchase, Accounts Payable, and Shared are added.
Configure User Purchase Order Alerts
In the User Alerts section, you can select other users who will be notified by email when the user makes relevant PO changes.
To configure the user alert, follow the steps below.
- On the Add User page, scroll down to the User Alerts section.

- Enter the email address of the other user who must be notified when the user makes relevant PO changes in the Email field.

- Press the Add icon.
 The email address will be added. Note that you can select an existing email address from the Email dropdown list and also add multiple users to be notified.
 - Select the event the recipient will receive the notification from the Event dropdown list.
 Note: You can remove any email address that no longer needs to be notified by pressing the Close icon. The PO alerts for the user are set.
How to View the Total and Monthly Expenditure of User
You can view the total and monthly expenditure of the user by following the steps below.
- On the Edit User page, scroll down to the Total and Monthly Expenditure section.

- Press Total and Monthly Expenditure.

The Total and Monthly Expenditure is displayed.
How to Edit Your User Settings
You can edit your user details and configure the settings based on your requirements, ensuring your user information is up-to-date.
- Navigate to the Profile icon on the Home page.
 The Profile dropdown list is displayed.
 - Press User Settings.
 The Edit User Settings page is displayed.

- Make the necessary changes to the fields.
For more information, refer to the following sections:
- Editing Your User Details
- Adding Your Profile Image
- Configuring Your Out-of-Office Settings
- Configuring Notification Settings
- Configuring Advanced Security Settings
- Configuring Mobile Application Settings
- Viewing/Editing Support Tickets Submitted By You
Editing Your User Details
To edit your primary information, follow the steps below:
- On the Edit User Settings page, navigate to the User Settings.

- Update the required fields. For more information regarding the fields, refer to User Details.
Adding Your Profile Image
To add your profile image to your PLANERGY account, follow the steps below:
- On the Edit User Settings page, navigate to the Add Your Profile Image, and press Drag & Drop or click here to select an image to upload. Alternatively, you can drag and drop the required image in this space.
 The Open dialog is displayed.
 - Select the required image file from your system and press Open.

The image is uploaded.
Configuring Your Out of Office
You can configure the dates when you will be out of the office and assign another user to take care of the approval tasks in your absence by following the steps below.
- On the Edit User Settings page, navigate to the Out Of Office section.

- Enter the details in the fields as required. For more information regarding the fields, refer to Configure Out of Office.

Configuring Notification Settings
You can configure your notifications to ensure you receive your purchase order, invoice, inventory & assets, and control panel updates in time.
To configure the notifications, follow the steps below.
- On the Edit User Settings page, navigate to the Notification Settings and press Notification Settings.

The Notifications page is displayed. - Enable the toggle button corresponding to MS Teams Notification to allow notifications from MS Teams.

- Set the MS Teams channel URL and select the required notifications. For more information, refer to Configure User Notifications.

- Enable the toggle button corresponding to Slack Notification to allow notifications from Slack.

- Set the channel URL and select the required notifications. For more information, refer to Configure User Notifications.

- Enable the toggle button corresponding to Subscribe To Mobile / Desktop Notification to allow notifications on mobile and desktop.

- Select the required notifications. For more information, refer to Configure User Notifications.
- Press Save.
 The success notification is displayed.

Configuring Advanced Security Settings
You can configure your advanced security settings to ensure your data is protected. To configure your advanced security settings, follow the steps below.
- On the Edit User Settings page, navigate to the Advanced Security Settings and press Advanced Security Settings.
 The Advanced Security Settings page is displayed.
 - Enable the Turn MFA On/Off toggle button to set up the multifactor authentication feature on your PLANERGY account.

- Select a preferred way of getting MFA codes from the My preferred way of getting MFA codes dropdown list.

- Press Save.
 The Successfully saved advanced security settings notification is displayed.
Configuring Mobile Application Settings
You can configure your mobile application settings to ensure your data is protected by following the steps below.
- On the Edit User Settings page, navigate to the Mobile Application Settings and press Mobile Application Settings.
 The Mobile Application Settings page is displayed.
 - Scan the QR code shown to initialize your mobile PLANERGY application and follow the instructions on your mobile.
 The Mobile Application setting is successfully configured.
Viewing/Editing Support Tickets Submitted by You
You can view support tickets that you have submitted to track the progress.
- On the Edit User Settings page, navigate to the Support Tickets Submitted By You.
 You can view all the tickets submitted by you, including the date of submission and the last comment on the ticket.
 - Press anywhere in the row of the ticket.

 The Ticket page is displayed.
- To submit a new file, press or drag and drop a file from your system in the Drag & Drop or click to select a document to upload in the Submitted Files field.

The Open dialog is displayed.
- Select the required file and press Open.
 The selected file is uploaded.

- Press Add New Comment if you wish to enter a comment.
 The Add comment to the log dialog is displayed.
 - Enter a comment in the Add comment to the log field.

- Press Save. The success notification is displayed.

- Scroll down the page to the Comments section to view the new comment.

Note
Location
Location Overview
The Locations in PLANERGY are the approved list of delivery addresses that must be selected while creating an order including non-deliverable orders such as services.
The delivery locations can also be used for reporting purposes.
In this section, you can view, edit, or add new delivery locations depending on your user permissions.
- On the Control Panel page, navigate to the Locations section.
 The Control Panel > Locations section is displayed.
  For more information, refer to the following sections:
How to Add/Edit Location
You can add a delivery location to access it while creating an order by following the steps below.
- On the Control Panel > Locations page, press Add New Location.
 The Add Location page is displayed.
Note
All fields with an asterisk (*) are mandatory. - Enter the name of the delivery location in the Location Name field.
- Enter the code of the delivery location in the Location Code field.

- Enter the contact number at the delivery location in the Location Contact Number field.
- Enter the address of the delivery location in the Location Address textbox.

- Select the company from the Company dropdown list.

- Enable the Needs Special Access Permission button if this delivery location needs special permission to access it.

- Enable the Active button to allow to set the active status for this delivery location.

- Press Save.
 The success notification is displayed.
Note
To edit details of a location, press anywhere in the row of the location you wish to update on the Control Panel > Locations page.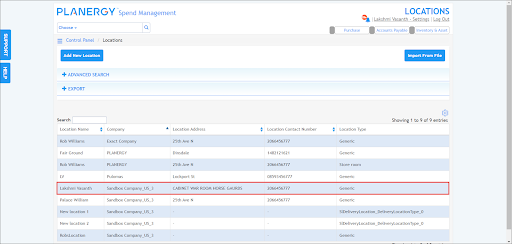 The Edit Location page is displayed.
 You can now make the necessary changes to the fields and save the data.