Vendors – 02 – Adding a New Vendor
To create a new vendor you can click the Add New Vendor button on the main Vendors page. This will bring you to the Add Vendor page. Here you can add all the details for the vendor.
Vendor Details
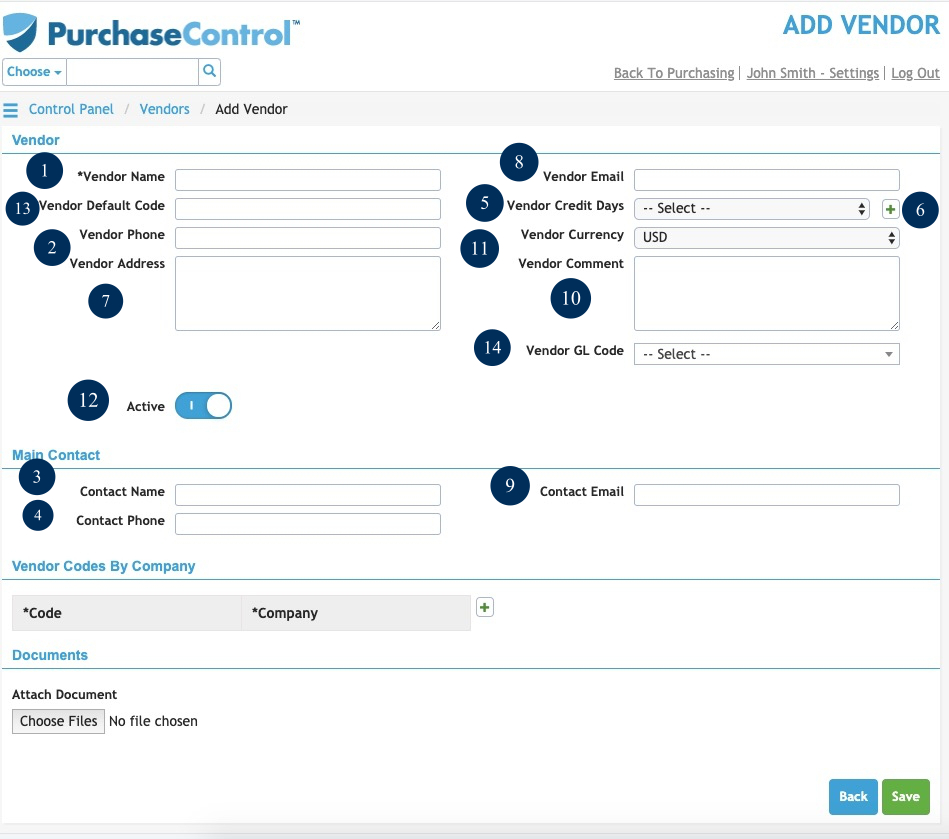
Figure 3: Add Vendor Page
- Name
The name of the vendor. The vendor name must be unique in the system. - Phone
The main phone number of the vendor. - Contact Name
The contact name for the vendor. - Contact Phone
The phone number of the contact for the vendor. - Terms
The payment terms for the vendor. Terms can be restricted for the vendor. By default it will be left open to be assigned when creating an order. If specific terms are set in this field for the vendor all orders created for this vendor will automatically be assigned with the correct payment terms and they cannot be edited. - Add Terms
Button to add new terms to the system. There are number of default terms available to select from in the system but you can also add new terms if required by clicking this button. The list of payment terms is managed in the Finance Functions section of the system but this button gives you the option to quickly add a new payment terms and add it immediately to a vendor. - Address
The address of the vendor. - Email
The email address of the vendor. The email address set here will be automatically filled in the Email PO field on all purchase orders approved for this vendor. - Contact Email
The email address of the contact for the vendor. - Comment
Any additional comments related to this vendor you want to add in the system. - Currency
The currency used for orders from the vendor. Currency can be restricted for the vendor. By default it will be left open to be assigned when creating an order. If all orders for a supplier should be in a specific currency you can set it in this field all orders created for this vendor will automatically be assigned with the correct currency and they cannot be edited. - Active
Switch to set if the vendor is active or not. An inactive department cannot be selected when creating an order.
Codes
The codes assigned for the vendor are identification codes and should match the codes used in your financial package. This should not be confused with a common feature in financial packages of linking a vendor to a specific general ledger or nominal ledger code.
In a multi-company setups of PLANERGY you have the option to set different vendor codes per company. This allows for the possibility that the different companies are using different financial packages and the vendor coding may not be the same.