Roles – 02 – Adding a New Role
To create a new role you can click the Add New Role button on the main Roles page. This will bring you to the Add Role page. Here you can add all the access and permissions settings for the role.
The basic role profile settings will be at the top of the page followed by a number of separate sub-sections – Order Permissions, Invoice Permissions and Additional Permissions.
Role Profile Settings
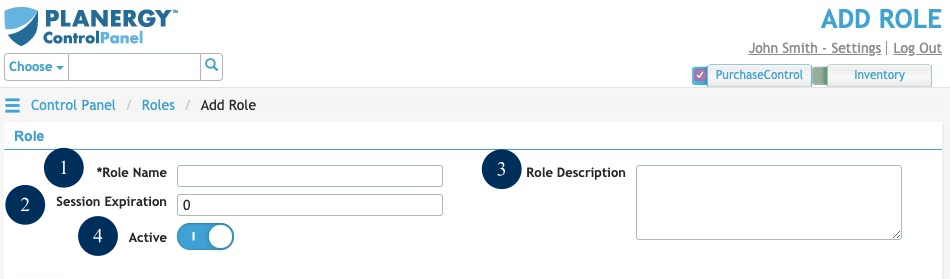
Figure 3: Add Role page – Role Profile Settings
- NameThe name for the role. This is what will appear in the dropdown list when selecting the role for the user.
- Session ExpirationThe number of idle minutes before the system logs out users set with this role.
- DescriptionThe description for this role. This can be used to explain the specific role more fully and outline the permissions related to the role.
- ActiveSwitch to set if the role is active or not. Users cannot be assigned with inactive roles.
Role Permissions
After assigning the profile settings for the role you will also need to define their specific permissions within the system. These settings control what a user can and cannot do when they are accessing the system. These permissions are split into 3 Sub-Sections that are then further split into specific permissions. The role permissions are the same as the user permissions. To read about these permissions please see the Users section of this guide.