PLANERGY handles the management of the purchasing process from order creation and approval, through the delivery of the goods or service and to the point of matching invoices back to the original purchase order and final authorization of the payment.
As a final stage of this process, PLANERGY allows you to integrate your financial package like Sage 50 to streamline the payment of purchase invoices.
This integration ensures that there is no requirement for double entry as all the information in PLANERGY can be sent across to Sage 50 ready to be paid as Purchase Invoice Transactions.
The integration requires installing a piece of software on the computer you are accessing Sage from. It will need to be able to access your Sage data for the link to work.
How Data is Mapped Between PLANERGY and Sage 50?
Data mapping between PLANERGY and Sage 50 is outlined in the diagram below. 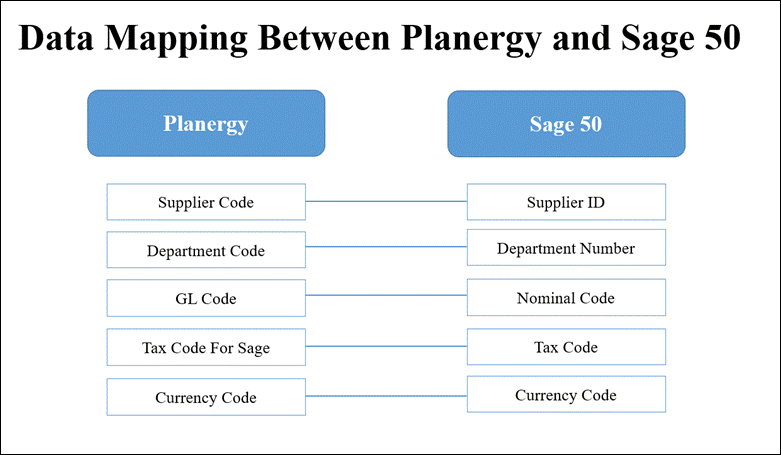
How to Integrate PLANERGY with Sage 50?
For the integration of PLANERGY to Sage 50 to work efficiently, you need to first update the background settings. To update this setting, please contact our dedicated support team at [email protected] or use the Support button in the application.
For more information, refer to the following sections.
- Enabling Sage 50 Integration
- Setting Changes in PLANERGY for Seamless Integration with Sage 50
- Installing Sage Order Importer
- Setting Up Sage Order Importer
- Setting Up the Link Between Sage 50 and PLANERGY
- Using the Order Importer
Note
Enabling Sage 50 Integration
To enable Sage 50 integration, follow the steps below.
- On the Home page, press the Profile icon in the top right corner.
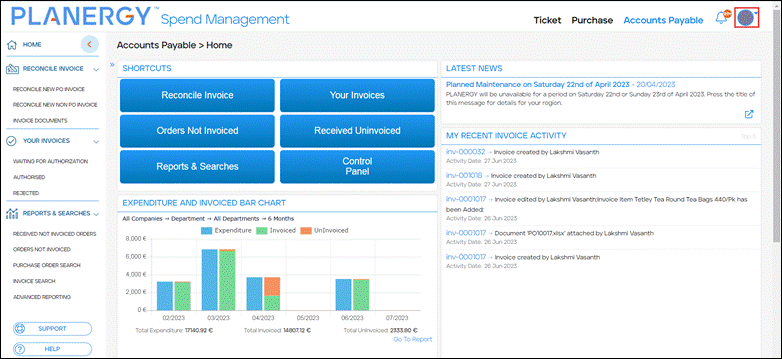 The Profile menu is displayed.
 - Press Control Panel.
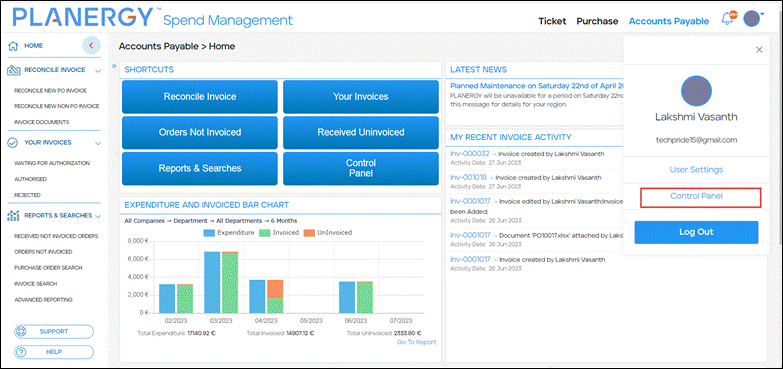 The Control Panel page is displayed.
 - Press Integrations under Advanced Controls.
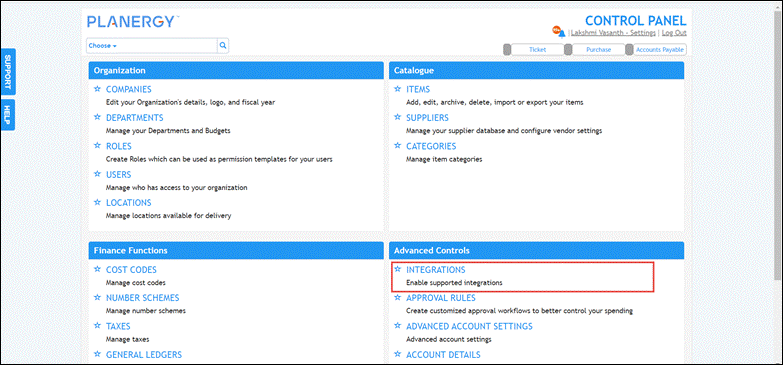 The Integrations page is displayed.
 - Scroll down and press Setup in the row of Sage 50.
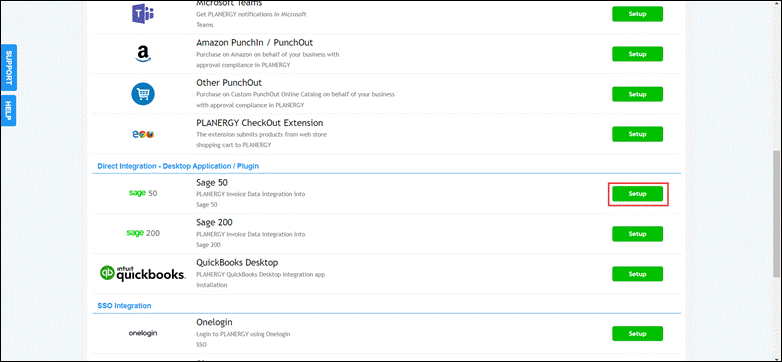 The integration is now enabled. For more information about the setting changes required in PLANERGY, refer to Setting Changes in PLANERGY for Seamless Integration with Sage 50.
Setting Changes In PLANERGY for Seamless Integration With Sage 50
When this integration setting is enabled, it introduces a few additional restrictions in PLANERGY to ensure optimal functionality of the link between the two systems.
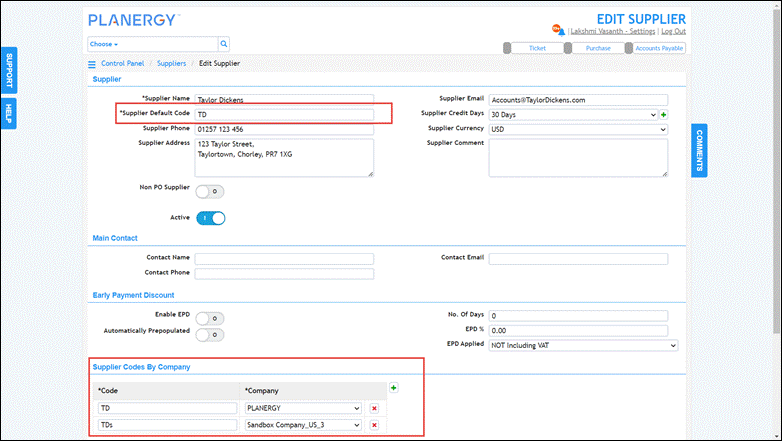
- Supplier Code in PLANERGY should match Supplier ID in Sage 50.To ensure all orders are assigned with a valid supplier code and have the required detail to link to Sage correctly, only suppliers in the approved supplier list can be used when creating an order.
- If an order has free text supplier details and has no assigned supplier code, the invoice matched against it will not be posted to Sage.
- If you are using a multi-company setup where different supplier IDs are used across various Sage companies, it is necessary to establish supplier codes on a per-company basis for these suppliers in PLANERGY.
Based on the company, the order for the specific supplier code will be used when posting invoices to Sage.
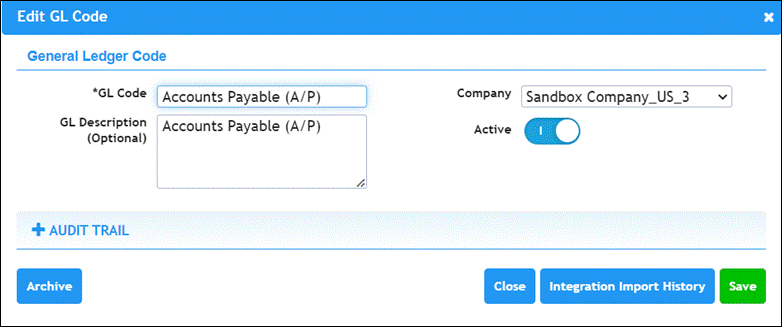
- GL Code is required for invoices and GL Code should match Nominal Code in Sage.
To ensure all invoices have the correct detail to link to Sage, the GL Code field will be mandatory for any invoices saved in PLANERGY.
- Tax Code For Sage in PLANERGY should march Tax Code in Sage.
To ensure all invoices have the correct detail to link to Sage, the Tax Code For Sage field in PLANERGY must be manually set to match the Tax Code used in Sage.
PLANERGY will automatically assign T in front of the number you enter in the Tax Code for Sage field to match the codes.Ensure that all the required tax codes set up in PLANERGY are the same as in Sage.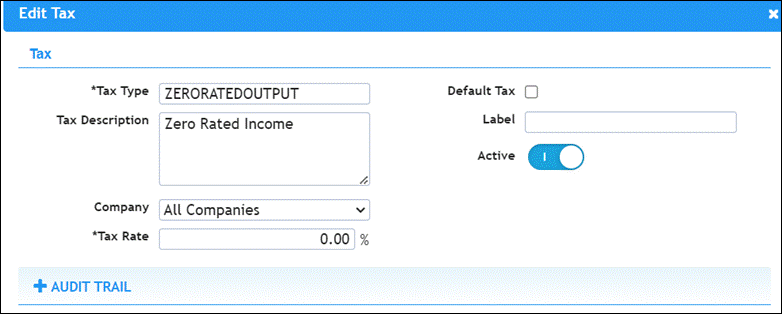
- Currency codes in PLANERGY must be the same as that in Sage.
To ensure all invoices have the correct detail to link to Sage, the Currency Code in PLANERGY must be the same as Currency Code in Sage. The currency will be matched and the currency conversion calculation will take place in Sage using the exchange rate rates set there.Note
The exchange rate set in PLANERGY will not be used when calculating the currency conversion in Sage.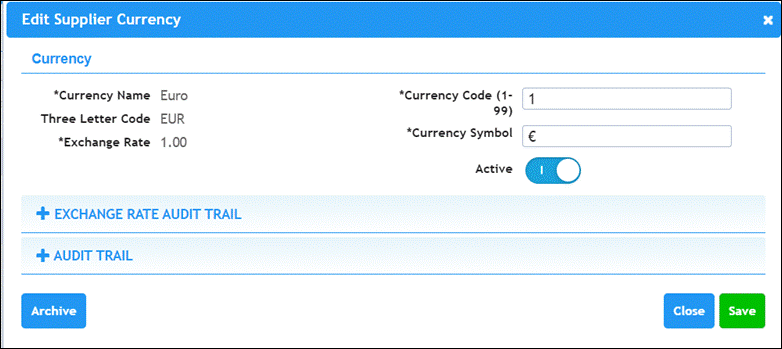
Installing Sage Order Importer
The Sage Order Importer is an independent software application that must be installed on the computer to access Sage 50 so that the information related to your invoices will be directly sent to Sage 50 from PLANERGY as purchase invoice transactions, ready to be paid.
- Press the link to download the Sage 50 installer – https://help.planergy.com/sage-50-integration/sage-50-integration-download/ The Sage 50 Integration Download page is displayed.
- Press Click here to download the Sage Order Importer.
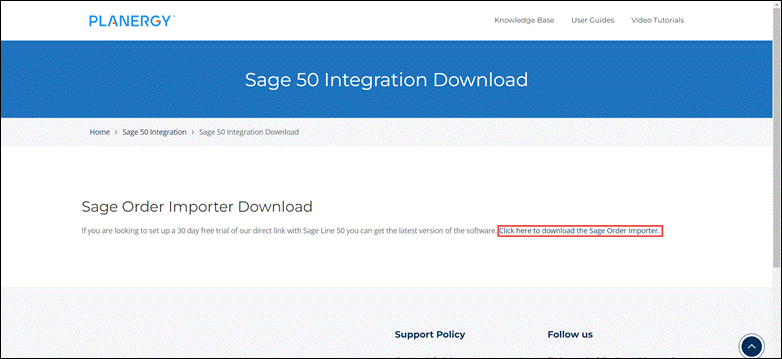 The Order Importer is downloaded on your system.
 - Press the downloaded file on your screen or you can open it from the system’s default download folder.
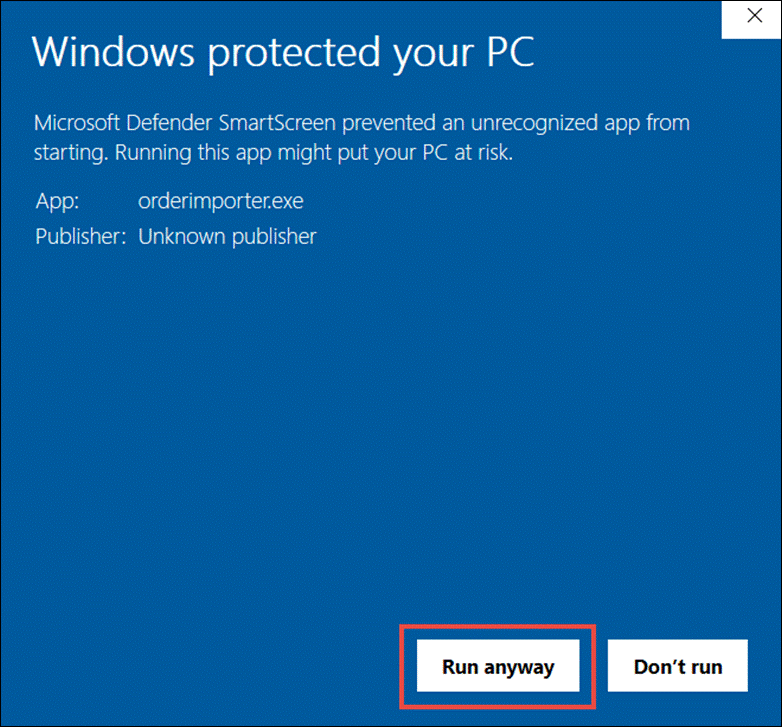
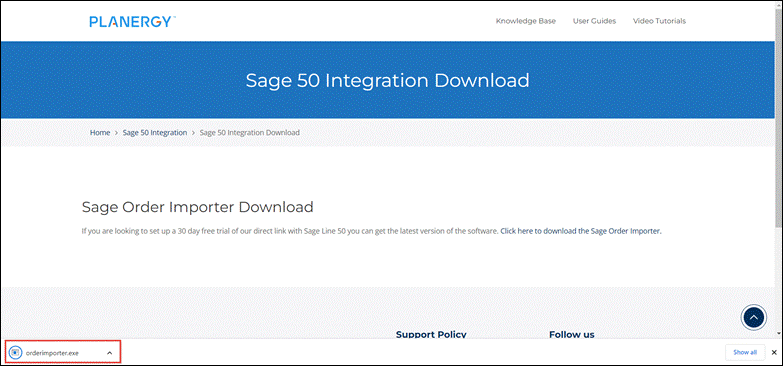 The Run prompt dialog is displayed.
 - Press Run/Run Anyway.
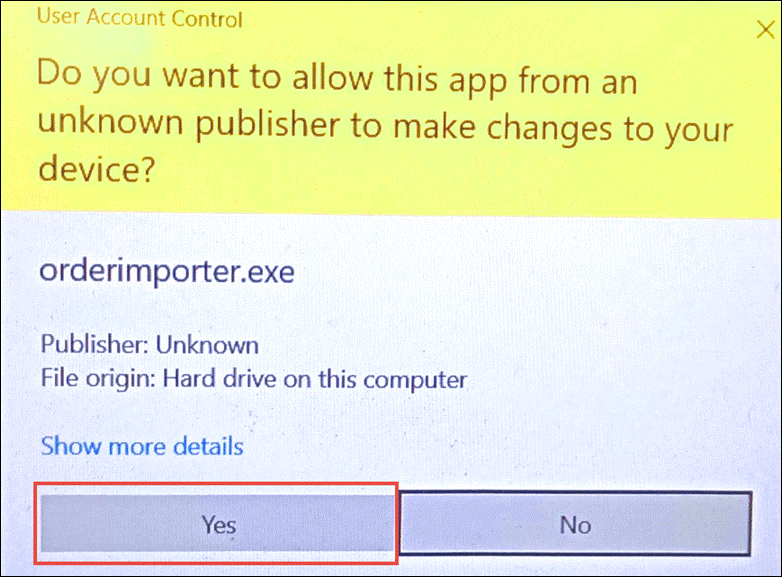
- Confirm User Account Control by pressing Yes.
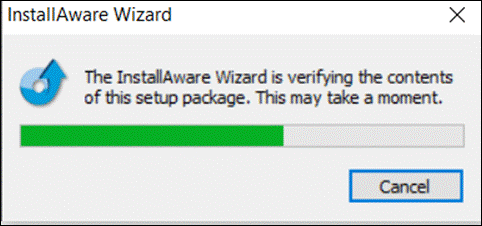
 The installation process is initiated.
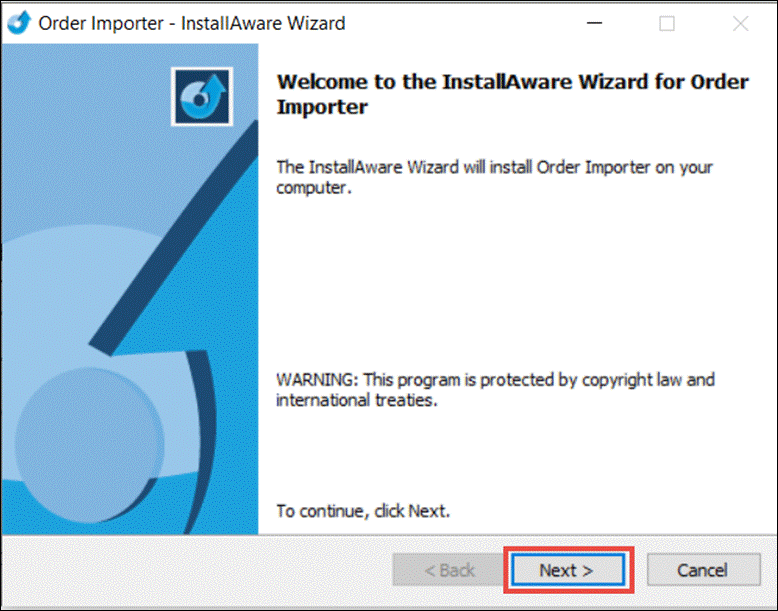
 The Installation Wizard dialog is displayed.
 - Press Next.
 The License Agreement dialog is displayed.
 - Read through the agreement thoroughly and check the box I accept the terms of the license agreement.
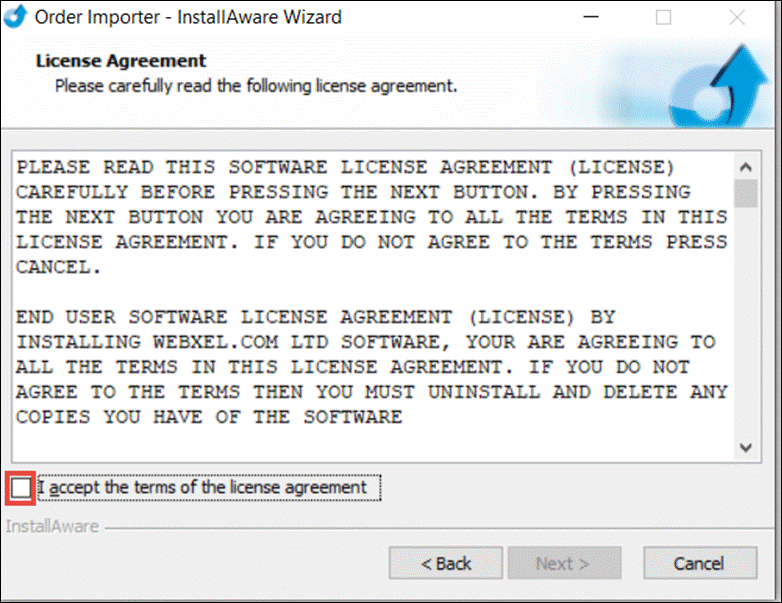 The Next button is enabled.
 - Press Next.

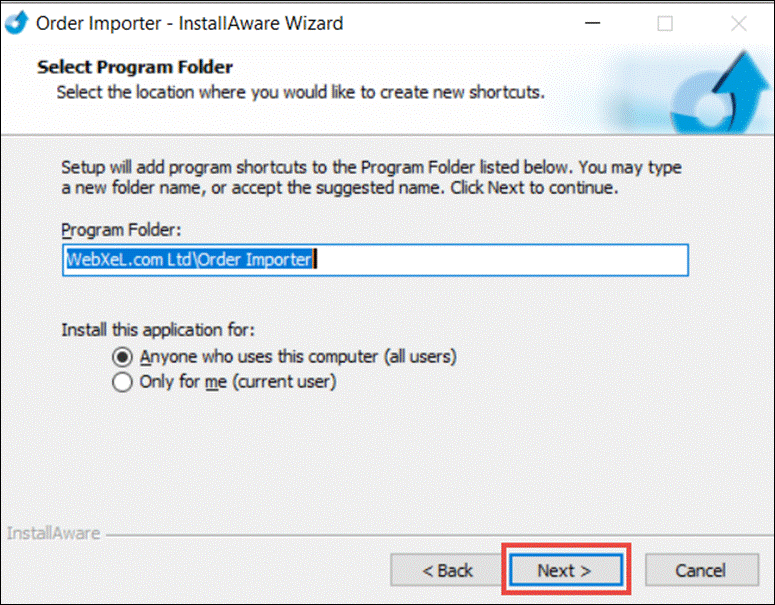
- Press Change to select the location to install the files on your system.
- Press Next.

- Select from the option the users who can use the application and the location of the application.
- Press Next.
 The installation process may take a few more minutes.
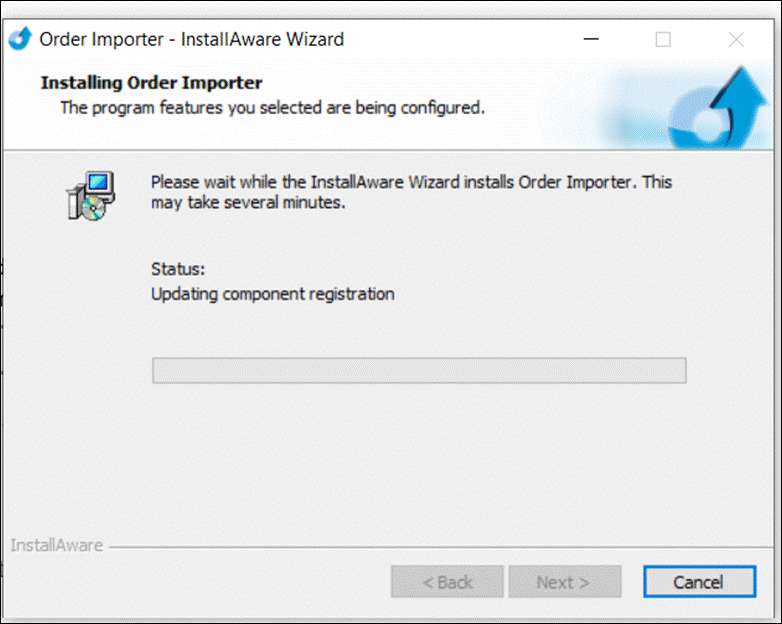
- Once the installation is completed, press Finish.
 The installation process is completed.
Setting Up Sage Order Importer
Once the Sage Order Importer is installed, you need to register to start using its features.
- Select your preferred method of using the software from the given options in the Register dialog.
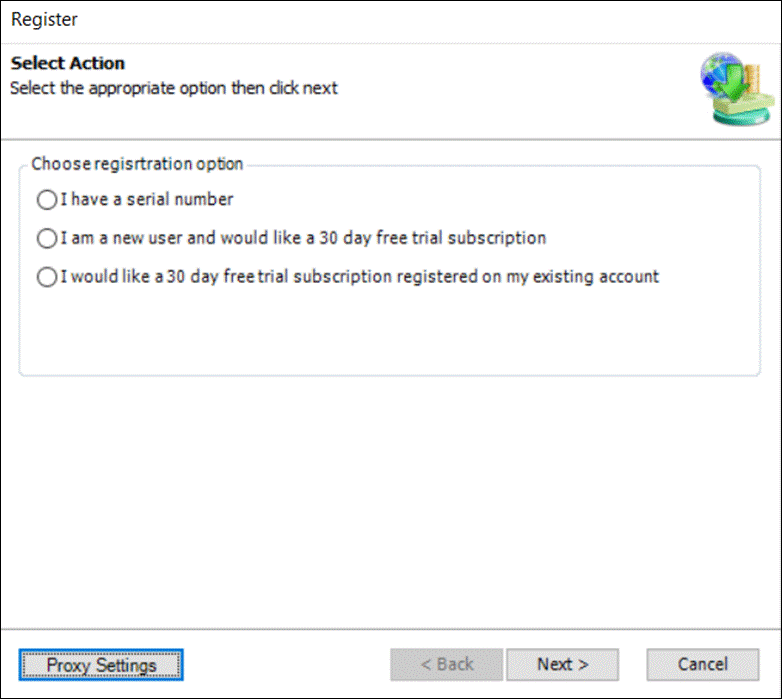
Note
You can opt to get a registered license and enter the license serial number which can be ordered through PLANERGY. If you would like to organize a serial number from PLANERGY, please contact our support team – [email protected]. - Press Next.

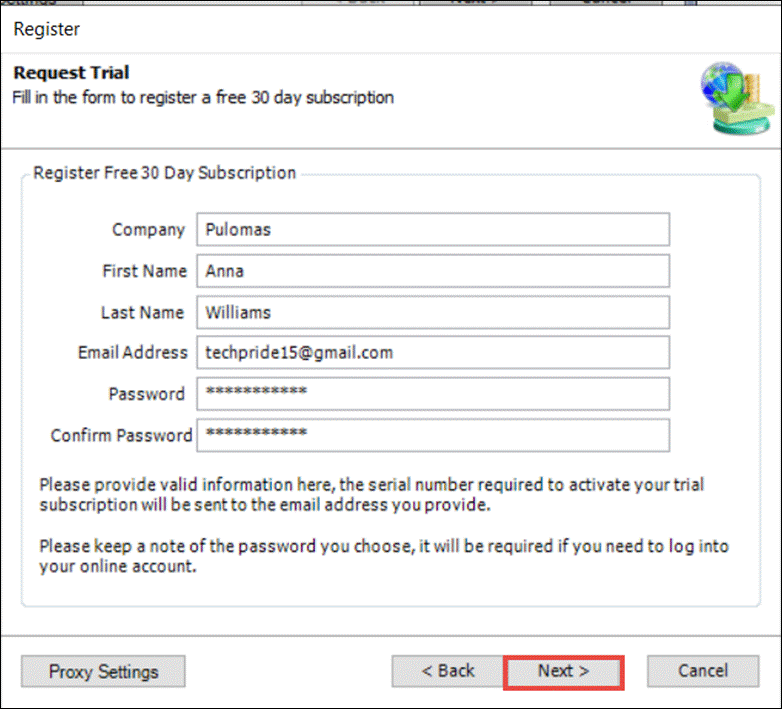
- Enter the name of your company to register with Sage 50 in the Company field.
- Enter your first and last names in the respective First Name and Last Name fields.
- Enter the email address you wish to register with Sage 50 in the Email Address field.
- Enter the password for Sage 50 in the Password field.
- Re-enter the password to confirm in the Confirm Password field.
- Press Next.
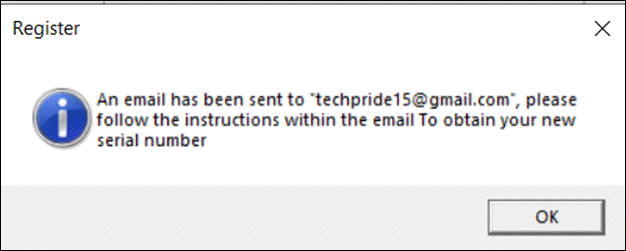
 A dialog is displayed with a message that an email for completing the registration process is sent.
 - Press OK.
- Navigate to the registered email and open the email to complete the registration process.
Note
If you have not received the email to complete the registration process, check the Spam folder or try with another email id. - Copy the Sage 50 Order serial number to complete the registration process.

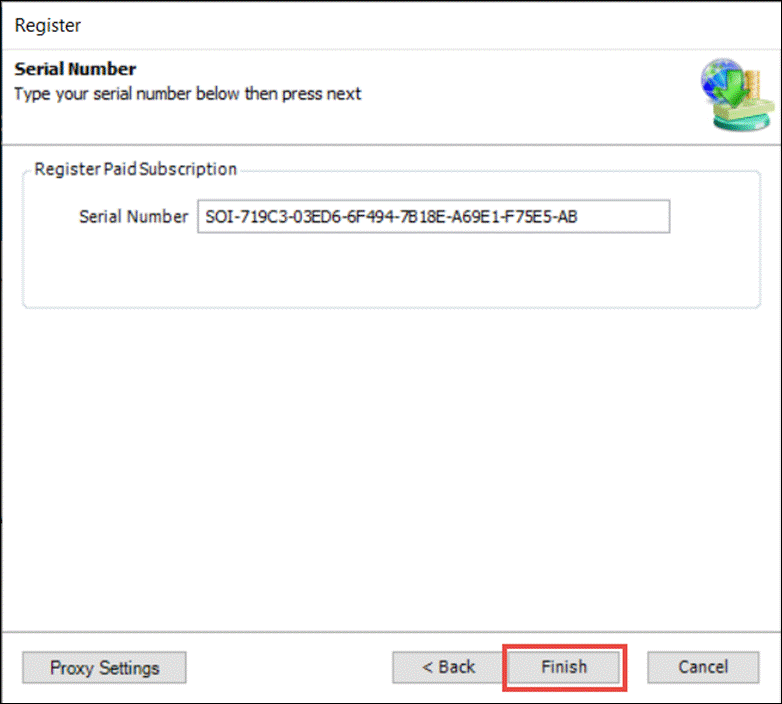
- Enter the serial number copied from the email in the space provided in the Register dialog.
- Press Finish.
 The dialog to set up the link between PLANERGY and Sage is displayed.
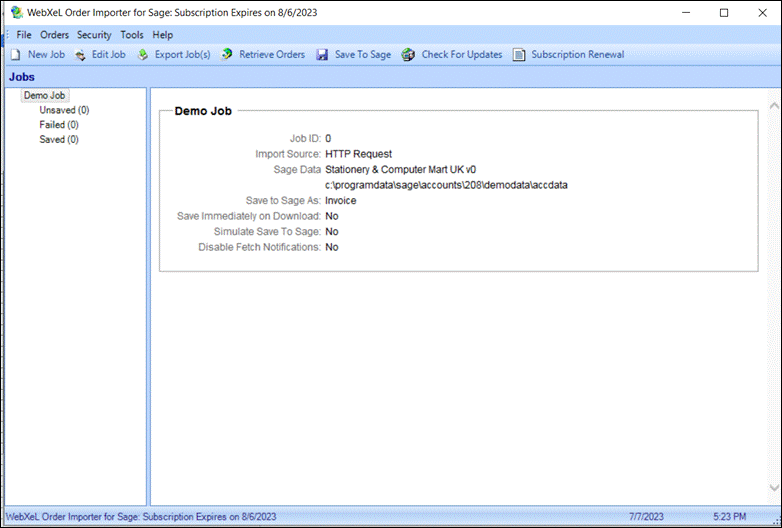 For more information, refer to Setting Up the Link Between Sage 50 and PLANERGY.
Setting Up the Link Between Sage 50 and PLANERGY
The next step after completing the registration process and setting up Sage Order Importer is to configure the link between your PLANERGY account and the relevant Sage companies.
- Re-open the Order Importer to begin configuration.
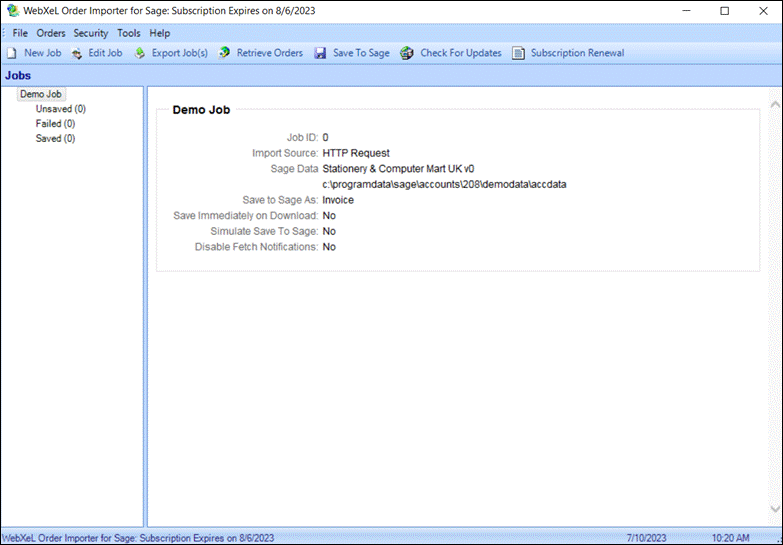
Note
- To set up the link between Sage and PLANERGY, you need to set up a job per company.
- If you have a single company setup, you need to create a single job to manage the link.
- If you have multiple companies, the process to create a job should be repeated for each company with a small variation in the information for each.
- Press New Job.
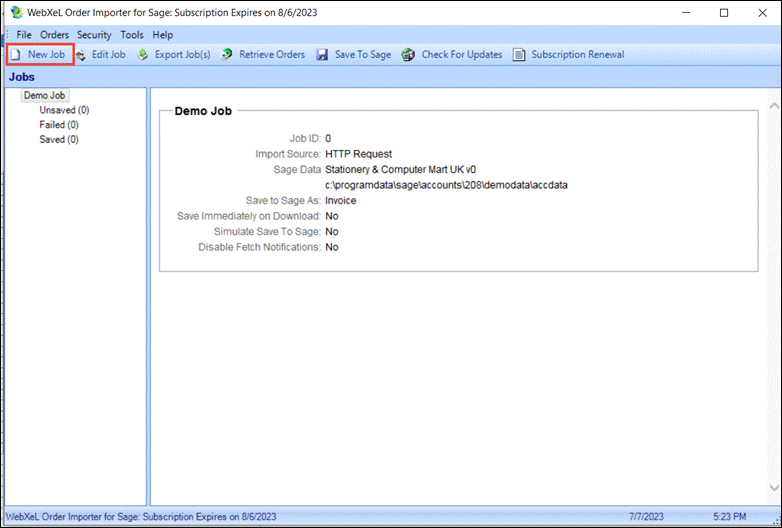 The Job Wizard dialog is displayed.
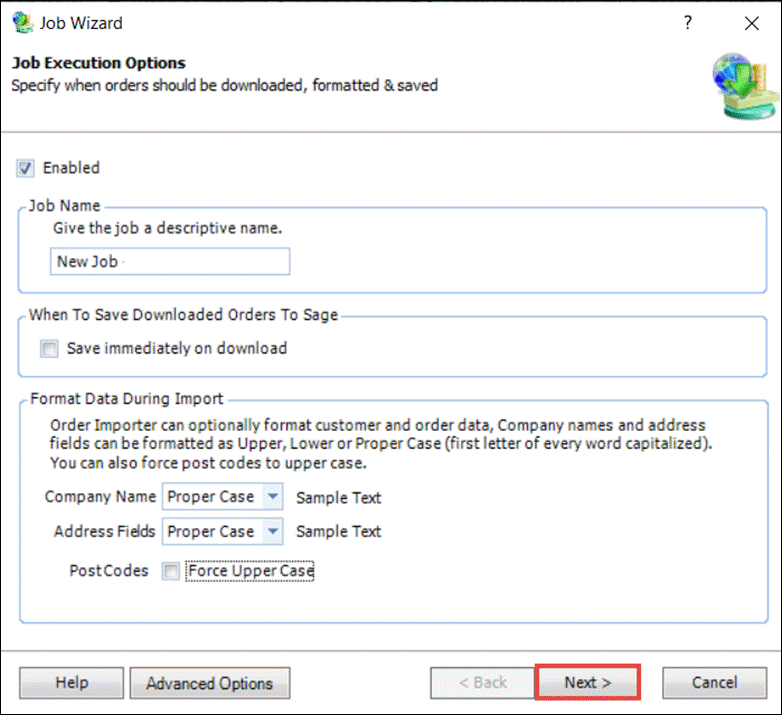
 - Enter a descriptive name of the job in the Job Name field.
Note
- If you have multiple companies, indicate the company relating to the job in the job name for easy identification.
- The other settings on this page should be left as default settings.
- Press Next.
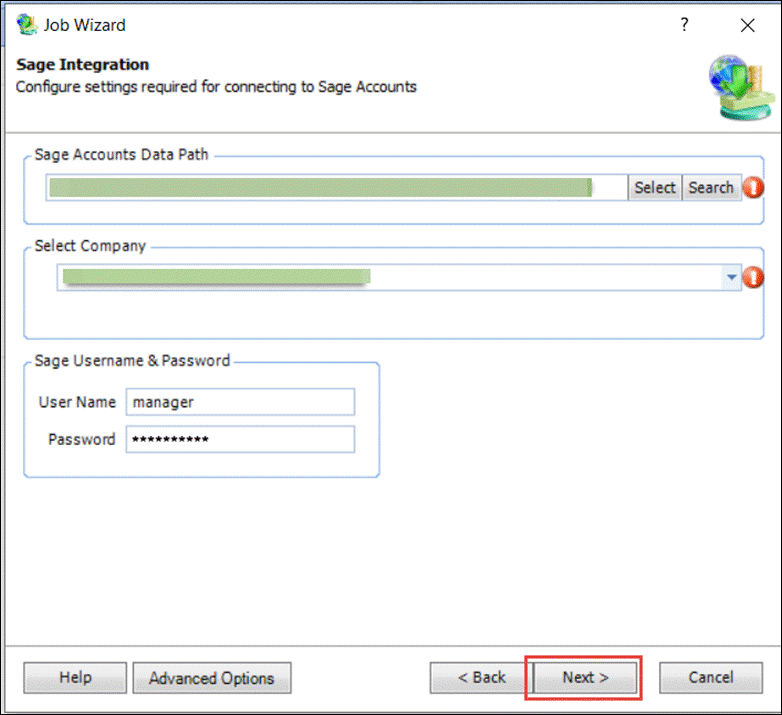
 The dialog to set the company details on Sage is displayed.
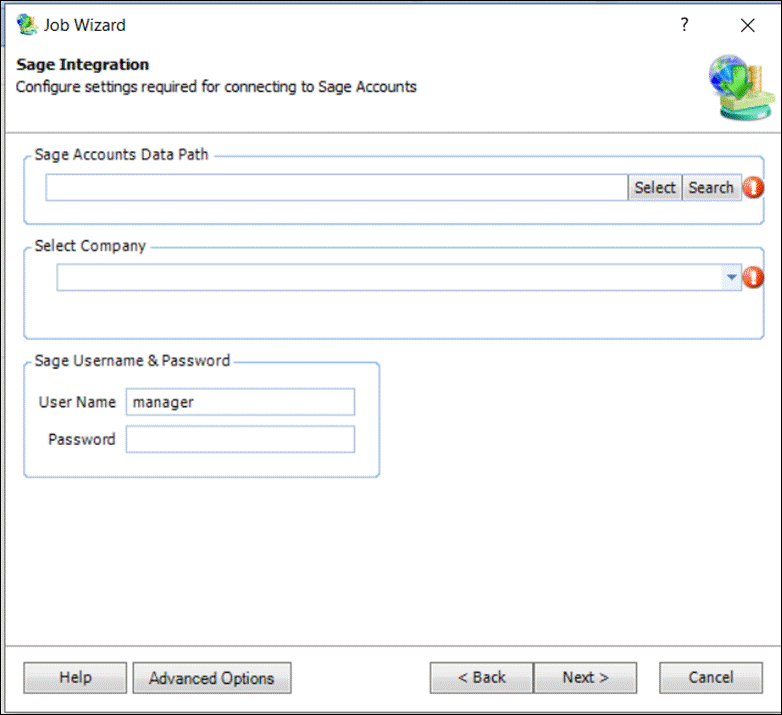
- Select/enter the location of the company’s account data from the Sage Account Data Path dropdown list. Note that the data path is available in the ACCDATA folder.
- Once the data path is set, choose the company from the Select Company dropdown list.
- Enter the credentials for accessing Sage 50 for the selected company in the respective fields in Sage Username & Password section. Note that the Order Importer will post data into Sage using this login and this user will have to log out of Sage when running the Order Importer.
- Press Next.
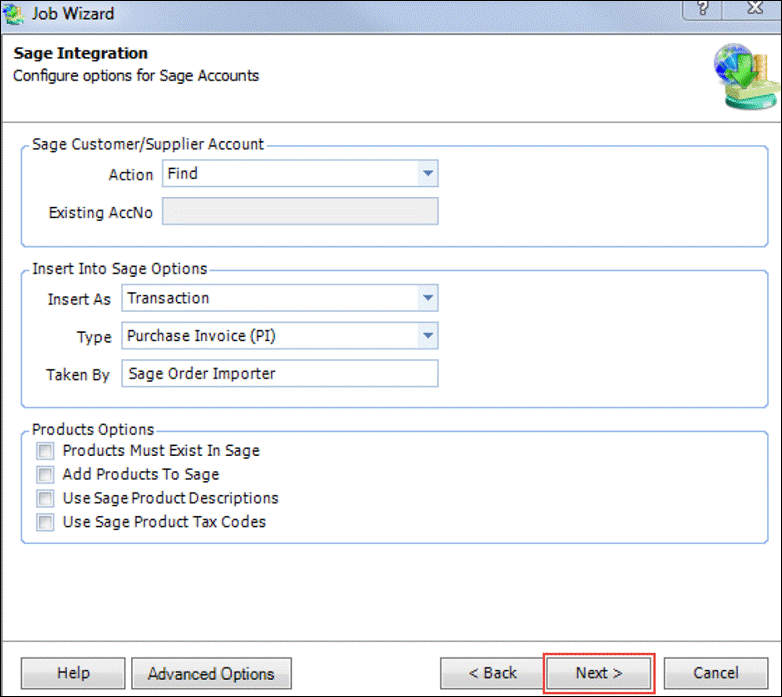
 The dialog with configure options for the Sage account is displayed. Note that the default settings should be kept as it is except for the Action, Insert As, and Type fields.
 - Enter Find in the Action field.
- Enter Transaction in the Insert As field.
- Enter Purchase Invoice (PI) in the Type field.
- Press Next.
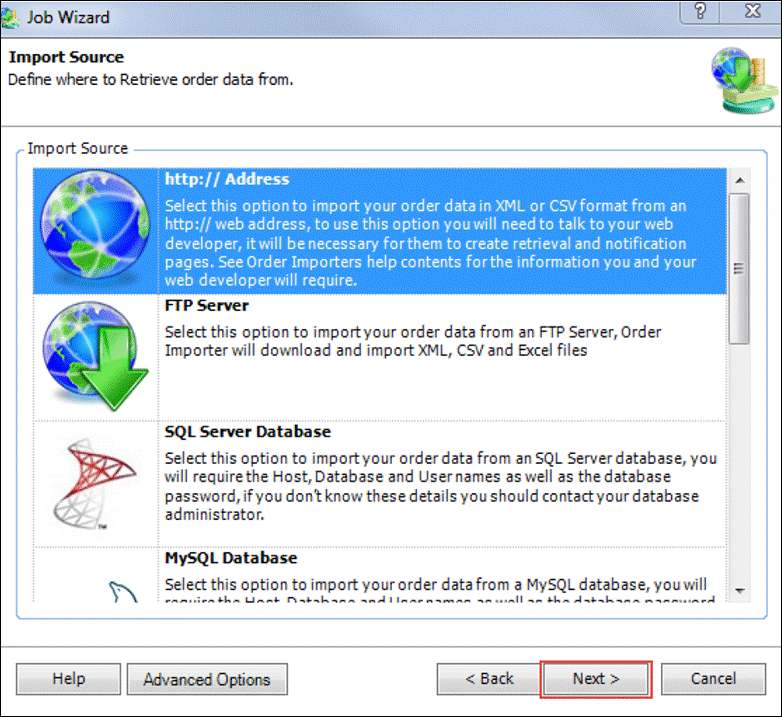
 The dialog to import source is displayed.
 - Set the source to import order data in the http:// Address option.
- Press Next.
 The dialog to configure the HTTP settings to link your PLANERGY account is displayed.
 - Enter the URL for importing the order data in the Import URL field.
- Select the type of data from the Data Type dropdown list.
- Enter the URL for notification in the Notification URL field.
Note
- Import URL – https://account.purchasecontrol.com/YourCompany/integration/sage/exportinvoices/xml?companycode=123
- Notification URL – https://account.purchasecontrol.com/YourCompany/integration/sage/markinvoicesasposted
In the above URLs, YourCompany should be replaced by the company name you are linking and 123 should be replaced by the company code you are linking.
- Check the box Use Authentication to set the authentication.
- Enter the PLANERGY login credential in the User Name and Password fields respectively. Note that when running the Order Importer, the user set here will be assigned to post the invoices.
- Press Next.
 You must now set the following user permissions for the PLANERGY user set in the Order Importer settings for the integration to work.
-
- Invoice Visibility set to All invoices

- PO Invoice Authorisation set to All POs
 The dialog to save the job is displayed.
- Invoice Visibility set to All invoices
- Press Finish.
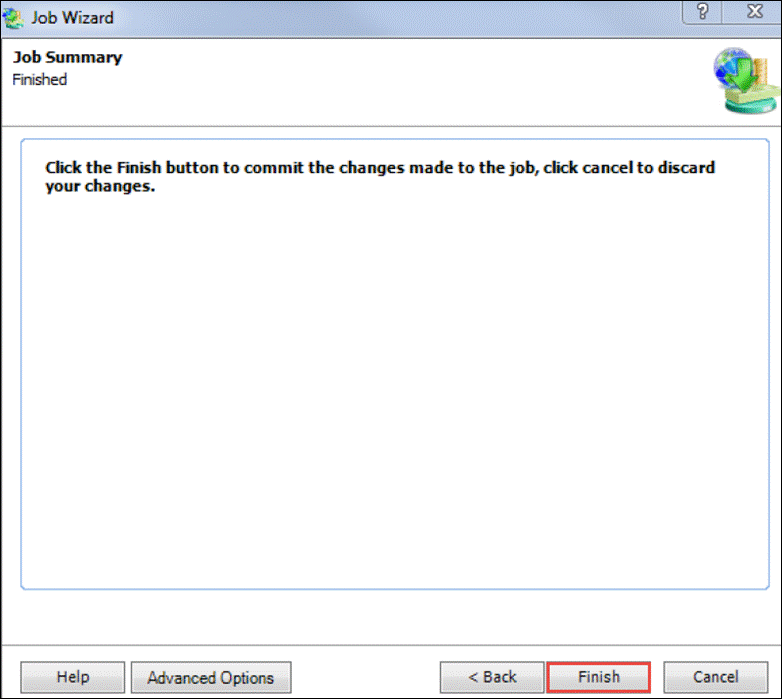 The job is saved.
 After setting up at least one job in the Order Importer, you will be able to use it to send authorized invoices from PLANERGY to Sage 50 as Purchase Invoice Transactions that are ready for payment. For more information, refer to Using Order Importer.
Using the Order Importer
Once the job is set up in Order Importer, you can use it to send authorized invoices from PLANERGY to Sage 50.
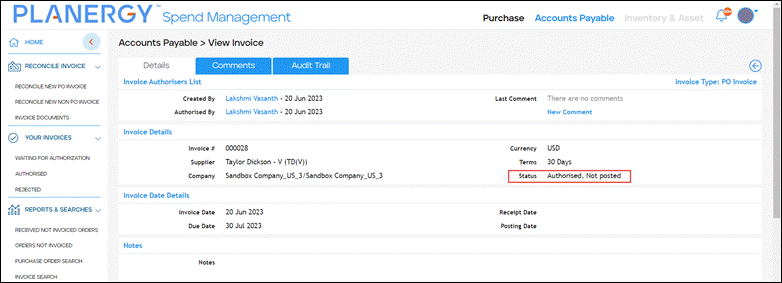
- Any invoice with the status Authorised, Not Posted in PLANERGY will be queued to be exported to Sage.
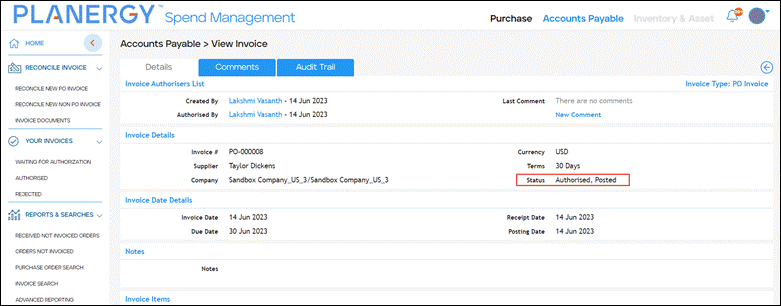
- When the Order Importer is run, all the queued invoices will be exported and their status in PLANERGY will be updated to Authorized, Posted.
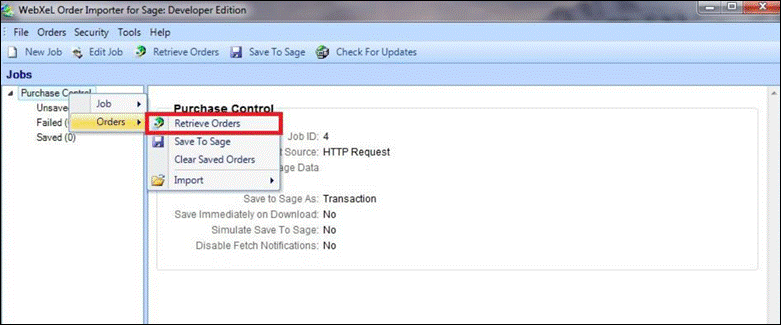
 To retrieve the authorized invoices sent from PLANERGY to Sage 50 for all the different jobs and companies, follow the steps below.
 - Press Retrieve Orders on the Order Importer dialog.
 You can also retrieve the invoices by right-clicking the job name in the left navigation menu job and pressing Orders > Retrieve Orders.
 The invoices are retrieved into the Order Importer in the Unsaved folder and are ready to be saved to Sage with all the information already assigned to them in PLANERGY.
 - Press the Unsaved folder under Jobs.
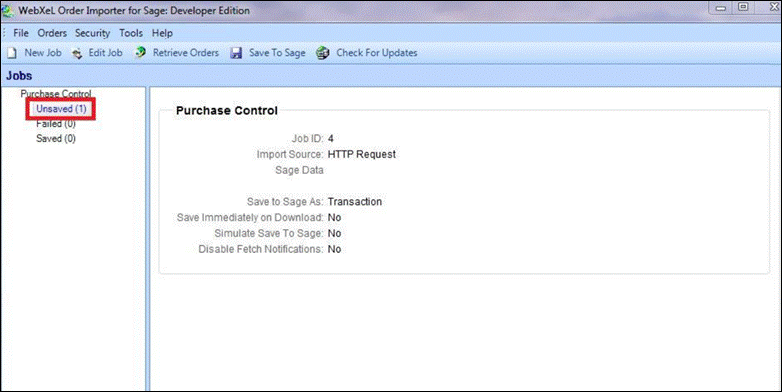 The list of invoices is displayed on the right when the Unsaved folder is pressed under Jobs.
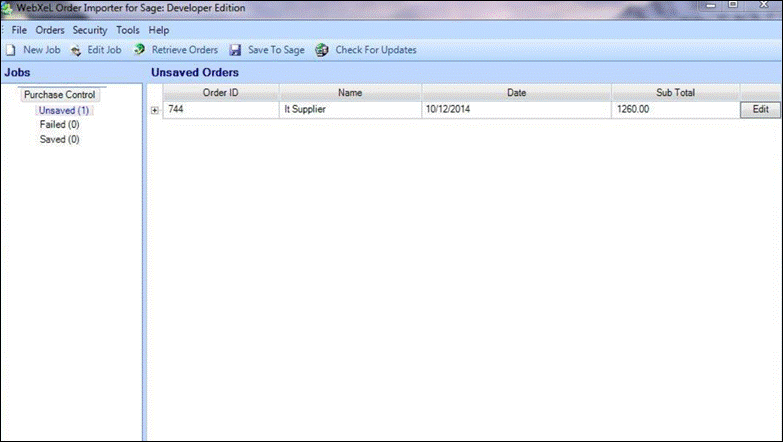
- Press Save Orders to save invoices for all the different jobs and companies.

Note
Alternatively, you can save the retrieved invoices by right-clicking the job name in the left navigation menu job and pressing Orders > Save to Sage.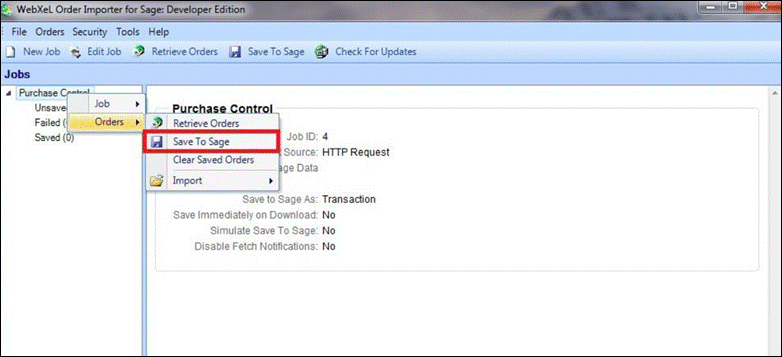 The invoices are saved in the Saved folder in the Order Importer.
Note
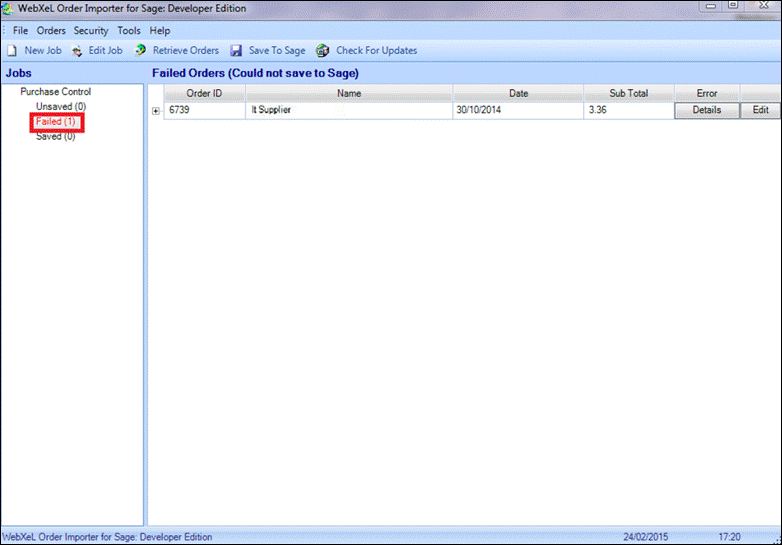
If any problem occurs while posting the invoices to Sage, the invoices will be moved to the Failed folder. The problem usually arises when there is a mismatch in the data stored in the two systems.