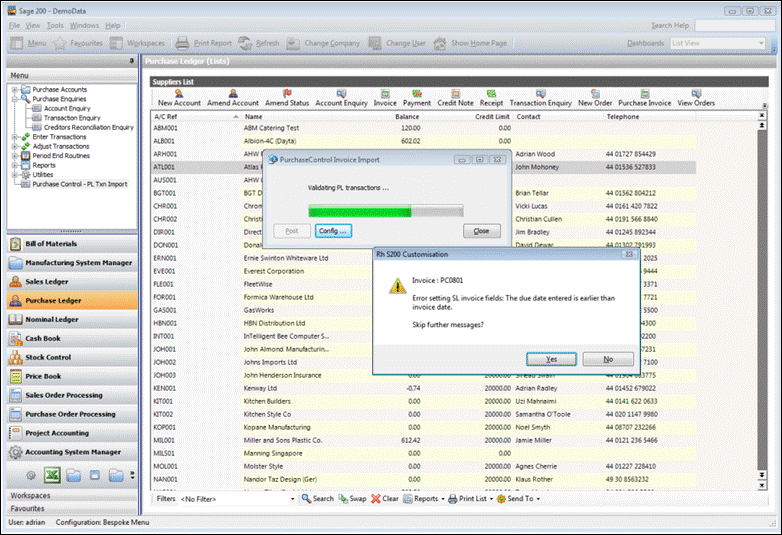
By integrating Sage 200 with PLANERGY, you can efficiently request, approve, and manage purchase orders from anywhere in PLANERGY’s cloud app on any device with no user access to Sage 200 required.
The PLANERGY Invoice Importer Module is installed as a menu option directly in your Sage 200 account. This enables PLANERGY to send information related to your invoices directly to Sage 200 as purchase invoice transactions that are ready to be paid.
The invoices authorized for payment in PLANERGY will queue to be imported to Sage 200. Upon running the integration, the invoices will be imported into Sage with all the details already assigned in PLANERGY.
For more information, refer to the following sections:
How Data Is Mapped Between PLANERGY And Sage 200
The import file will be in CSV format without a header record and only the fields that are mapped will be imported.
Data mapping between PLANERGY and Sage 200 is outlined in the table below.
| Item | Field Name in Purchase Control | Mapping in Sage 200 |
| 1 | Invoice Number | Ref 1 (Inv Num) |
| 2 | Invoice Date | Invoice Date |
| 3 | Currency | |
| 4 | Invoice Net Total | |
| 5 | Invoice Tax | |
| 6 | Invoice Total | |
| 7 | PO Number | Second Reference |
| 8 | Department Name | NL Department or NL Cost Centre |
| 9 | Charge To Account | |
| 10 | Terms | |
| 11 | Supplier Name | |
| 12 | Supplier Code | PL Account Code |
| 13 | Receipt Date | |
| 14 | Due Date | Due Date |
| 15 | Posting Date | |
| 16 | Approval Status | |
| 17 | Posting Status | |
| 18 | Approved By | |
| 19 | Rejected By | |
| 20 | Tax Code | VAT Code |
| 21 | Tax Rate | |
| 22 | General Ledger Code | NL Account Code |
| 23 | Item Code | |
| 24 | Item Description | |
| 25 | Item Price | |
| 26 | Item Quantity | |
| 27 | Discount | |
| 28 | Item Total | Goods Value |
| 29 | Tax Code Description | |
| 30 | Header Po Text | |
| 31 | Line Item VAT Total | VAT Value |
Note
How To Integrate PLANERGY With Sage 200
You can integrate PLANERGY with Sage 200 by meeting the installation requirements and following the steps below.
- Installation Requirement For Sage 200 Integration With PLANERGY
- Registering Sage 200
- Configuring Sage 200
- Using Sage 200 on PLANERGY
Installation Requirement For Sage 200 Integration With PLANERGY
The PLANERGY Invoice Importer Module is installed within Sage 200 by the PLANERGY technical team. Before proceeding with the installation, we need to establish the following:
- Obtain acknowledgment from the customer’s Sage Business Partner confirming their consent for installing third-party software.
- Ensure you have the Sage 200 serial number ready for installation. Note that this information is available to you on the Help > About page within Sage 200.
Once these requirements are met, we can install the integration in Sage 200 by first registering the software. For more information, refer to Software Registration.
Applying the Importer License in Sage 200
You must apply the license for the software first to efficiently integrate PLANERGY with Sage 200.
- Launch the PLANERGY Invoice Importer Module from the Sage 200 menu.
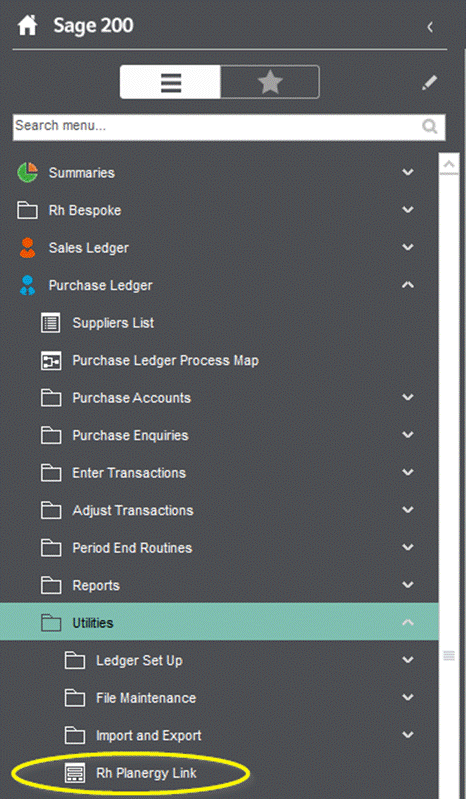 When running the software for the first time at each Sage 200 site, a message will be displayed stating that the software is not licensed. To license the application, click the Yes button.
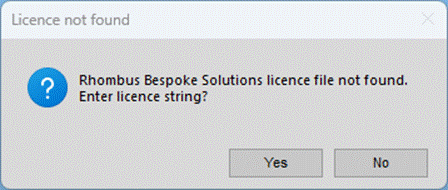
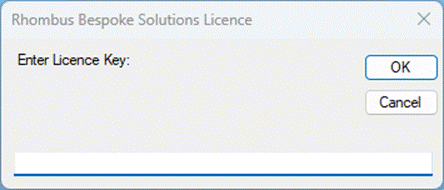
- A new form will be displayed requesting the Licence Key to be entered. Copy and paste the license key supplied and click the OK button.
Note
This process is required to be performed only once per Sage 200 installation and will cover Sage 200 users and all Sage 200 companies on that site. You can now configure the integration. For more information, refer to Configuring Sage 200.
Configuring Sage 200
After installing and licensing the software, you must configure the integration.
When you access the integration feature from the menu in Sage 200, it will open and operate directly within the Sage 200 software allowing you to utilize its functionalities without the need to switch to PLANERGY.
- Press Config …
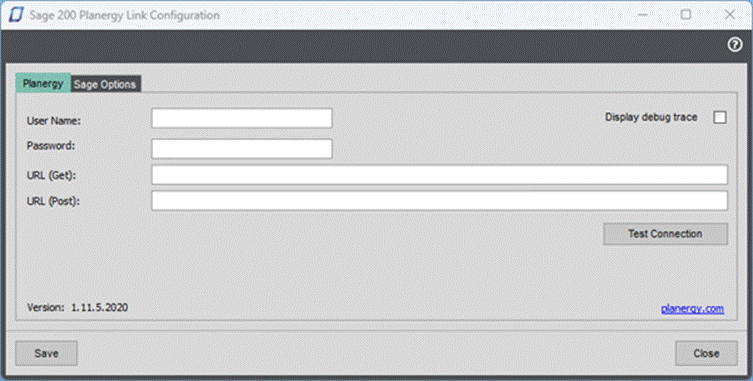
 The Sage 200 PLANERGY Link Configuration dialog is displayed.
-
- User Name
This sets the PLANERGY user that will be used to export the invoices and mark them as posted with PLANERGY. This is the email address of the user. - Password
This sets the password for the PLANERGY user. This needs to match the password for the user set in User Name field of the configuration. This needs to match the password they use when accessing PLANERGY. - URL (Get)
This sets the URL used for receiving information from PLANERGY. This will be specific to your account of PLANERGY and have the following format:https://account.purchasecontrol.com/AccountName/integration/sage/exportinvoices/xml?companycode=123 - URL (Post)
This sets the URL used for updating information in PLANERGY. This will be specific to your account of PLANERGY and have the following format:https://account.purchasecontrol.com/AccountName/integration/sage/markinvoicesaspostedIn the above URLs, AccountName should be replaced with the name of your PLANERGY account and 123 should be replaced by the company code you are linking (you can find the code in Control Panel > Companies). - Test Connection
This button allows you to test if the settings assigned in the Sage 200 Add-on are working correctly by checking a connection to PLANERGY is successfully completed.
- User Name
- Click Sage Options tab to see more options
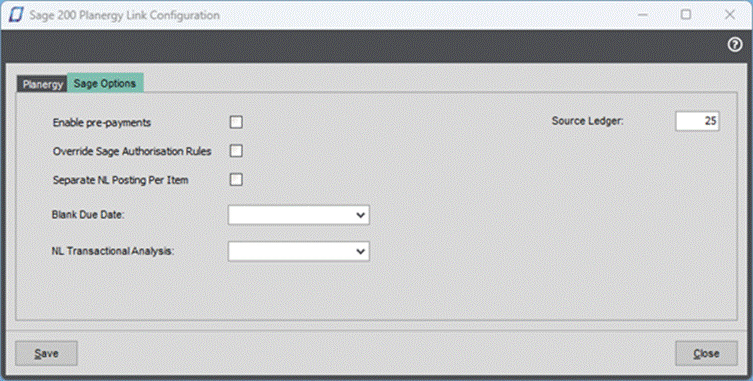
-
- Enable Prepayments – When enabled, if the PLANERGY ‘BudgetDate’ is a valid date, a Nominal Ledger prepayment posting is made. This enables invoices to be posted which are due for payment in a future period/year.
- Override Sage Authorisation Rules – When enabled, all PLANERGY invoices are set to be ‘authorised’, irrespective of the Sage purchase ledger authorisation rules.
- Separate NL Posting Per Item – When enabled, a separate nominal posting will be made for each nominal split which allows a different nominal narrative for each split. When disabled, nominal splits will be accumulated by Nominal Account, Cost Centre and Department with a single nominal narrative.
- Blank Due Date – Determines the invoice date if the PLANERGY invoice date is blank. When set to ‘Supplier Payment Terms’, the invoice date will be set according to the terms on the supplier account; alternatively, the ‘Invoice Date’ will be used.
- NL Transactional Analysis – Only available if Nominal Ledger Use Additional Transactional Analysis is enabled in Sage, and determines which PLANERGY field contains the analysis code (None / Cost Code / Custom Field)
- Source Ledger – Postings made from third party systems can be assigned a separate ledger code in the range 20-90, and the default Source Ledger for PLANERGY is set at 25. However, this does mean that the Sage Purchase Ledger period controls are not enforced on PLANERGY invoices.To prevent postings being made into closed purchase ledger periods, the Source Ledger should be set to 2 (indicating purchase ledger), and postings will be made to the next open period.
- Press Save.
 The next step is to run the import.
For more information, refer to Using Sage 200 on PLANERGY.
Using Sage 200 on PLANERGY
Once the configuration is set, you can export all the authorized invoices from PLANERGY to Sage 200.
Any invoice with the status Authorised, Not Posted in PLANERGY will be queued to be exported to Sage. 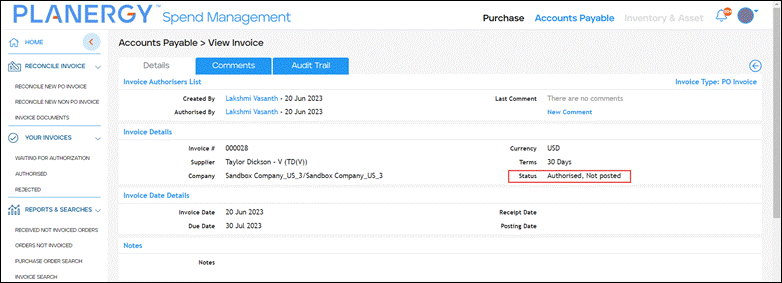
Importing Invoices in Sage 200
- Open the integration within Sage 200.
The Invoice Import dialog is displayed. - Press Post.
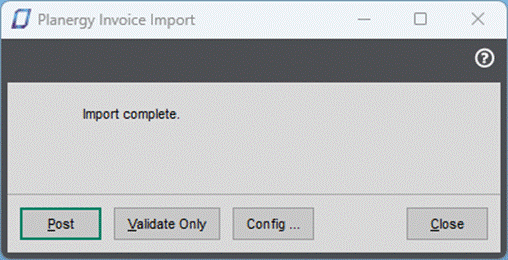
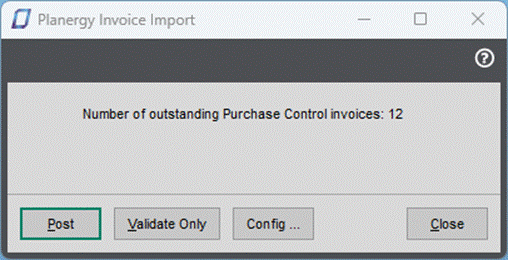 Once the import is completed, the notification is displayed in the Invoice Import dialog.
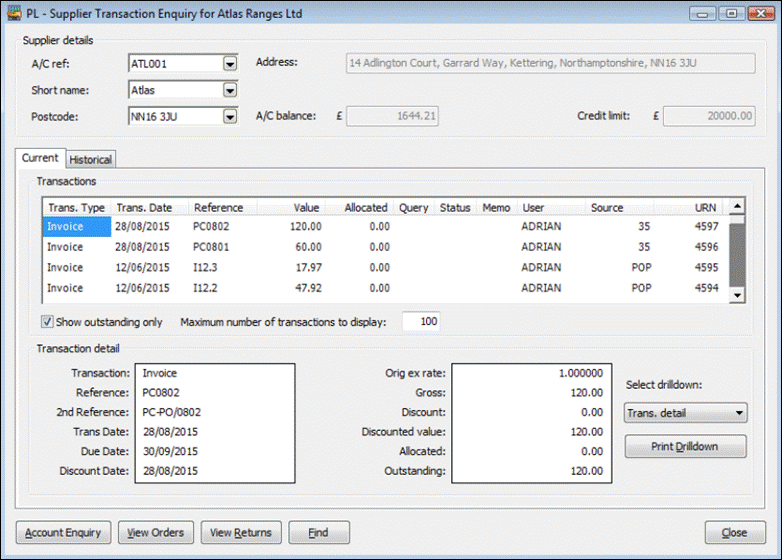
- The invoices will then be available within Sage 200 with all the details imported from PLANERGY.
Note
