The Advanced Controls section of the PLANERGY Control Panel allows you to configure the supported integrations, create and manage customized approval workflows to control your spending, and set up the advanced account settings.
In this section, you can manage the account owner details and other account details. From here, you can also manage custom fields for purchase orders, invoices, users, and many more.
For more information, refer to the following sections.
Integrations
Integrations Overview
The Integrations section allows you to configure various accounting applications with PLANERGY to manage your procurement processes.
The integration allows you to automatically generate bills in the connected accounting software for all authorized invoices with no user access required to the integrated accounting software.
You can import data and documents that are editable by your accountant before they process the payment.
- Navigate to Control Panel > Advanced Controls section and press Integrations.
 The Control Panel > Integrations page is displayed.
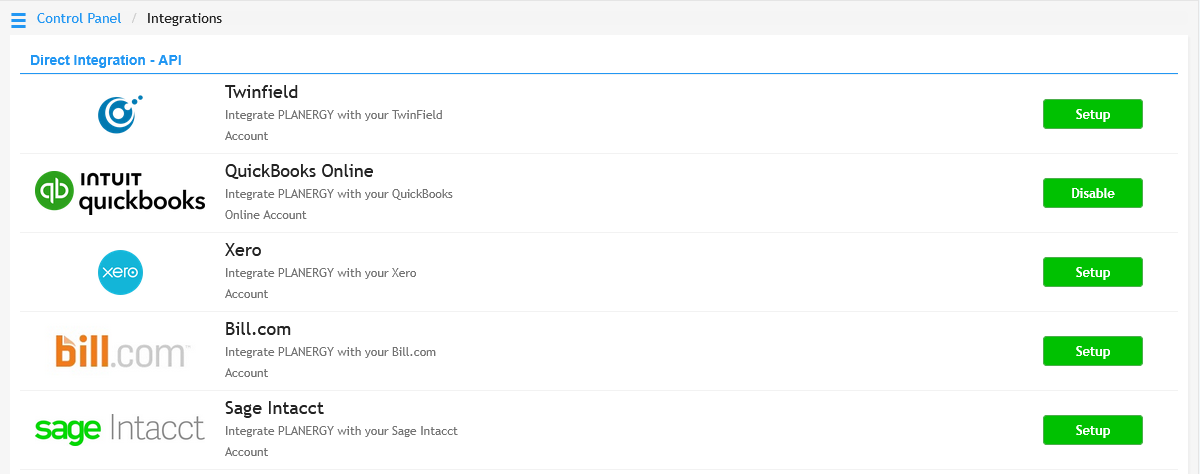
For more information, refer to the following:
- PLANERGY – QuickBooks Online Integration
- PLANERGY – Xero Integration
- PLANERGY – Microsoft Teams Integration
- PLANERGY – Slack Integration
- PLANERGY Checkout Extension
- PLANERGY Punchout Integration
Approval Rules
Approval Rules Overview
The Approval Rules section allows you to assign a series of approval rules intended to create automated approval workflows for greater spending control.
You can configure multi-step approvals at definite thresholds using approval workflows.
You can set a threshold value for the approval rule to trigger it. This ensures that orders with equal or above the threshold value will need to be approved by different approvers set in the approval rule.
- Navigate to Control Panel > Advanced Controls section and press Approval Rules.
 The Control Panel > Approval Rules page is displayed.
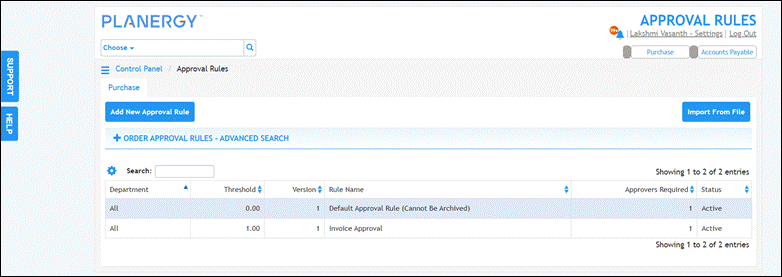
For more information, refer to the following sections:
How to Add/Edit Approval Rule
To add an approval rule, follow the steps below.
- On the Control Panel > Approval Rules page, press Add New Approval Rule.
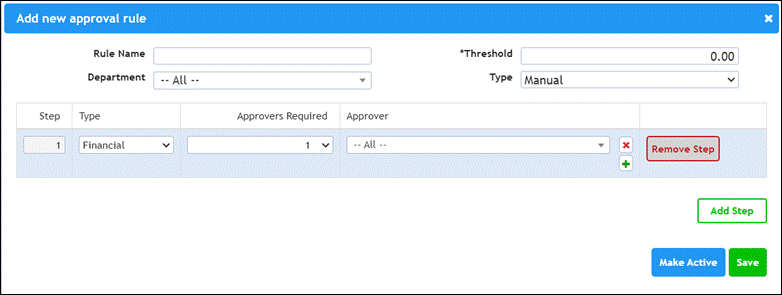
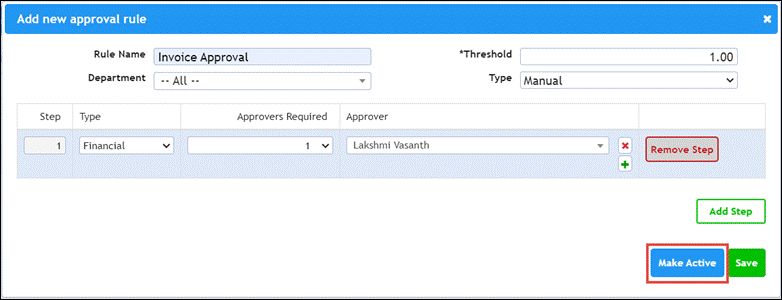
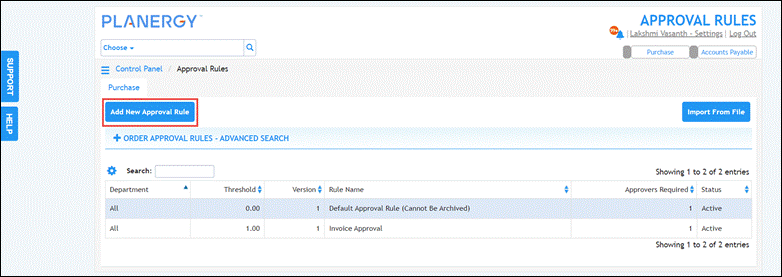 The Add new approval rule dialog is displayed.
Note
All the fields with an asterisk (*) are mandatory. - Enter the name of the approval rule in the Rule Name field.
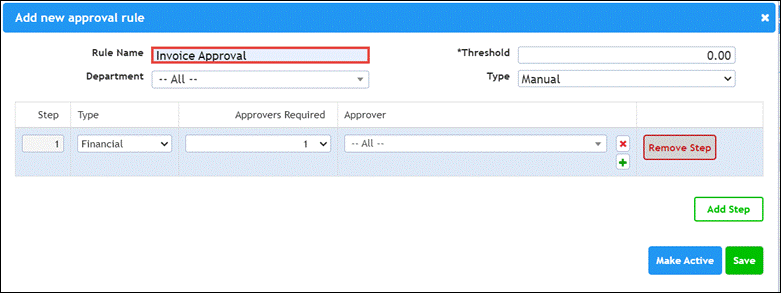
- Select the department you wish to set the rule for from the Department dropdown list.

- Enter the value to trigger the approval rule in the Threshold field.
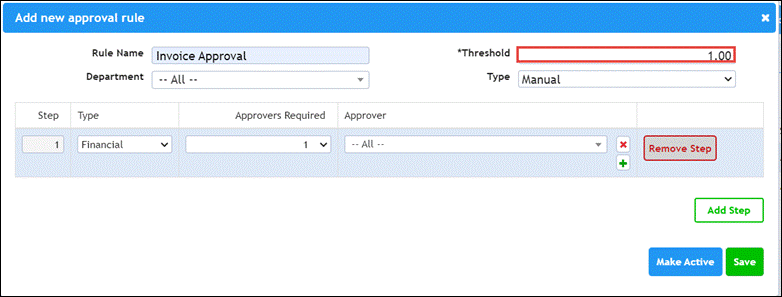
- Select the Manual or Automatic option to manually/automatically trigger the approval rule from the Type dropdown list.

- Select the approval type option from the dropdown list in the Type column.
 Note that the approval rule described here is only for the Financial type where it works on the financial value of the order.
 - Select the number of approvers required to approve the orders from the dropdown list in the Approvers Required column.

- Select the user you wish to set as the approver from the dropdown list in the Approver column.
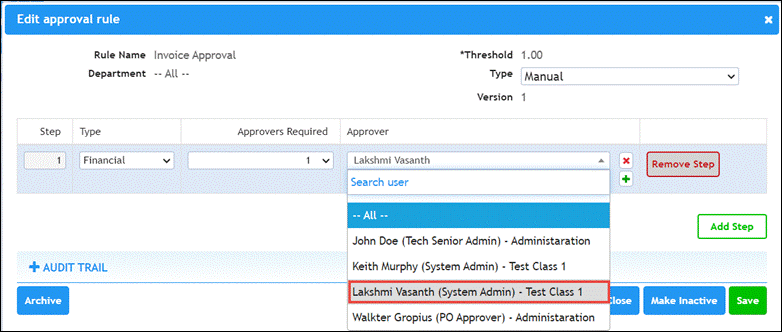
Note
- You can set a requirement for additional approvers based on the value of the order.
- If multiple approvers are set, you should ensure that these approvers you set have high enough purchasing limits to approve orders for each department.
- You can press the Add icon in the Approver column to set more users as approvers.
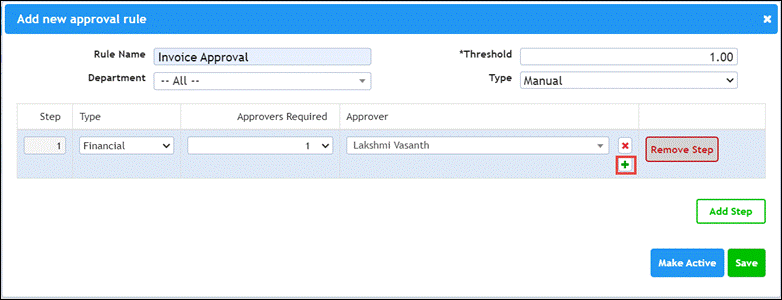
- You can press Add Step to add additional steps or Remove Step to delete any additional step added if needed.

- Press Make Active to enable/disable the approval rule. By default, the approval rule is enabled.
- Press Save.
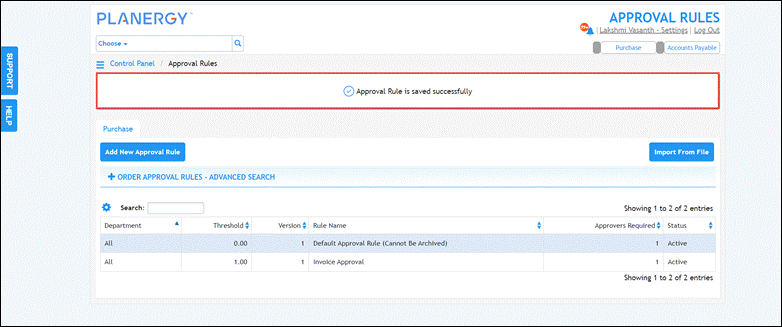
 The success notification is displayed.
Note
To edit an approval rule, press anywhere in the row of the approval rule you wish to update on the Control Panel > Approval Rules page.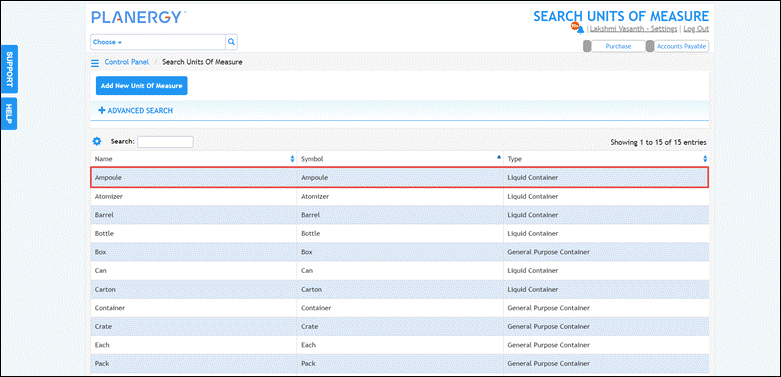 The Edit Approval Rule dialog is displayed.
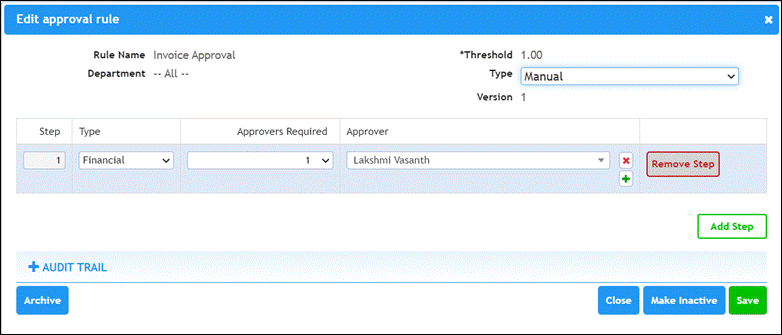 You can now make the necessary changes and save the approval rule. Note that you cannot archive the default approval rule.
Advanced Account Settings
Advanced Account Settings Overview
The Advanced Account Settings section allows you to configure the general settings in the system such as enabling the email notification and setting the pagination across the various areas in the system.
You can also outline the account policy requirements in the Advanced Account Settings section.
You can configure the settings for the Purchase and Inventory sections in the system from here.
In the Advanced Account Settings section, you can enable the control panel settings and configure the audit trail settings. 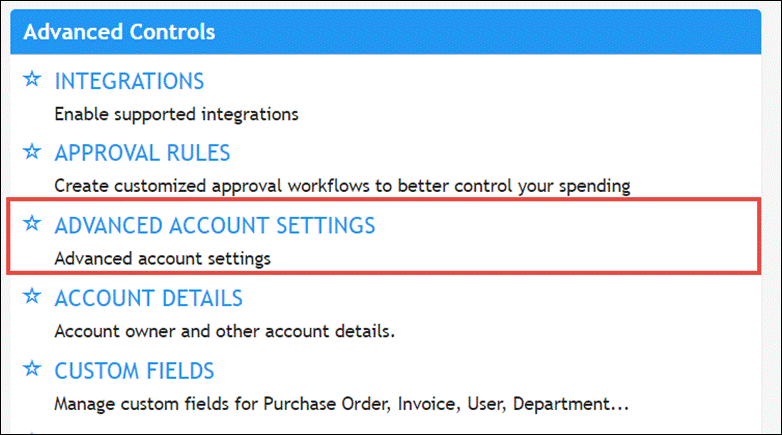
For more information, refer to the How to Configure the Advanced Account Settings.
How to Configure the Advanced Account Settings
To configure the advanced account settings, follow the steps below.
- Navigate to Control Panel > Advanced Controls section and press Advanced Account Settings.
 The Control Panel > Advanced Account Settings page is displayed.
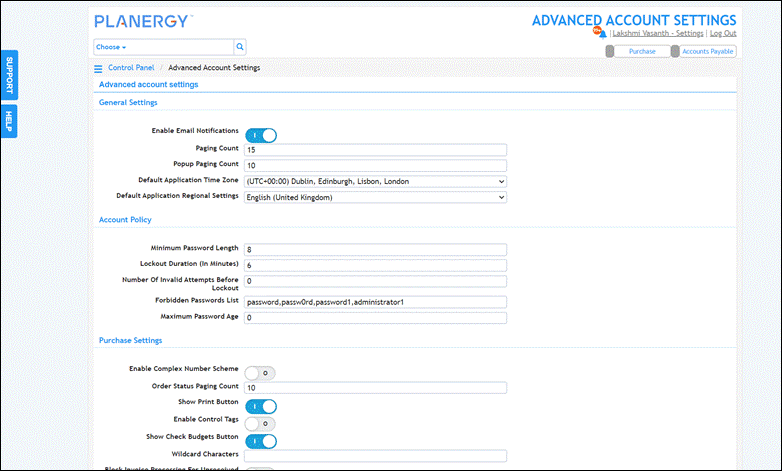
- Configure the required settings. For more information, refer to the following sections:
- Press Save.
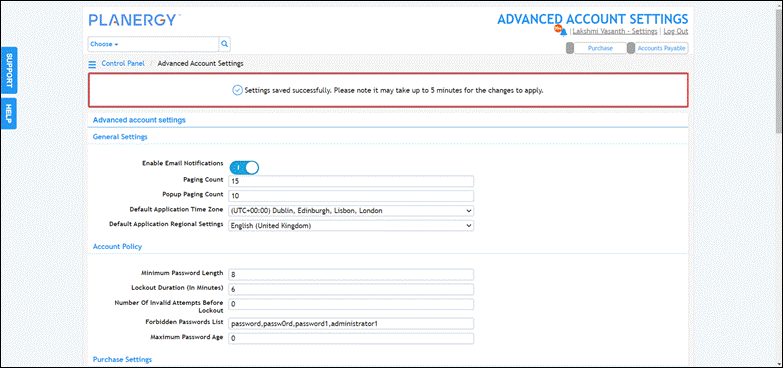
 The success notification is displayed.
Edit General Settings in Advanced Account Settings
The General Settings are set by default for your account but you can change it when required. To edit the general settings, follow the steps below.
- On the Advanced Account Settings page, in the General Settings section, press the Enable Email Notification button. When this notification is enabled, the user will receive a notification through email each time his purchase order is approved or received.

- In the Paging Count field, enter the desired number of results to be displayed per page in search results.

- Enter the number of results to be displayed per page in popup search results in the Popup Paging Count field.

- Select the timezone to configure the default application timezone for timestamps from the Default Application Time Zone dropdown list. Note that this setting can be overruled by the settings at the Company and User levels.

- Select the regional settings to configure the default application regional settings from the Default Application Regional Settings dropdown list.
 The values are set in the General Settings section.
Edit Account Policy in Advanced Account Settings
To edit account policy settings, follow the steps below.
- On the Control Panel > Advanced Account Settings page, navigate to the Account Policy section.

- Enter the desired number to set the minimum character length for the password in the system in the Minimum Password Length field.

- Enter the time in minutes that the user will be locked out of the system after a series of failed login attempts in the Lockout Duration (in Minutes) field.

- Enter the number of failed login attempts before the user is locked out of the system in the Number of Invalid Attempts Before Lockout field.

- Enter the list of passwords that the users are not allowed to use in the Forbidden Password List field.

- Enter the number of days after which the user must change the password in the Maximum Password Age field.
 The values are set in the Account Policy section.
Edit Purchase Settings Configuration in Advanced Account Settings
To update the purchase settings configuration, follow the steps below.
- On the Control Panel > Advanced Account Settings page, navigate to the General Settings section.
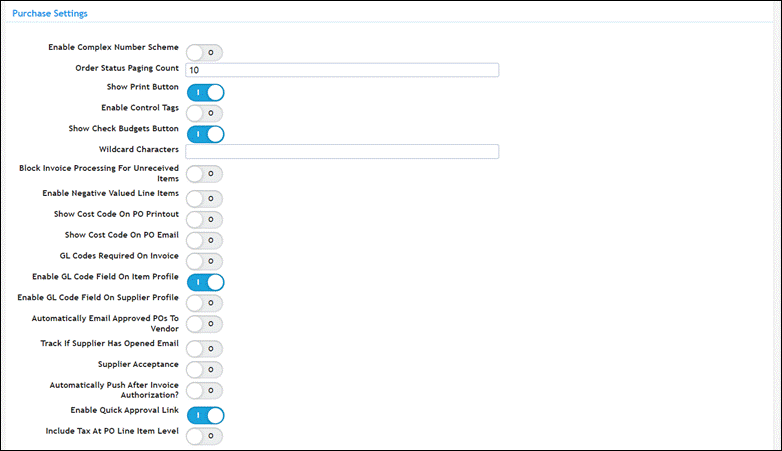
- Enable the associated buttons for the available settings of the Purchase module. In the following example, we are showing you the activation of the Complex Number Scheme feature.This feature helps you to set the purchase order numbering scheme per company. You can similarly enable the other settings in your account for the Purchase module. The available buttons that you can enable in Purchase settings are as follows:
- Show Print – This feature when enabled will allow you to display the print option on PO Search, View PO, and View Invoice
- Enable Control Tags – This feature when enabled will allow you to make the item control tags available in the system when the Approval Type is Advanced.
- Show Check Budgets Button – This feature when enabled will allow you to display the Check Budgets button on the purchase orders.
- Block Invoice Processing For Unreceived Items – This feature when enabled will allow you to only match items received against an invoice.
- Enable Negative Valued Line Items – This feature when enabled will allow the negative price on line items to enter the credit notes on purchase orders.
- Show Cost Code On PO Printout – This feature when enabled will allow you to display the Cost Code field on the purchase order printout.
- Show Cost Code On PO Email – This feature when enabled will allow you to display the Cost Code field on the purchase order email.
- GL Codes Required On Invoice – This feature when enabled will allow you to necessitate the GL Code when saving an invoice.
- Enable GL Code Field On Item Profile – This feature when enabled will allow you to link the saved items to a GL Code. This will allow the GL Code to auto populate on an invoice when matched with the item.
- Enable GL Code Field On Supplier Profile -This feature when enabled will allow you to link the saved suppliers to a GL Code so that the GL Code will auto populate on an invoice when matched.
- Automatically Email Approved POs To Vendor -This feature when enabled will allow you to automatically email the authorized purchase orders to the suppliers.
- Track If Supplier Has Opened Email – This feature when enabled will allow you to track if the supplier has viewed the email sent to him.
- Supplier Acceptance – This feature when enabled will allow you to track the order acceptance by the supplier.
- Automatically Push After Invoice Authorization? – This feature when enabled will allow you to automatically post the authorized invoice on integrated accounting software such as Xero, QuickBooks, etc.
- Enable Quick Approval Link – This feature when enabled will allow you to display the quick approval link in the purchase order approval request email.
- Include Tax At PO Line Item Level – This feature when enabled will allow you to display the tax field in the purchase order line item.
- Enter the number of results you wish to display per page in Order Status Search in the Order Status Paging Count field.
- Enter a wildcard symbol that you wish to allow the users to include in the searches across the system in the Wildcard Character field.
 The Purchase Settings are set as required.
Edit Inventory Settings Configuration
To update the Inventory Settings configuration, follow the steps below.
- On the Control Panel > Advanced Account Settings page, navigate to the Inventory Settings section.

- Enable the Stock Adjustment button if you do not wish to receive or send items to the storage location.
 The Inventory Settings are set as required.
Edit Control Panel Settings Configuration
To update the control panel setting configuration, follow the steps below.
- On the Control Panel > Advanced Account Settings page, navigate to the Control Panel Settings section.

- Enable the associated buttons for the available settings of the Control Panel. In the following example, we are showing you the activation process of the Enable Department Hierarchy button. This feature when enabled allows you to set the departments, sub-departments, and budgets for them.
 Similarly, the other Control Panel Settings that can be enabled or disabled are as follows:
- Enable Supplier Classification – This feature when enabled will allow you to classify the supplier using predefined options.
- Enable Supplier Custom Management – This feature when enabled will allow you to enable the supplier approval process so that only approved suppliers can have requisitions created for them.
- Enable Out Of Office – This feature when enabled will allow you to set a proxy approver when the user is out of the office. This feature is available only for the Advanced Approval Type.
- Enabled Custom Address – This feature when enabled will allow you to split the address field into multiple fields such as City, State, Country fields, etc.
- Enable Batch File Uploads – This feature when enabled will allow you to import data from CSV, XLS, and XLSX file in Departments, Suppliers, Items, Cost Codes, GL Codes, and Locations sections of Control Panel.
- Enable Unit Of Measure – This feature when enabled will allow you to configure/edit the unit of measure.
- Use Role Change Permissive Mode – This feature when enabled will allow you to update the user permission settings if there is a change in the role permission assigned to the user such as addition or removal of permissions in a role.

Edit Audit Trail Settings Configuration in Advanced Account Settings
To edit Audit Trail Settings configuration, follow the steps below.
- On the Control Panel > Advanced Account Settings page, navigate to the Audit Trail Settings section.

- Activate the Enable Audit Trail button to record every action on the control panel objects in the Audit table.

- Activate the Send Audit Trail Data on Email button to send emails to the address listed in the Email Distribution List whenever a user changes something in the control panel.

- Enter the email addresses to which you wish to send the control panel audit trail notifications in the Email Distribution List.
 The Audit Trail Settings are set.
How to Enable Supplier Classification
An Account Owner user can enable supplier classification to organize suppliers into categories for better spend analysis, compliance, and strategic sourcing.
- Navigate to Control Panel > Advanced Controls > ADVANCED ACCOUNT SETTINGS.
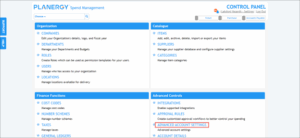
The ADVANCED ACCOUNT SETTINGS page is displayed.
- Scroll down to Control Panel Settings and press Enable Supplier Classification.
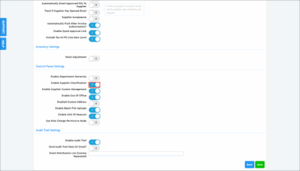
- Press Save.
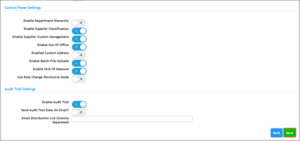
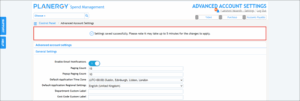
The setting is successfully enabled.
Note: You can view the supplier classification on the NEW ORDER, NEW ORDER FROM TICKET, RECONCILE NEW PO INVOICE, RECONCILE NEW NON-PO INVOICE, AND NEW CREDIT NOTE pages as shown in the following example.

Account Details
Account Details Overview
The Account Details section in PLANERGY Control Panel allows you to view the primary details of the account owner such as the name, department, email address, and contact number.
You can update the account information such as the business name, email, contact number, and address when needed
- Navigate to Control Panel > Advanced Controls section and press Account Details.
 The Control Panel > Account Details page is displayed.
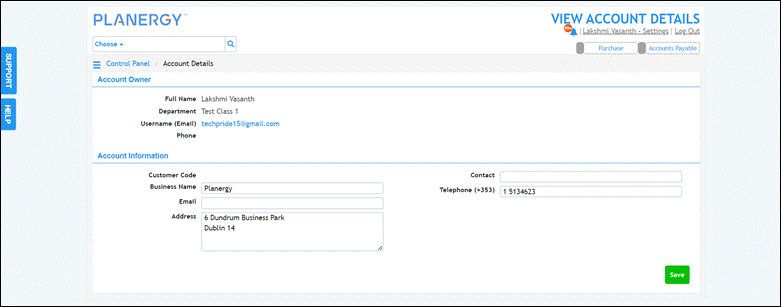
You can view the details of your account here. For more information, refer to How to Update Account Information.
How to Update Account Information
To edit the account information, follow the steps below.
- On the Control Panel > Account Details page, navigate to the Account Information section.
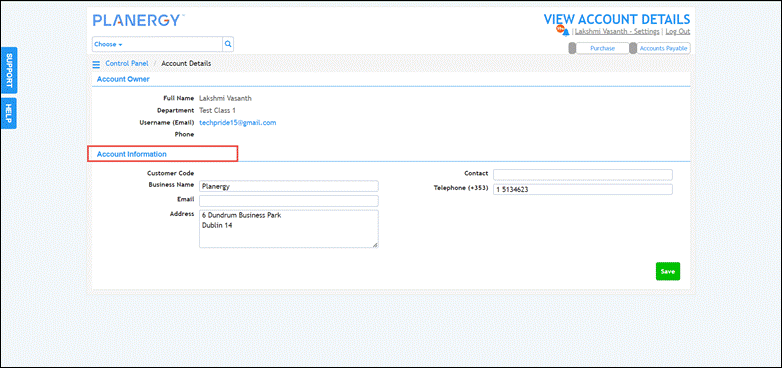
- Update the name of your business in the Business Name field.

- Update the email address of your business in the Email field.

- Update the business address in the Address textbox.

- Update the name of the contact of your business in the Contact field.

- Update the business telephone number in the Telephone field.

- Press Save.
 The success notification is displayed.
Custom Fields
Custom Fields Overview
The Custom Fields section gives you the ability to make the required changes directly when needed. It gives you the control and flexibility to create and manage custom fields in the system.
You can also perform the common actions of the Control Panel that is applicable to this section.
- Navigate to Control Panel > Advanced Controls section and press Custom Fields.
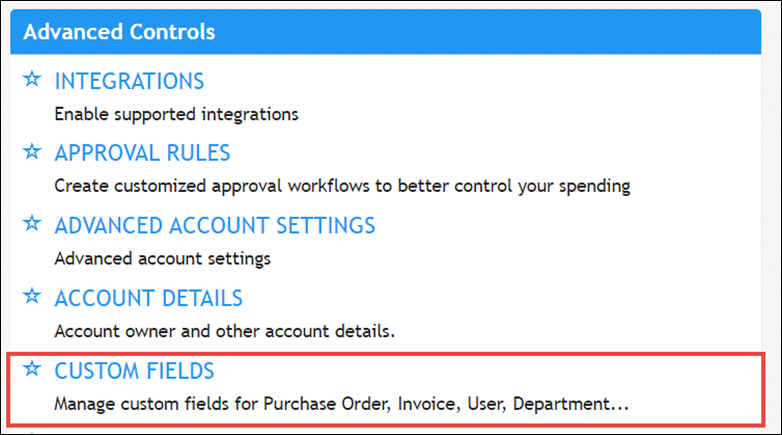 The Control Panel > Custom Fields page is displayed.
For more information, refer to the following sections:
How to Add/Edit Custom Fields
To add custom fields, follow the steps below.
- On the Control Panel > Custom Fields page, press Add New Custom Field.
 The Add Custom Field page is displayed.
Note
All the fields with an asterisk (*) are mandatory. - Enter the name of the custom field in the Custom Field Name field.

- Select the location where you wish to add the custom field from the Custom Field Location dropdown list.
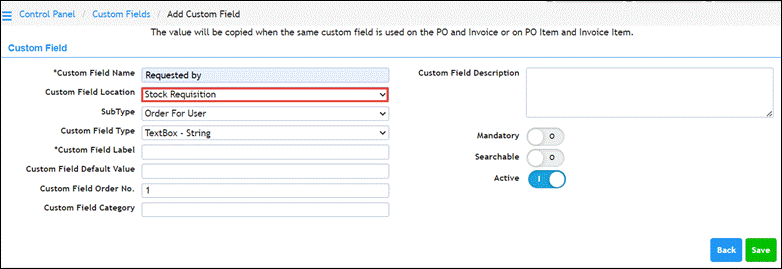
- Select the subtype for the custom field from the Sub Type dropdown list.

- Select the type of data you wish the custom field to accept from the Custom Field Type dropdown list.

- Enter the label for the custom field in the Custom Field Label field.

- Enter a default value you wish to set for the custom field in the Custom Field Default Value field.

- Enter/select the order number of the custom field in the Custom Field Order No. field.

- Enter the category of the custom field in the Custom Field Category field.

- Enter any information or description about the custom field in the Custom Field Description textbox.

- Enable the Mandatory button if you wish to make the custom field mandatory.
 Enable the Searchable button if you wish to search data based on the custom field.
 Enable the Active button to set the custom field as an active field. By default, this button is enabled.
 Press Save.
 The success notification is displayed.
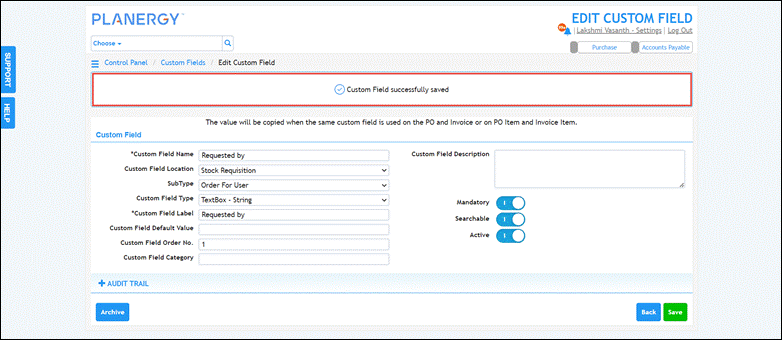
Note
To edit a custom field, press anywhere in the row of the custom field you wish to update on the Control Panel > Custom Fields page.
The Edit Custom Field page is displayed.You can now make the necessary changes and press Save.
How to Add Custom Fields at Credit Note/Credit Note Item Level
You can add custom fields at the Credit Note or Credit Note Item level to capture additional, organization-specific information for better tracking and reporting.
- Navigate to Control Panel > Advanced Controls > CUSTOM FIELDS.
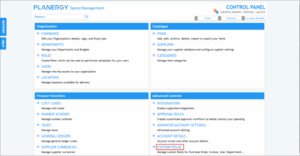
The CUSTOM FIELDS page is displayed.- Press Add New Custom Field.

The ADD CUSTOM FIELD page is displayed.
Note: All the fields with an asterisk (*) are mandatory.
- Enter the name of the field in the Custom Field Name textbox.
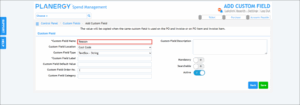
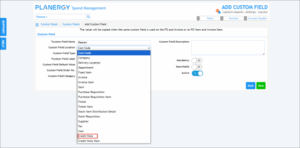
- Select the Credit Note/ Credit Note Item option to add the custom field from the Custom Field Location dropdown list. The following example illustrates how to add a custom field at the credit note level. You can follow similar steps to add a custom field at the credit note item level.
- Select the type of data you wish the custom field to accept from the Custom Field Type dropdown list.

- Enter the label for the custom field in the Custom Field Label field.
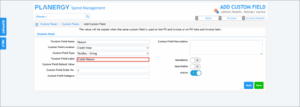
- Enter a default value you wish to set for the custom field in the Custom Field Default Value field.
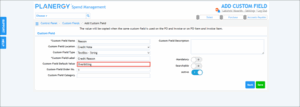
- Enter/select the order number of the custom field in the Custom Field Order No. field.

- Enter the category of the field in the Custom Field Category field.
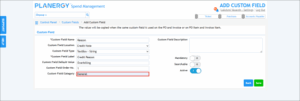
- Enter any information or description about the custom field in the Custom Field Description textbox.
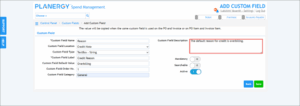
- Enable the Mandatory button if you wish to make the custom field mandatory.
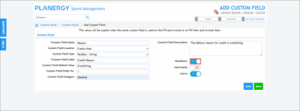
- Enable the Searchable button if you wish to search data based on the custom field.
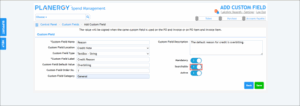
- Enable the Active button to set the custom field as an active field. By default, this button is enabled.
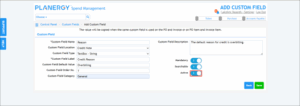
- Press Save.

The success notification is displayed.
Note: To edit a custom field, press anywhere in the row of the custom field you wish to update on the Control Panel > Custom Fields page.
The Edit Custom Field page is displayed.
You can now make the necessary changes and press Save.
